UI performance and performance optimization
It takes about 10 minutes to read this article
This article provides some suggestions for User Interface development, including how to use UI functions properly to improve UI performance and reduce performance consumption.
UI performance optimization suggestions
TIP
A beautiful and sophisticated User Interface is usually an important part of a high-quality experience. Developers are advised to pay more attention to UI performance issues, otherwise the blurry/jaggies UI will affect Player' initial impression and basic experience of the experience.
Avoid jagged edges in UI icon when using large-size images at reduced size
Is it true that the larger the uploaded asset size, the clearer the UI texture will be? In fact, this is not the case, because the UI texture has been processed for anti-aliasing before uploading. If this UI texture is excessively reduced in actual use, the anti-aliasing of the original image will be destroyed, resulting in a strong sense of jagged edges on the image.
When this happens, you need to re-upload UI texture asset of the appropriate size. It is recommended that icon and icon baseplates be uploaded with a power-of-two size that is closest to the size used in the UI editor(select from the three size types: 64×64/128×128/256×256) .
Currently, the editor provides a default DPI scale rule to ensure that the actual display size of the same UI set is reasonable on screen of various resolution . However, this will result in the same UI texture being used in the UI editor and on the final Player device not being completely consistent. Unless the Player device and the UI editor's design size (default 1920×1080) are exactly the same, the texture will be scaled to a certain scale.
The significance of the power-of-two size is that the power-of-two size UI texture in the editor will automatically turn on Mipmap, and can pre- generate image thumbnails with different reduction ratios (as shown below). The closest thumbnail is selected according to the actual usage size of this UI texture on the final Player device, so that the UI texture can still maintain details and clarity when it is reduced in size, reducing aliasing and moiré. However, in some cases, the thumbnails automatically generate by Mipmap may cause image distortion or deformation, especially thumbnails with smaller magnifications. Therefore, even if the power-of-two size can enable Mipmap, it is not advisable to make icon that are too large.
- Please note that for UI texture(especially circle) that do not fill the entire area of the image, do not completely fit the top, bottom, left, and right edges before anti-aliasing. Otherwise, the transition area at the edge after anti-aliasing cannot be retained within the image range, and the small-scale thumbnail automatically generate by Mipmap will be deformed; it is recommended to leave 3 pixels of space on the top, bottom, left, and right edges.
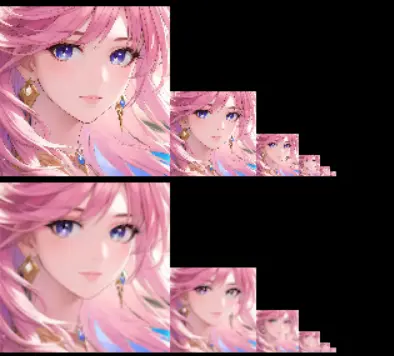
- Please note that for UI texture(especially circle) that do not fill the entire area of the image, do not completely fit the top, bottom, left, and right edges before anti-aliasing. Otherwise, the transition area at the edge after anti-aliasing cannot be retained within the image range, and the small-scale thumbnail automatically generate by Mipmap will be deformed; it is recommended to leave 3 pixels of space on the top, bottom, left, and right edges.
For example, a set of icon in the UI editor(design size 1920×1080) are all used in a size of 100×100. On a low-end Player device, the actual size after DPI scale is 67×67:
- When using a 128×128 texture asset , a 64×64 thumbnail is selected with the help of Mipmap technology, and its edges are not jagged; on Player' devices with higher resolution , the 128×128 original image will be selected, and there will be no problem with clarity.
Avoid using UI texture that are too small, and do not compress the original image before uploading.
In addition to the fact that using a large image for a small purpose will affect the UI effect, if the original texture size is much smaller than the actual size used, it will also cause the UI to be blurry. In this case, you need to make an texture of the appropriate size and re-upload it.
You need to pay attention to whether the original UI texture asset used in the experience are blurry or whether there are problems with the detail processing. Take the trophy icon in the following picture as an example. It also uses a 64×64 size. After optimization the details, the effect will be improved.

In addition, do not compress the original image asset before uploading in order to save memory . Because according to the editor cooking process, the memory size of the UI texture in the experience is only related to the size of the UI texture itself , and has nothing to do with its format. The editor will uniformly compress the texture in the asset cooking stage after uploading. Therefore, compressing the original image before uploading will only reduce the clarity of the texture and will not bring any optimization to the performance.
Before uploading, please check whether the original image has black edges. Try to avoid using small-sized UI texture with complex content.
- Currently, the editor will automatically compress the UI texture uploaded by developers into ASTC and other format during the asset cooking stage after uploading. This can save 1/4~1/9 of the memory usage of the texture . In some cases, format compression will have a certain impact on the clarity of the UI texture:
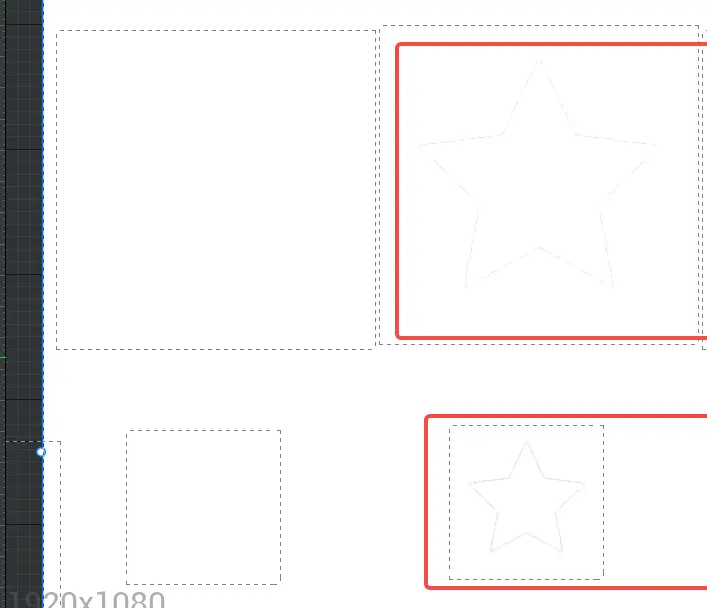
- The original image exported by Figma and other drawing software need to be processed by RGB overflow process in Photoshop, otherwise there will be black edges. For example, the black edges on the left side of the picture below have been processed, while the black edges on the right side have not been processed. format compression may cause the black edges to be smeared to the edge of the image to produce noise. Although the difference is not obvious in most cases, if such a situation is found, you can try to process the original image through RGB overflow process and re-upload the image.
- Try to avoid using small-sized and complex UI texture, as the clarity of such texture will be significantly affected after being format.
- Unless necessary, try to avoid having translucent shadow effects on the edges of UI texture , otherwise edge noise may occur. The principle is similar to the black edge problem mentioned above.
UI performance optimization suggestions
TIP
For experience with many UI , UI optimization, especially reducing experience memory, is of utmost importance. When you encounter performance bottlenecks, you can check whether the following optimization principles are followed when making the UI.
Pay attention to the original size of UI texture. Using large textures in small sizes will take up extra memory.
- In addition to causing the aliasing problem mentioned above, using large images for small purposes will also cause a waste of asset. For example, in the figure below, a 1024×1024 UI background image is reduced to 256*256 for use. This UI texture alone will occupy up to 1M of memory, causing a huge amount of unnecessary memory usage. Therefore, be sure to use the power-of-two size that is closest to the actual size in the UI editor. The size requirements for icon and icon bases are 64×64/128×128/256×256.
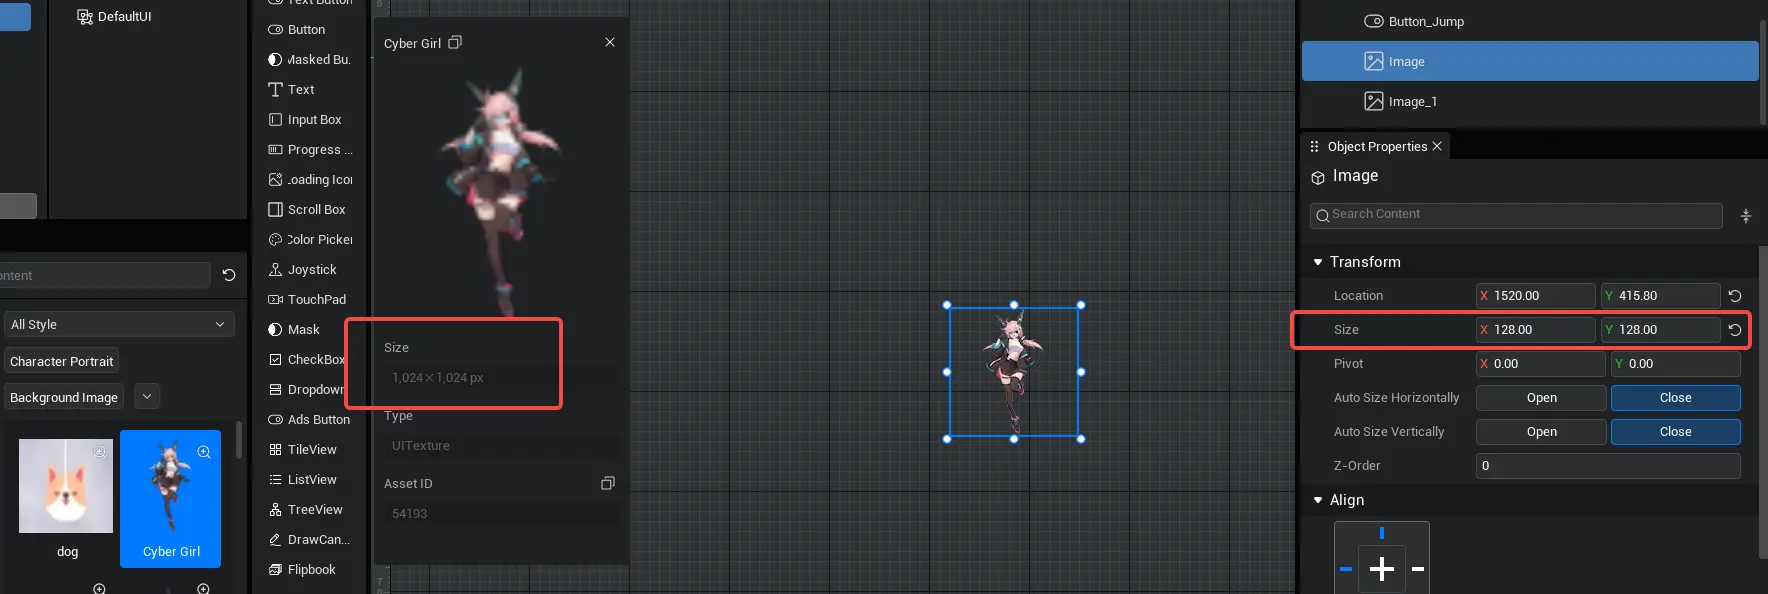
- The maximum size of a single UI texture before uploading is not allowed to exceed 2048×2048. It is recommended not to exceed 1280×720 (the total screen resolution of low-end models, such as OPPOA57). Remember that when the texture size is larger than the size used on the final Player device, there will be no improvement in effect.
Use a nine-squared grid as much as possible for the UI baseplate to save memory
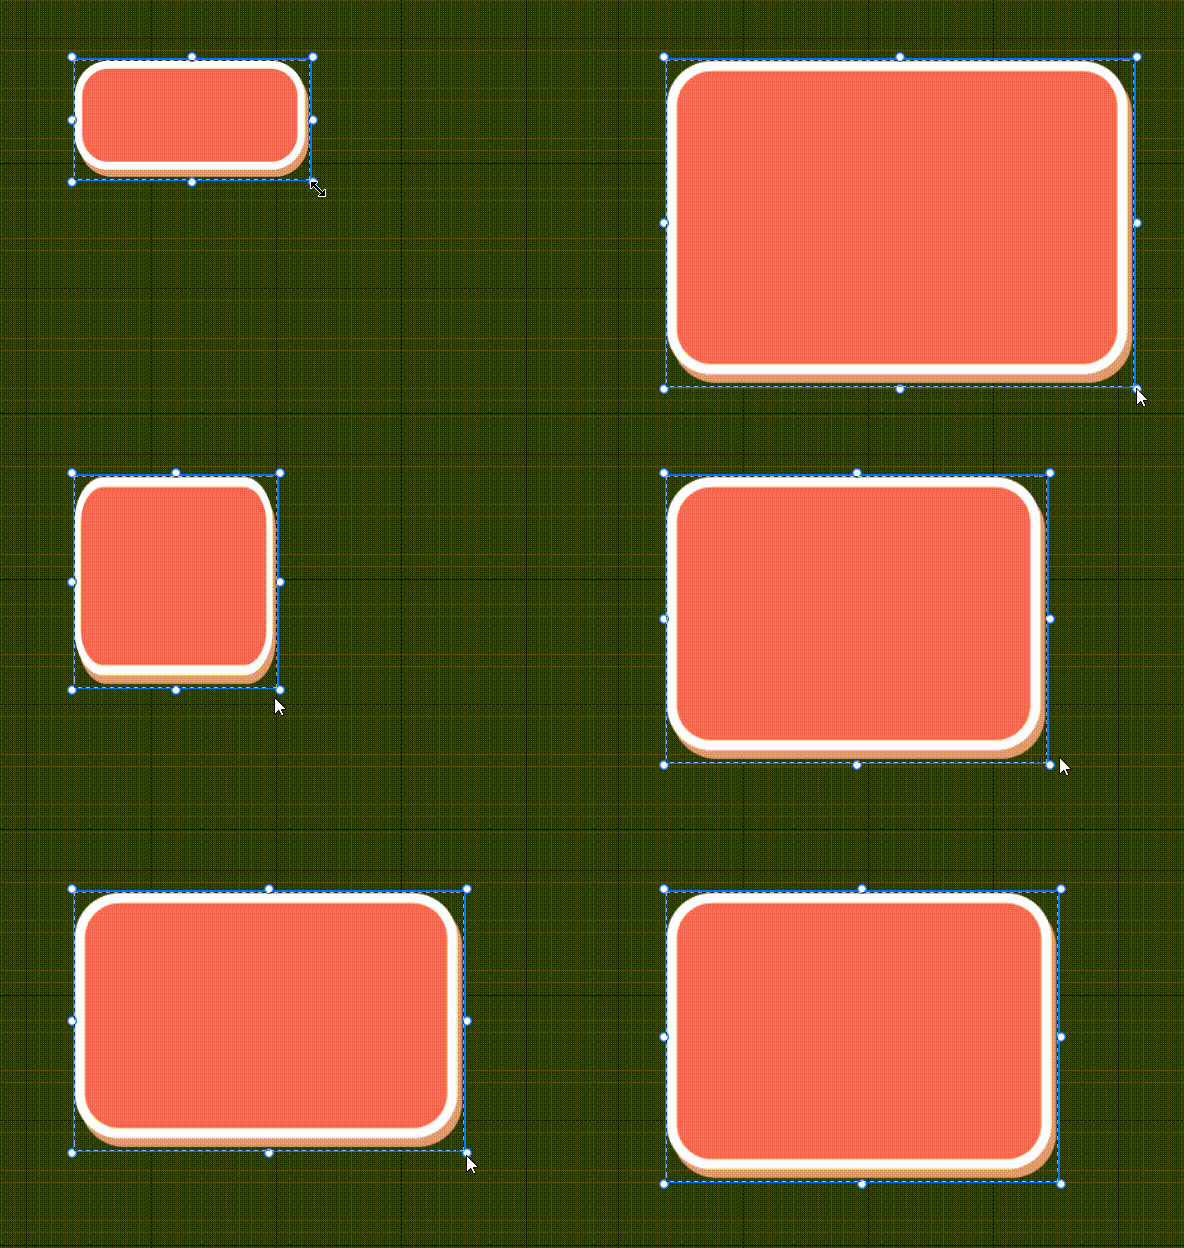
- By flexibly using the nine-squared grid function in the image drawing type, you can enlarge a small-sized UI texture to any size without distortion, saving memory space while maintaining the clarity and beauty of the image. The asset size of the nine-squared grid UI baseplate must be less than or equal to 256×256.
- If the UI baseplate has too many details to use the nine-squared grid, but is composed of repeated patterns, it is recommended to split the pattern into four consecutive texture and upload them to save memory.
- nine-squared grid drawing type demonstration: For instructions, please see UI widget - Image :
Reasonably use the principle of splitting and reusing, and reuse image as much as possible
- The left picture is a whole picture, this shows that reasonable splitting and reusing a whole picture can save memory.
Combining the above two principles, we can achieve the following different UI baseboard style(there are many similar ones).

3324x1378

1734x1370

1734x1370
1734x1370
In fact, you only need to use the following two pictures, and make reasonable use of the split reuse principle, the nine-squared grid drawing type, and modify the color of the image to Union all the pictures above, which will save thousands of times of memory usage.

198x127

100x100
It is recommended to use Collapsed instead of Hidden to hide the UI.
- When modify the visibility of UI widget, if you do not need to consider the layout space, it is recommended to use Collapsed to hide the UI, because Hidden still occupies the layout space after hiding, while Collapsed does not occupy the layout space after hiding. Therefore, no Prepass calculation is performed after hiding, and the performance is better than Hidden. Reasonable selection of a better visibility mode can effectively optimization performance and reduce time consumption.
//UI node display rules
    enum SlateVisibility {
        /** Visible */
        Visible = 0,
        /**Hidden and does not take up space*/
        Collapsed = 1,
        /** Hide the size of the calculation*/
        Hidden = 2,
        /** It can be seen that the node itself and its child nodes cannot respond to events*/
        HitTestInvisible = 3,
        /** It can be seen that it cannot respond to events*/
        SelfHitTestInvisible = 4
    }
//UI node display rules
enum SlateVisibility {
/** Visible */
Visible = 0,
/**Hidden and does not take up space*/
Collapsed = 1,
/** Hide the size of the calculation*/
Hidden = 2,
/** It can be seen that the node itself and its child nodes cannot respond to events*/
HitTestInvisible = 3,
/** It can be seen that it cannot respond to events*/
SelfHitTestInvisible = 4
}Example:
const btn = this.uiWidgetBase.findChildByPath('Canvas/Button_Jump') as Button
//Hide and do not occupy size in the layout, saving performance
btn.visibility= SlateVisibility.Collapsed
//Hide and occupy size in layout
btn.visibility= SlateVisibility.Hidden
const btn = this.uiWidgetBase.findChildByPath('Canvas/Button_Jump') as Button
//Hide and do not occupy size in the layout, saving performance
btn.visibility= SlateVisibility.Collapsed
//Hide and occupy size in layout
btn.visibility= SlateVisibility.Hidden Editor Doc