Publishing Your Game
Estimated reading time: 5 minutes.
Once all the features are complete, the next step is to publish your game online and bring it directly to players! However, before doing so, it's a good idea to test your game on a mobile device to identify any potential mobile-specific bugs. This chapter will guide you through the process of publishing your game on our official platform and playing it on your phone.
1. Set the Maximum Number of Users per Room
Before publishing your game, you first need to set the maximum number of players allowed in a single room. In the GPark Editor, there are two settings related to room capacity:
Maximum Player Count
Reserved Slots for Players
The first parameter determines the total number of players that can be in a single room, including reserved slots.
Reserved players refer to those who join through special means other than the standard "Start Game" button, such as joining via a friend's invitation or through the "Currently Playing" feature.
In simple terms, if you set the Maximum Player Count to 5 and the Reserved Player Count to 1, and all users join by clicking the "Start Game" button on the game details page, the room can accommodate up to 4 players, leaving 1 reserved slot.
Impact of Enabling Reserved Slots on Matching
When reserved slots are set, the system will prioritize matching players to rooms with friends. The system will prioritize rooms with more players if multiple rooms with friends are available.
Now that you understand the concept, let's see how to set these parameters in the editor:
Click the Settings button in the top-right corner of the editor's main interface.
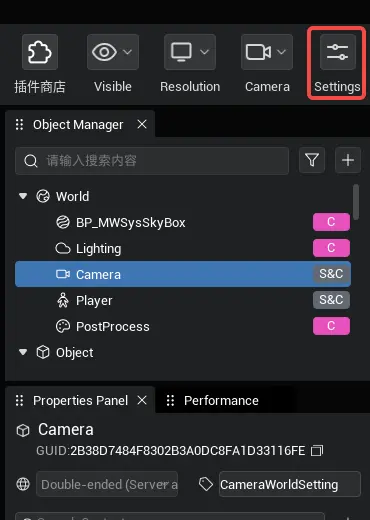
In the Settings menu, select World Settings → Room Settings.
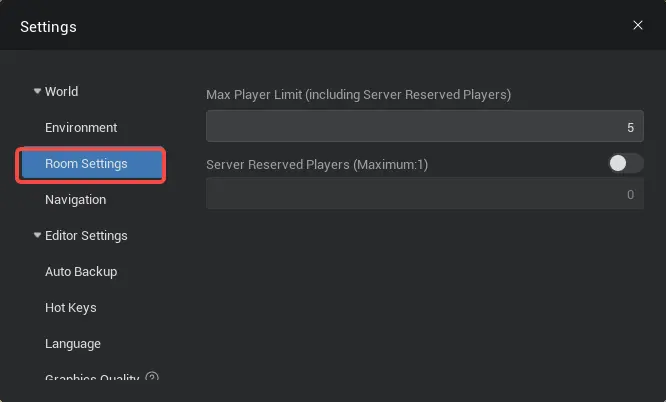
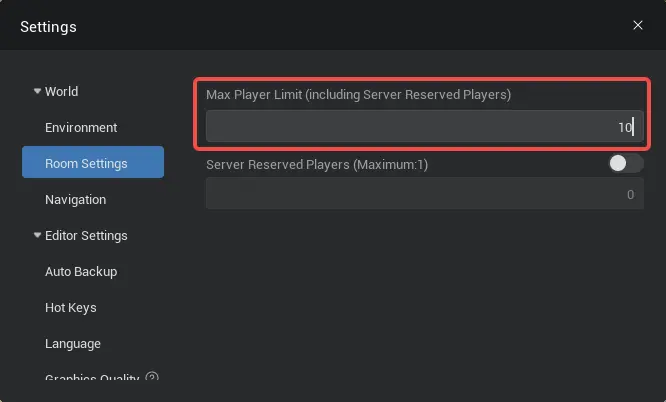
Set the Maximum Player Count (range: 5 ~ 50). Here, I’ve set it to 10, but you can adjust this based on your game's requirements.
Set the Reserved Player Count. For demonstration purposes, I’ve enabled this feature and set it to 1. Again, this value should be set according to your specific needs.
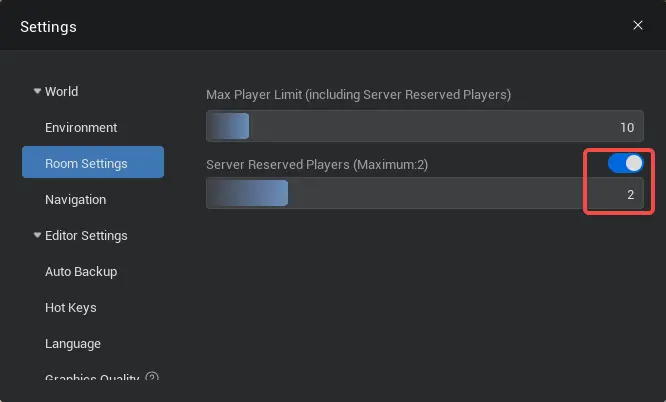
With this, the first step is complete. You can now close the Settings window and move on to the next part of the process.
2. Upload Your Game and View It in the Creator Dashboard
To play your game on the platform, you first need to upload the project to the official server. Once the upload is complete, you can view detailed information about your game in the Creator Dashboard. Let’s go through the steps to upload your first game!
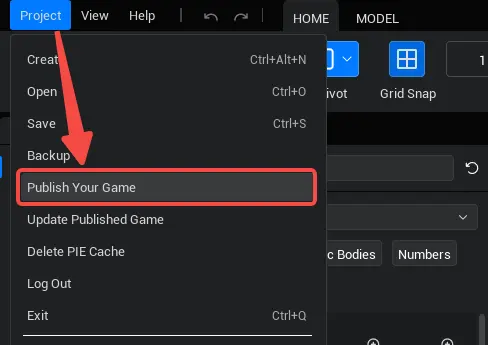
In the editor, click the Function button in the top-left corner → then click Publish Game.
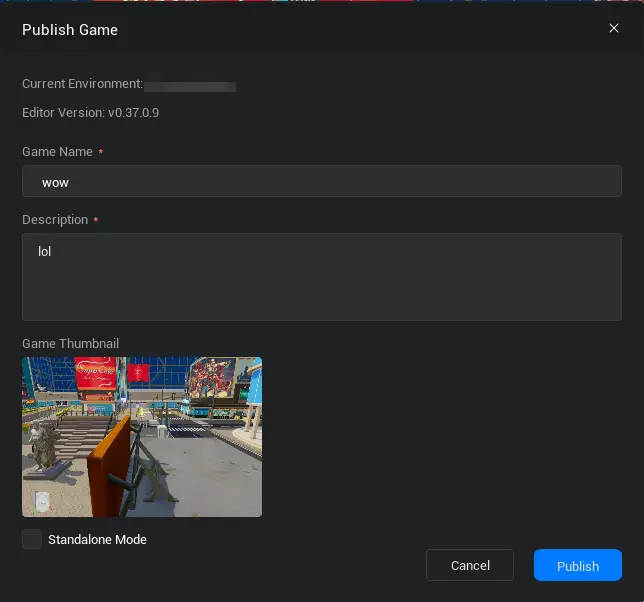
In the Publish Game window, enter the game name and release notes, then optionally select whether to integrate MGS or enable single-player mode. Here, I’ve named the game "GPark Editor Launch!" and added the release notes: "Test Game."
About Standalone Mode
- Selecting the
Standalone Modeoption will make the game single-player, preventing it from connecting with other users on the platform.
- Selecting the
Once everything is set, click the Publish Game button. After the upload is complete, the editor will automatically open your browser and navigate to the Creator Dashboard Creator | GPark.
3. Set Up Game Assets in the Creator Dashboard
About Testing Games
If you only want to test your game on a real device, you can skip uploading assets for now. Assets are only required when you’re ready to officially launch the game.
- Game Name: The name visible to users after the game goes live. It can be edited again in the Creator | GPark.
- Game Icon: The icon representing your game.
- Homepage Image: A large preview image for your game (Primary Exposure Entry).
- Game Category & Tags: Set the appropriate category and tags for your game to improve visibility.
 Editor Doc