Particle Emitter
INFO
Read this article for 15 minutes
This article outlines the use of the Gameplay Object- Particle Emitter.
1. What is a particle emitter?
- A particle emitter is an effect unit that can emit particles . Its various property can be modified to achieve rich effect.
- Particle emitters are customize effect that can modify a variety of property and even texture. Non customize effect are editor customized effect with fewer modifiable parameter but a high degree of completion. In actual projects, you can choose the effect type as needed.
2. How to create a particle emitter?
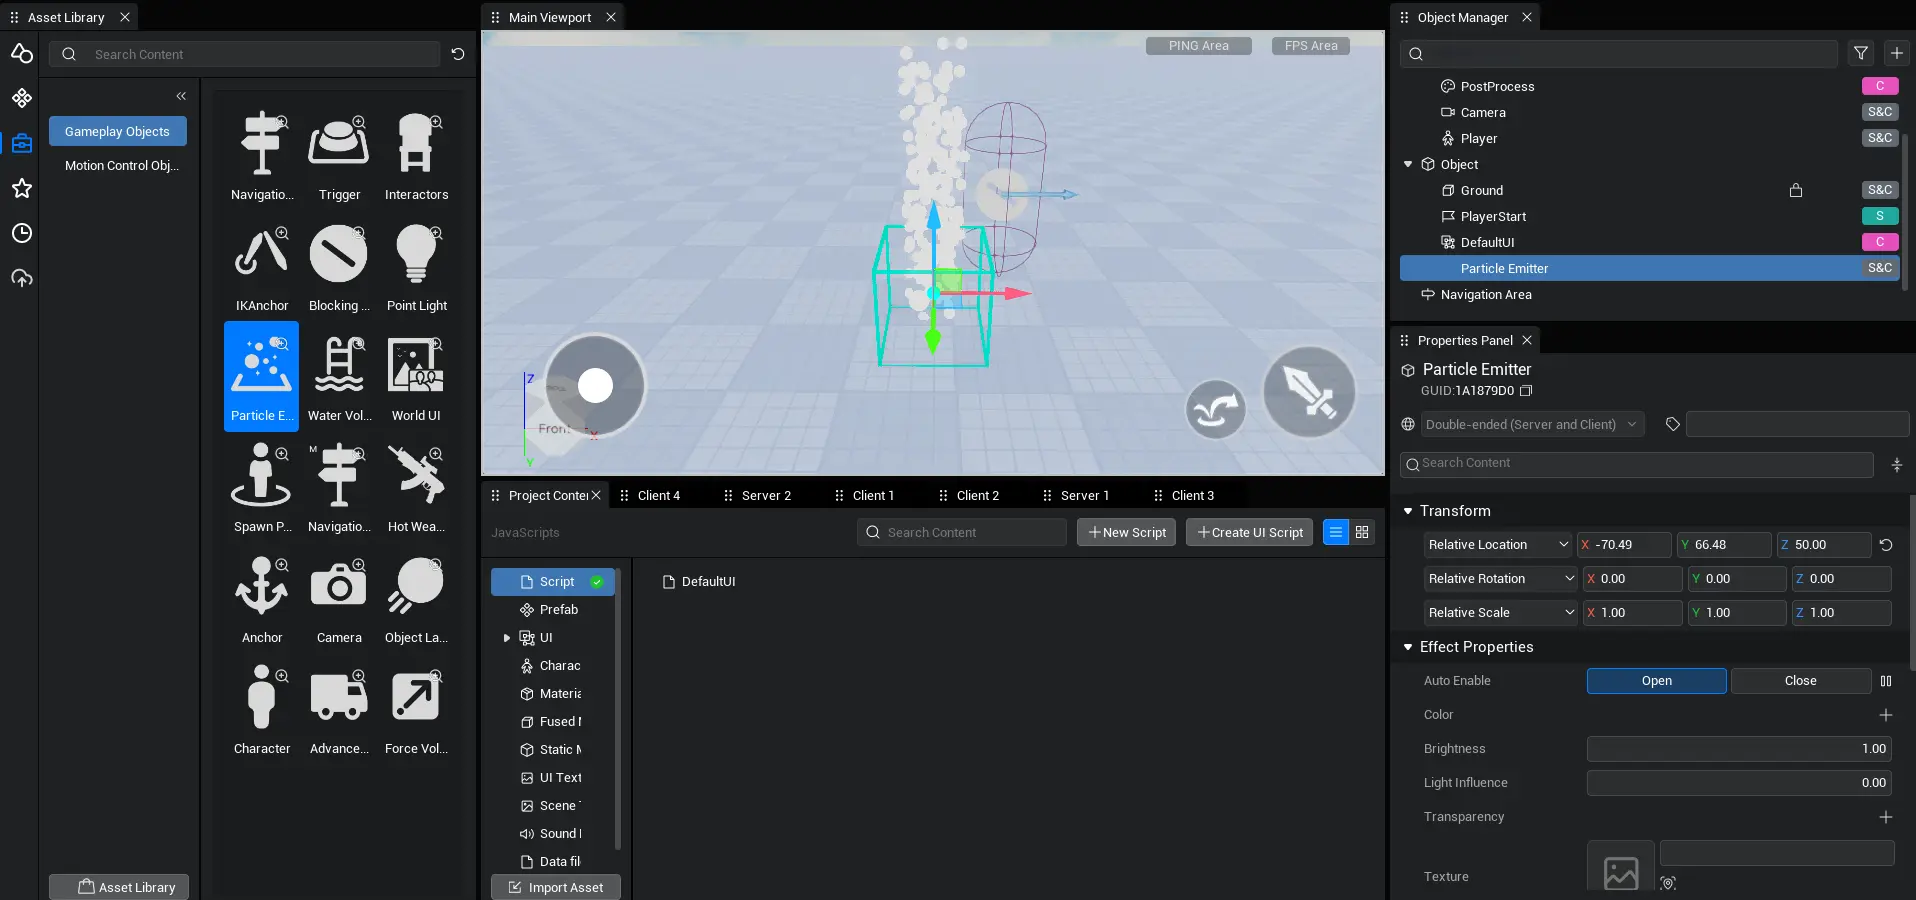
- Drag the emitter from the Gameplay Objects-Asset Library to the scene or object manager. After selecting the particle emitter, you can change the property in the panel.

3. What are the property and API of particle emitters?
3.1 Transformation

3.1.1 Relative position : The position of the particle emitter in the world .
3.1.2 Relative rotation: The rotation of the particle emitter in the world.
3.1.3 Relative scale: Fixed to (1,1,1) and cannot be changed.
3.2 Effect property

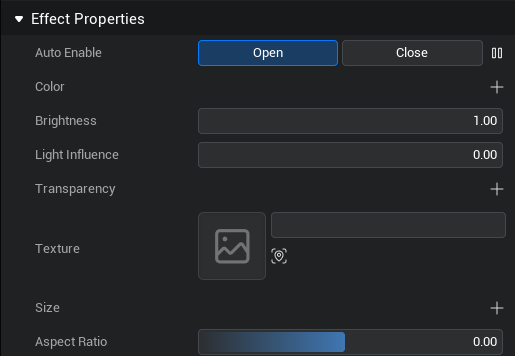
3.2.1 enable
When turned on, the particle emitter will emit particle when the experience is started, otherwise it will not. The pause button allows the particle emitter to pause emitting in the editor . This property can only be modified in the editor.
TIP
In the script, use ParticleEmitter.play() to start emitting particle, use ParticleEmitter.stop() to stop emitting particle, and use ParticleEmitter.forceStop() to stop emitting and destroy all emitted particle.
3.2.2 Color
Control the color and changes of particle during the life cycle.
TIP
The above data format is called "keyframe interpolation", which is frequently used in particle emitters to achieve rich effects. instructions: 1. click the plus sign to add a keyframe node. 2. The "Time Point" property is the percentage of the particle's entire life cycle from birth to destruction. 3. "Value" can be color, transparency or even acceleration, which means that the particle will change from the property of the last "time point" to the current value. 4. The following code example implements keyframe interpolation in the script.
// achieve keyframe interpolation in the script
let Effect = this.gameObject as ParticleEmitter;

// create a keyframe array of particle colors to linearly transition from blue to red
let ColorSequence = Array<mw.colorSequencePoint>();
// Blue when the life cycle is 0%
ColorSequence.push(new mw.colorSequencePoint(0, new LinearColor(1,0,0)));
// Red when the life cycle is 100%
ColorSequence.push(new mw.colorSequencePoint(1, new LinearColor(0,0,1)));
Effect.color = ColorSequence;
// achieve keyframe interpolation in the script
let Effect = this.gameObject as ParticleEmitter;
// create a keyframe array of particle colors to linearly transition from blue to red
let ColorSequence = Array<mw.colorSequencePoint>();
// Blue when the life cycle is 0%
ColorSequence.push(new mw.colorSequencePoint(0, new LinearColor(1,0,0)));
// Red when the life cycle is 100%
ColorSequence.push(new mw.colorSequencePoint(1, new LinearColor(0,0,1)));
Effect.color = ColorSequence;3.2.3 brightness
Control the brightness of particle . The default value is 1.
3.2.4 Lighting Influence
Control the degree to which particle are affected by environment lighting, with 0 to 1 representing completely unaffected to completely affected. The default value is 0.
3.2.5 Transparency
Control the transparency of particle, support“keyframe interpolation”, and the default value is 1.
3.2.6 Texture
The texture of a single particle . Currently only applicable to scene texture.
3.2.7 Size
Control the size of particle, support“keyframe interpolation”, the default value is 1.
3.2.8 Aspect Ratio
Control the aspect ratio of particle. The default value is 0.
3.3 Spawn property

3.3.1 Life Time
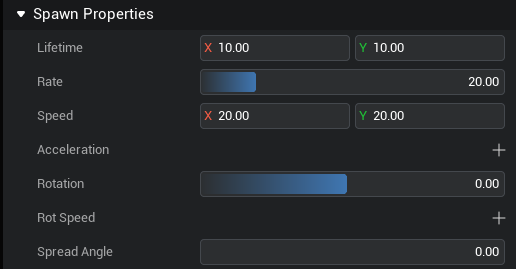
Control the time from the birth to the destruction of particle. X and Y represent intervals. When they are the same, the lifecycle is constant. When they are different, the lifecycle will be random between the two. The default value is (10,10).
3.3.2 Rate
Control the emission frequency of particle, unit: “particles/second”, range: 0-100, default value: 20.
TIP
If a single particle emitter emits 1000 particle that have not yet been destroyed, the emission frequency will be automatically slowed down to ensure that the number remains below 1000. If you need the effect of a large number of particle, you may want to combine multiple particle into a single image to reduce rendering pressure. If the effect is still not satisfactory, you can try stacking multiple particle emitters.
3.3.3 Speed
Control the speed of particle, unit is "cm/s".
3.3.4 Acceleration
Control the acceleration of particle during their life cycle and support“keyframe interpolation”.
3.3.5 Rotation
Control the initial rotation angle of particle when they are emitted. The default value is 0.
3.3.6 Rot speed
The speed at which particle rotate during their life cycle, support“keyframe interpolation”.
3.3.7 Spread angle
The angle at which particle deviate from the vertical direction of emission
3.4 Emitter property

3.4.1 Shape Extend
The current version of the particle emitter only support rectangle, where XYZ represents the length, width, and height of the rectangle. The default value is (50,50,50).
TIP
In the case of a rectangle particle emitter, reducing XYZ can achieve particle emission from a single point; reducing one value and enlarging the other two values can achieve the effect of square plane emission, etc.
3.4.2 Shape style
It is categorised into surface emission only and volume emission. Surface emission only means that particle will only be generate from the surface of the emitter, and volume emission means that particle will be generate from the inside of the emitter. The default is to emit within the volume.
3.5 Other property

3.5.1 Drag
The rate at which the particle attenuation from the start of emission to 0. The calculation formula is "particle speed + = particle speed * - Drag * DeltaTime". The value range is 0-1, and the default value is 0.
3.5.2 Mask radius
Set the edge mask cull of particle , the value range is 0-1, and the default value is 0.5.
4. Suggestions for using particle emitters
- When you need to emit a large number of particle, you can consider combining multiple particle into one image to reduce rendering pressure.
- Pay attention to the life cycle of particle. If particle are not destroyed for a long time, it may affect the number of newly emitted particle.
- particle emitters can produce a large number of effects, such as falling leaves, rain and snow, level upgrade effect, foot walking effect, etc. However, you need to pay attention to the achieve method. As follows, when achieve rain and snow effects, you can consider mounting the particle emitter in the camera instead of in the world.
//Mount the particle emitter on the camera in the script
@Component
export default class EffectExample extends Script {
    private character: Character;

    protected onStart(): void {

        let Effect = this.gameObject as ParticleEmitter;
        Player.asyncGetLocalPlayer().then((player) => {
            Effect.parent=Camera.currentCamera
            Effect.localTransform.position=new Vector(0,0,50)
        });
    }
}
//Mount the particle emitter on the camera in the script
@Component
export default class EffectExample extends Script {
private character: Character;
protected onStart(): void {
let Effect = this.gameObject as ParticleEmitter;
Player.asyncGetLocalPlayer().then((player) => {
Effect.parent=Camera.currentCamera
Effect.localTransform.position=new Vector(0,0,50)
});
}
} Editor Doc