Introduction to the Blank Project Structure
TIP
It takes about 15 minutes to read this article.
Your first project in the editor will be the Blank Project, which is also the starting point of our game development journey. In this chapter, we will explore the various objects within the Blank Project together.
1. Spawn Point
Once the Blank Project is created, open it in the editor. In the main viewport, you'll notice a ① wireframe of a capsule-shaped object—this is the Spawn Point. In the Object Manager, its icon resembles a small flag.

The position and rotation of the Spawn Point determine the player's default location and orientation upon entering the game. If there are multiple spawn points in the game, the player will randomly start at one of them. For more details on the functionality of the Spawn Point, please refer to: Spawn Point
2. Default Ground Model
In the Object Manager, there is a default model named Ground, which serves as our floor. Since the player character is affected by gravity and will fall downward upon spawning, we need a ground for the player to stand on and interact with.
①: Ground object in the Properties panel.
②: Ground model in the game.

You may have already noticed that the Ground object is the only one in the Object Manager with a small lock icon on the far right. This indicates that the model cannot be selected in the main viewport.

When you hover your mouse over the lock icon, you'll see an eye icon next to it. Clicking the eye icon toggles between an open and closed eye state. This controls whether the object is visible in the main viewport of the editor, which is especially helpful when building complex levels.

TIP
These two features only affect the editor and have no impact on the game when it is running.
3. Default UI
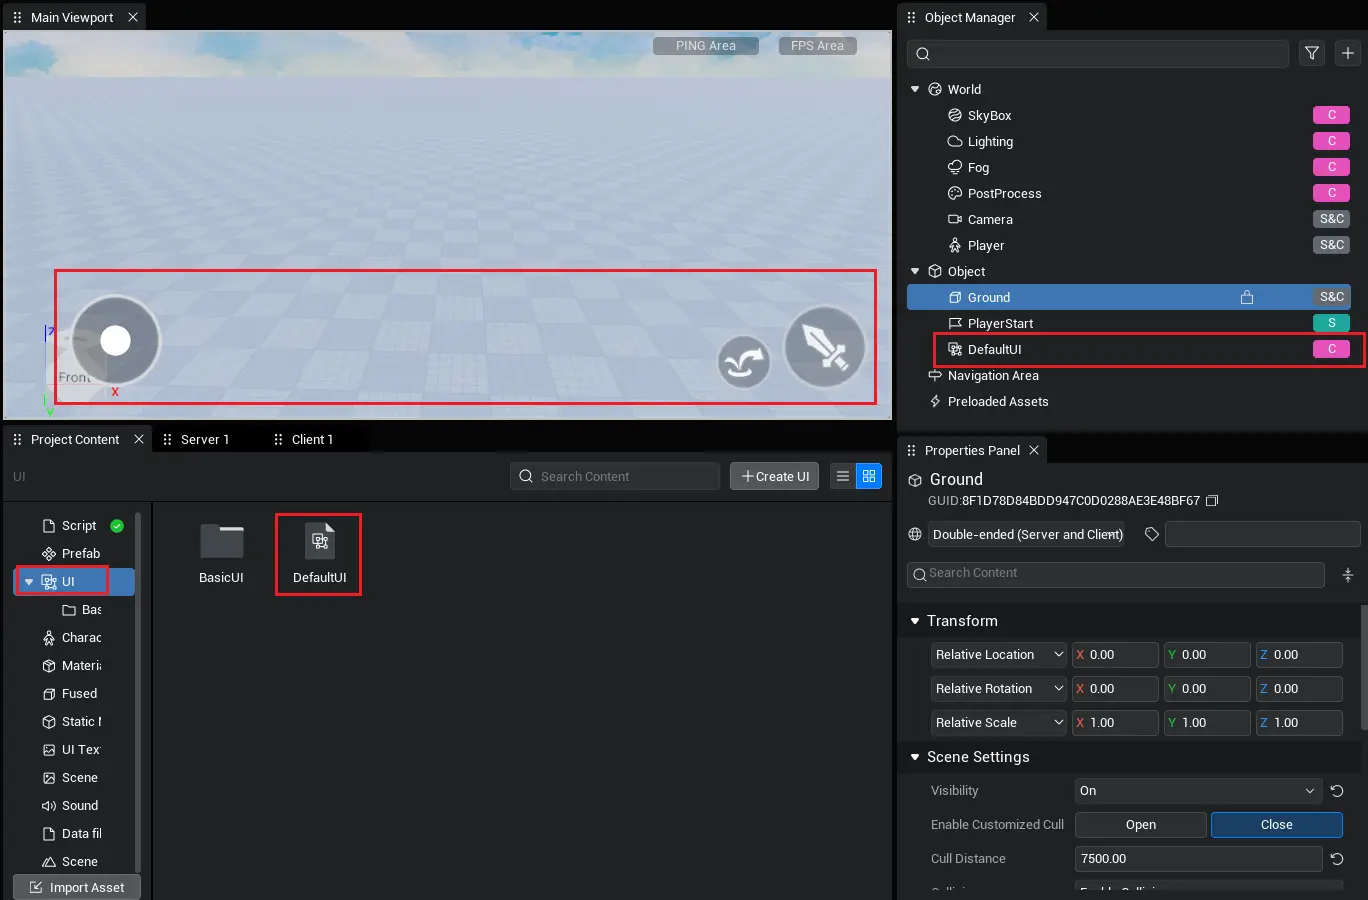
In the Blank Project, a default UI is automatically created and placed in the scene. This UI includes a joystick, camera swipe area, jump button, and attack button. By default, the joystick is mapped to the W, A, S, and D keys for movement. Thanks to this default UI, you can control the player to walk, jump, and trigger specified actions when running the game in the Blank Project.
①: Drag the default UI into the Object Manager.
②: The default UI controls provide functionality for player control when the game is running.
③: The default UI file—if you need to modify the default UI, you can open and edit this file.

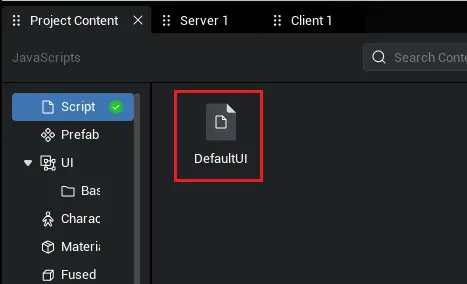
In the editor, the UI file does not contain any code logic. Therefore, the Blank Project includes a matching code file for the default UI. You can find this code file in the Project Content → Scripts section.

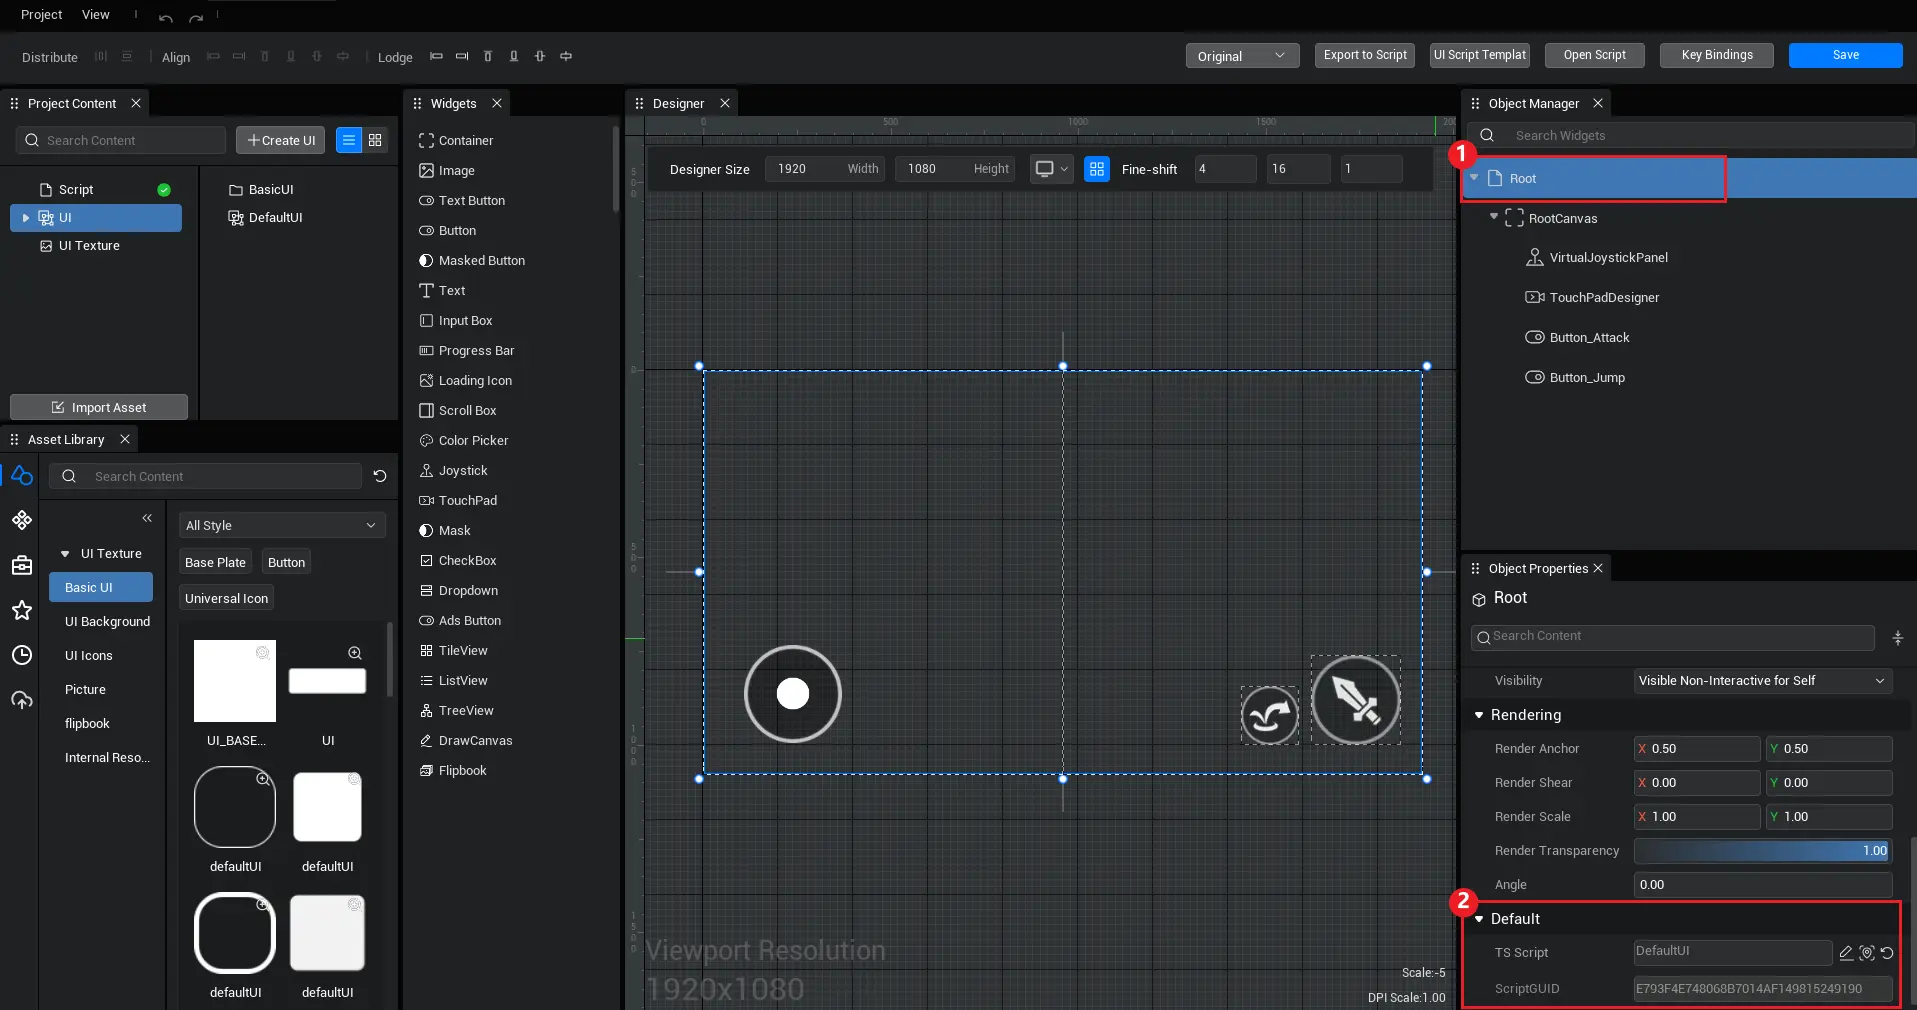
It's important to note that to associate a code file with a UI file, you'll need to open the specific UI file (using the Default UI as an example). In the UI Editor → Object Manager, select the Root node. At the bottom of the Properties panel, you'll be able to see the code file linked to the UI.

For a detailed introduction and usage guide on UI files, UI controls, and more, please refer to the product manual: Creating User Interface
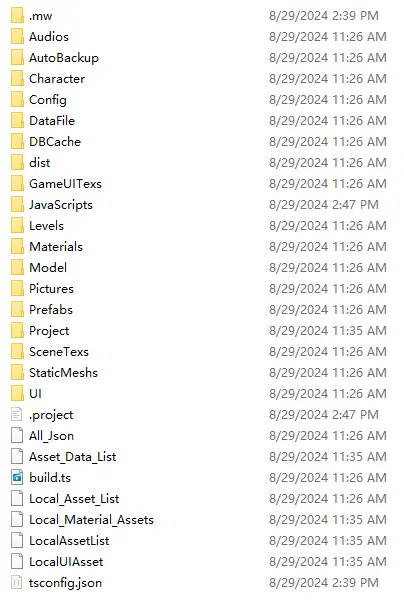
5. Project Folder Overview

.mw: Stores deleted local files (such as scripts, prefabs, etc.) for recovery purposes. This folder is cleared every time the project is opened.AutoBackup: This folder stores automatic backups of the project created by the editor..vscode: Configuration folder for VSCode, generated based on the user's personal configuration preferences.Character: This folder is generated when the character editor is used in the project and contains user-created character data.Config: Stores configuration files for the project, including resource paths, window size, project settings, key binding information, and more.DBCache: Local cache folder. When data storage interfaces are called in the project, corresponding data files are generated in this folder after running on a PC. Deleting this directory clears the game's data storage.dist: Compilation cache directory, where thegame.jsfile is generated after each compilation.JavaScripts: significant This is the script folder, where all user-created scripts are stored.Levels: Contains scene files used in the game, representing different levels.Materials: The folder where material data files are stored after a new material is created by the user. This directory contains all custom materials.Pictures: Stores automatic screenshots of game scenes, which are displayed in the project list.Prefabs: significant This is the prefab directory, where all prefabs used in the project are stored—whether created by the user or downloaded from the resource library.UI: significant This directory stores all UI files. If any code files are referenced, they will still be located in theJavaScriptsdirectory.All_Json: Consolidated data file for the entire project.Asset_Data_List: A list of resources used within the scene, including details about each resource utilized.build.ts: A temporary file automatically generated by the system; no user action is needed.Local_Asset_List: Index data of all local assets used in the project.xxxxxx.project: The game project file, which stores essential project information.tsconfig.json: TypeScript usestsconfig.jsonas its configuration file. When a new project is opened in the editor, this file is automatically created.
As you can see, a project contains various files and directories. However, aside from the scripts, UI, and prefabs that we create, most of the other information is automatically maintained by the editor. Typically, there’s no need to pay attention to these files during development.
 Editor Doc