Safe zone adaptation and designer functions
It takes about 10 minutes to read this article
This article provides an overview of how to use the safe zone adaptation function, and how to use the designer's top tool, distribution/alignment/placement, and other common designer features.
Safe zone adaptation function
Why is it necessary to use safe zone adaptation
- When the experience project is running on a phone with a special-shaped screen, the UI may be blocked by the camera and unable to be displayed and interacted; and some devices will have an area on the edge of the graphics where the screen can be displayed, but it is actually impossible to click and interact;
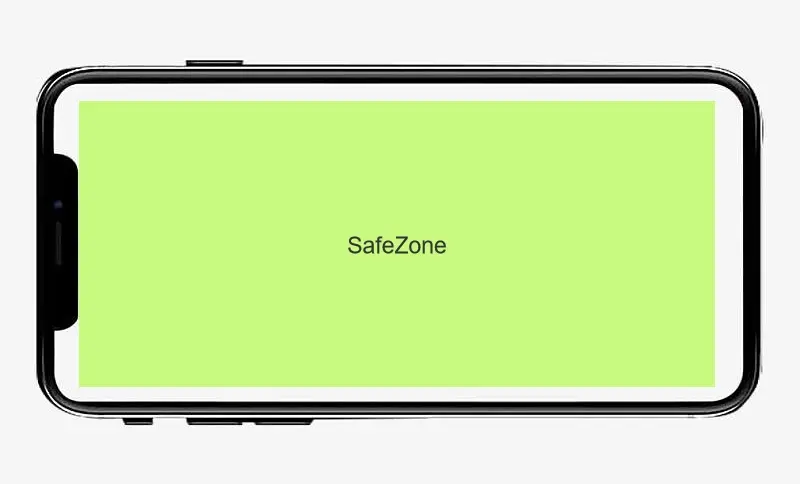
- Take the iPhone X in the image below as an example. Only the green area can display the graphics and you can click to interact. If you place interactive widget (such as button) in the white area, they can be displayed but you cannot click to interact;
- There is no need to design multiple sets of UI for these special models; we only need to design a standard UI interface and use the safe zone adaptation function to solve the above problems.
Safe zone adaptation usage
- Set the UI file that needs to open the security zone - root layer - “Adapt to the security zone” property to enabled (the SafeAreaEnable property in the corresponding UserWidget class in the TS script), and this property is not enabled by default;
- When the UI file that opens “Adapt to the Safe Zone” is instantiated as a UI object (or when the SafeAreaEnable property is dynamically opened using a script), it will automatically read the safety zone information of the player's current device, modify the position and size of the root canvas level in this UI file, and include it within the safety zone of the current device. Afterwards, the UI's sub-level widget will also change position and size according to their own align, so that the UI avoids areas that cannot be displayed/clicked;
- When the screen is flipped horizontally or when the screen is experience portrait, the safe zone adaptation will automatically take effect.
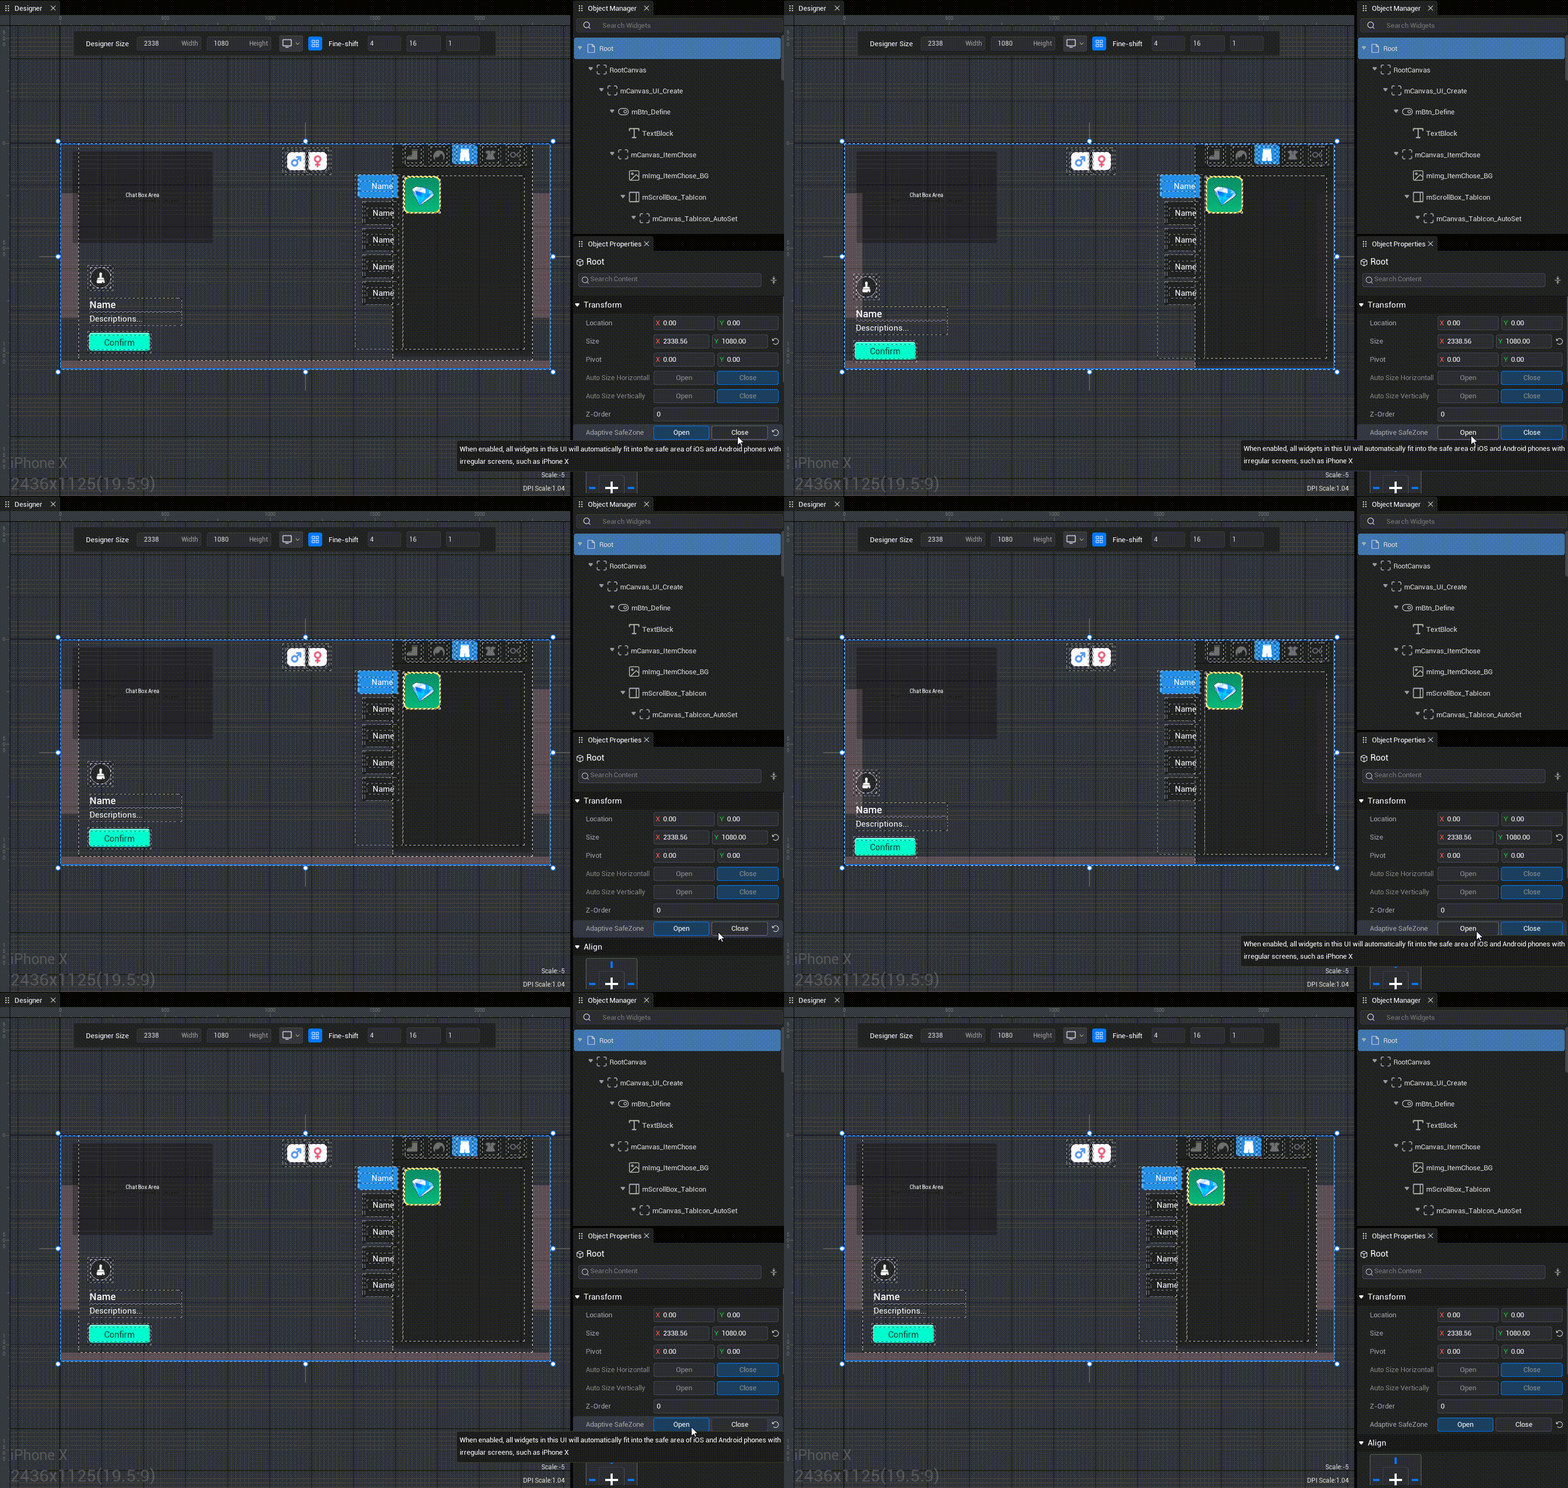
Important Notes and recommended usage
- 1. Creating a new UI object adapted to the safe zone will take a frame to complete the calculation, which will show that the UI flashes and then enters the safe zone. If you do not want this delay, hang the newly created UI object within the UI object that has already been create to enable the security zone as its sublevel;
- 2. After turning on the “Adapt Safe Zone”, the principle that the RootCanvas layer follows the changes of the player's device is to leave the upper, left, and right safe zone margins around the model. Even if this UI file is not used as a full-screen UI, when the “Adapt Safe Zone” is turned on, it also leaves a space around the device that has a safe zone. Therefore, it is important to note that when creating lists such as bag, etc., there is no need to open the “Compatible Safe Zone” when storing non-full-screen UI file for each entry;
- 3. Similar to the previous article, in the case where multiple UI files are nesting, if a UI file is mounted as a customize control under another UI file as a child level, and the parent UI file and the child UI file open the “Adaptation Safe Zone” at the same time, on the basis of the parent UI file adaptation, the child UI file will also be adapted once again. This will cause the widget inside the child level UI file to “be superimposed and adapted twice”, leaving twice as much space. Care must be taken to avoid this usage;
- 4. Even a full-screen UI does not necessarily mean that the “Adaptive Safe Zone” should be enabled. For example, a full-screen loading waiting interface or a mask bottom panel should not open the safe zone; otherwise, devices with safe zones will appear to leave a space around them. Therefore, it is up to you to choose whether the UI in different situations should open the “Adaptive Safe Zone”.
TIP
- Recommended usage:
- An adapted UI widget is required; only any level of parent UI file (UserWidget) is required to open the “Adaptive Security Zone”, and do not open it repeatedly; there is no need for an adapted UI widget, ensure that any level of parent UI file (UserWidget) does not open the “Adaptive Security Zone”;
- Therefore, it is recommended to only open the full-screen UI file of a certain top-level parent node in the “Adaptive Security Zone”, place all the UI that needs to be adapted within it, or dynamically generate it as a child level. Or just open the “Adaptive Security Zone” for multiple UI file at the same level.
Designer top tool
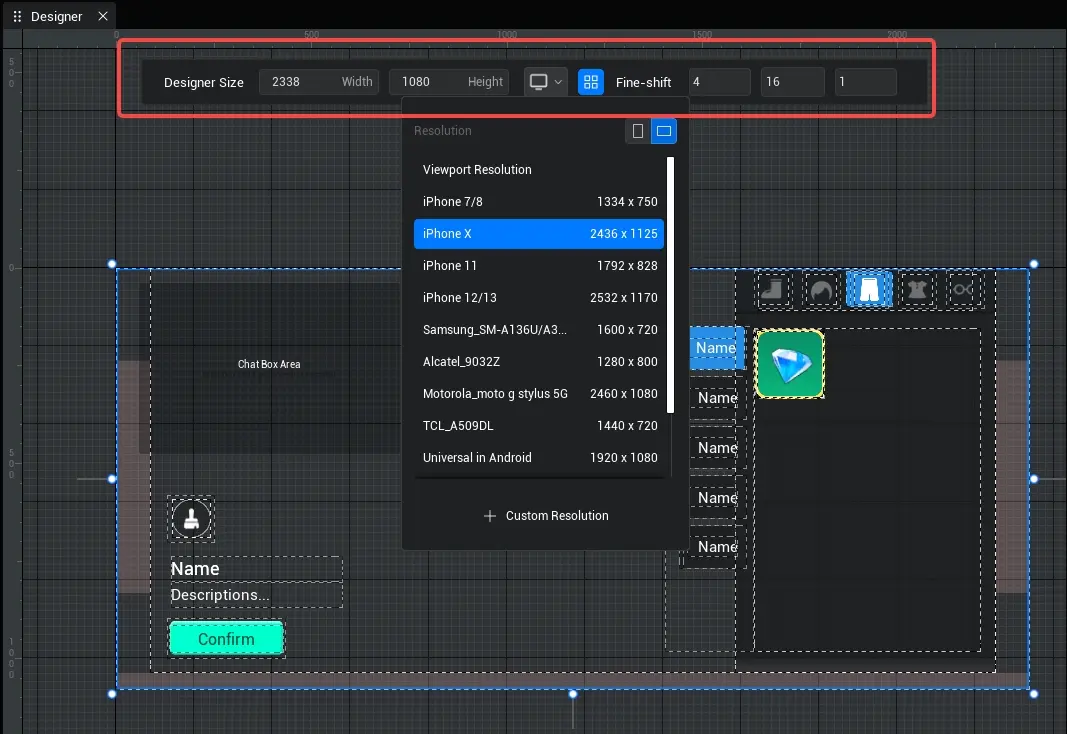 The top toolbar of the UI Editor Designer includes the following features: - modify the design size of this UI file - Preview the landscape screen/vertical portrait performance of this UI file on different devices - After selecting a model to preview, the design size of the UI file can be automatically modify to the resolution of that model, and DPI scale can be applied at the same time - If you select a model with a safe zone, you can also preview the compatibility of this UI file, showing a red non-interactive area in the designer; if the UI file enables the safe zone adaptation function, you can also preview the adaptation performance of each UI widget after entering the safe zone at the RootCanvas layer - If the design size is manually modified, the model preview state will end and automatically switch to the main viewport tiled state - Set whether to enable align to the integer mesh - Set the unit size to be fine-tuned using the keyboard arrow keys - Unit size that can be moved directly with the arrow keys - Shift+ arrow key movement unit size - Unit size for Ctrl+ arrow keys to move
Distribution/alignment/placement tools

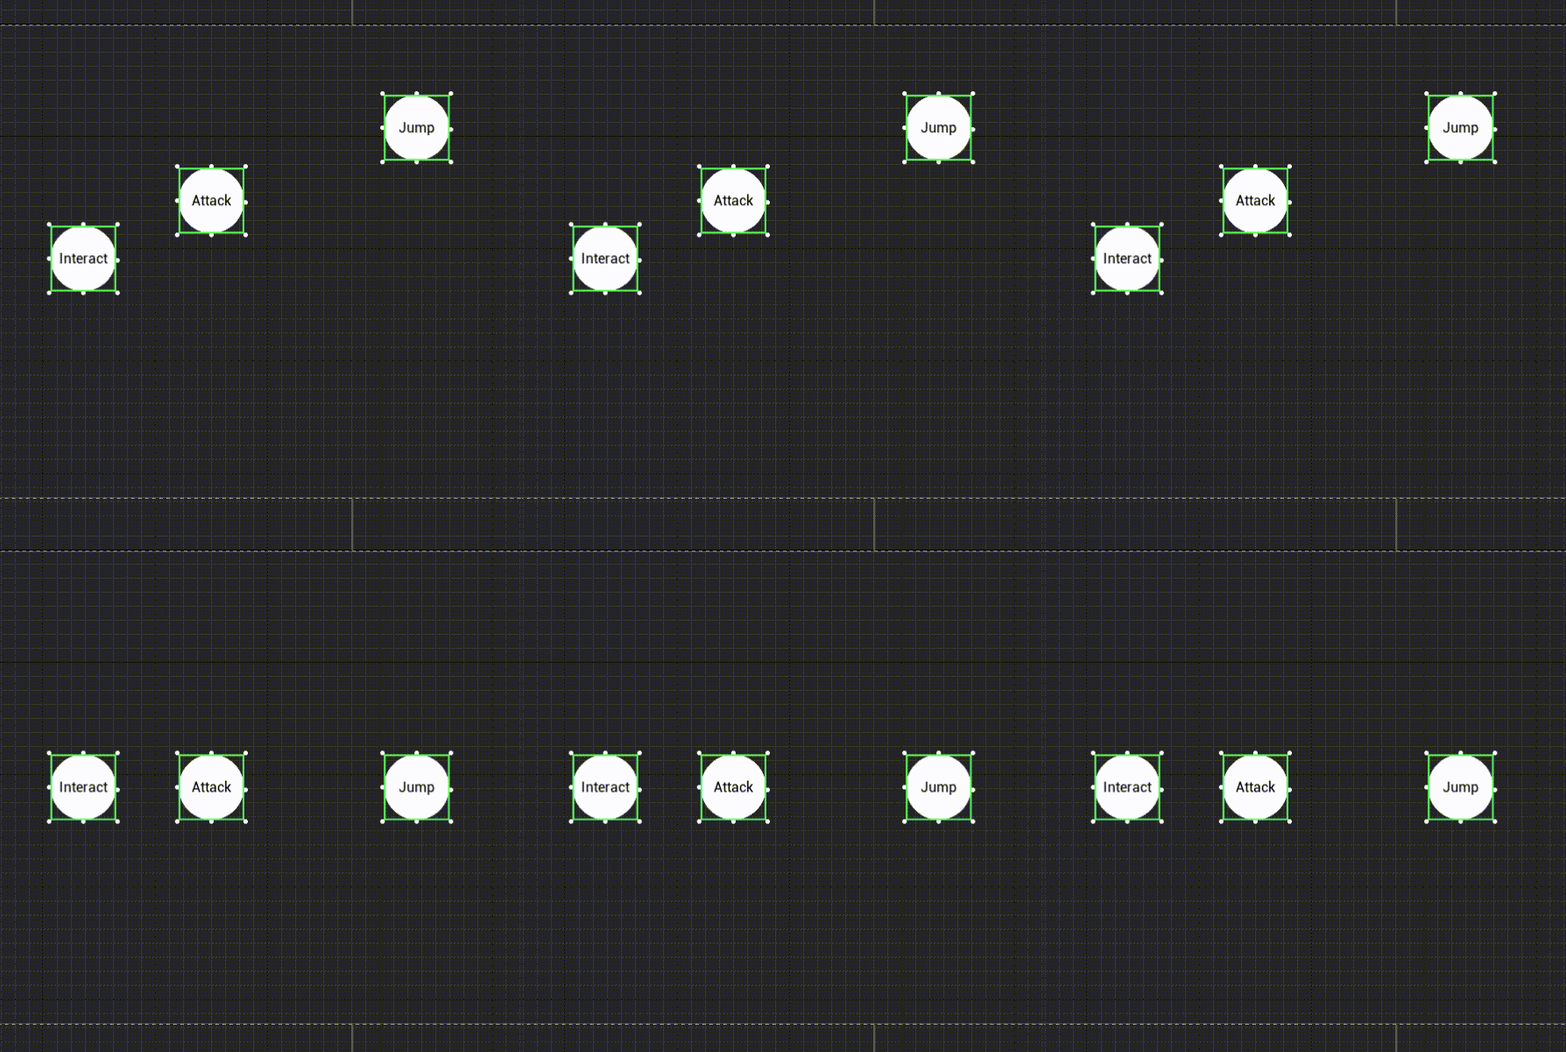
distribute
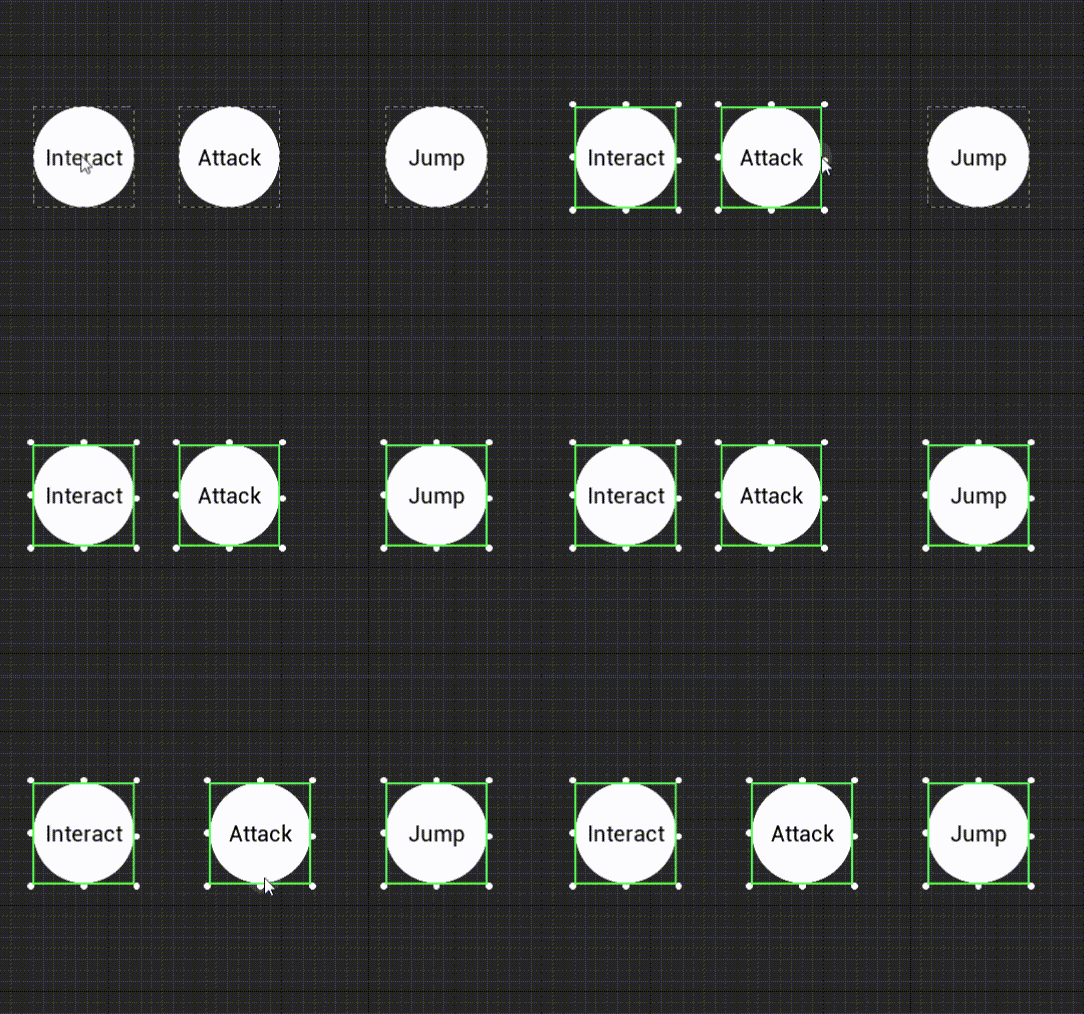
distribute is the uniform arrangement of all selected object horizontal and vertical
Horizontal distribute
- On the premise of not changing the relative order between object or change the positions of the two most left and right objects, change the x-axis position of other objects to achieve uniform horizontal distribute
Vertical distribute
- On the premise of not changing the relative order between object or change the position of the top two objects, change the y-axis position of other objects to achieve uniform vertical distribute
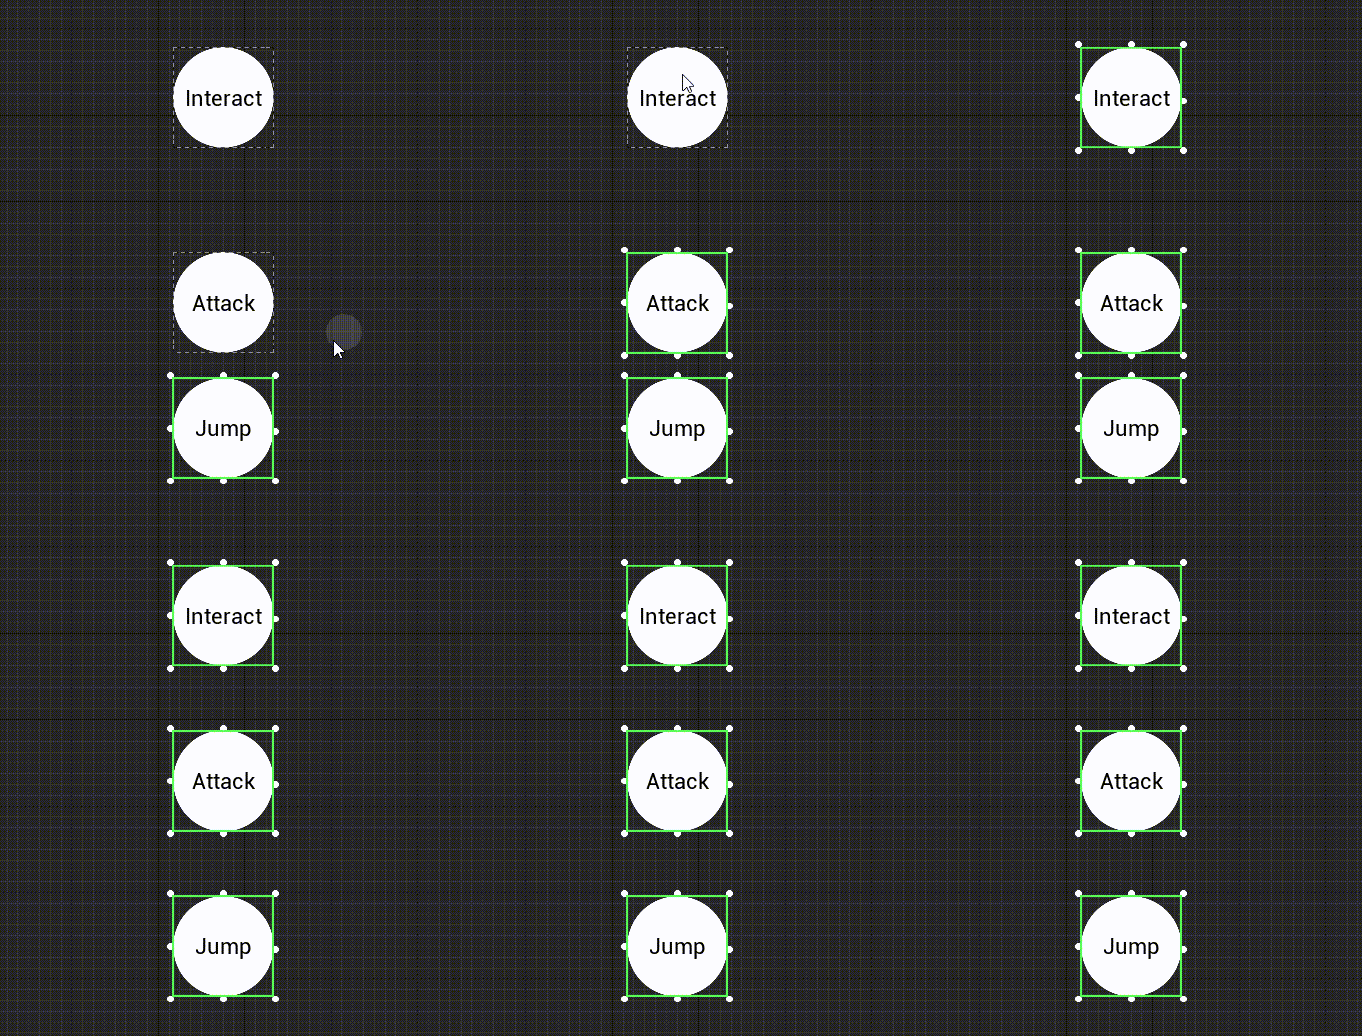
align
Alignment is aligning the border/center points of multiple selected objects to a certain edge/center line of the first selected object, regardless of their parent Container
Up/down/left/right align
- Take left align as an example: move object horizontal so that the left edge of all objects' marquee boxes is aligned with the left edge of the first selected graphic's marquee
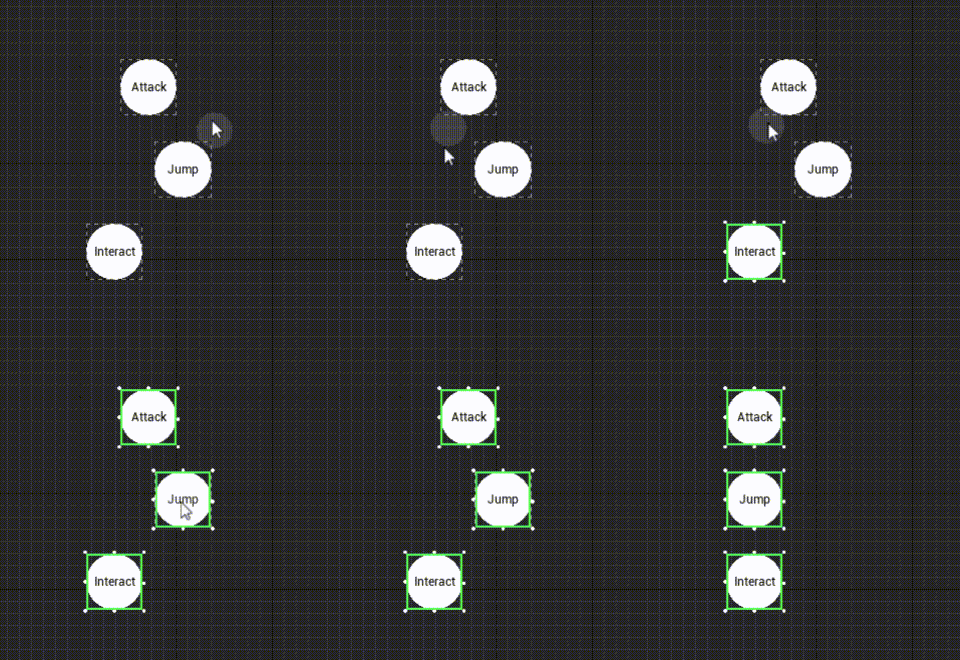
Horizontal/vertical line align
- Take horizontal line align as an example: move the object vertical so that the center point of all objects' checkboxes is aligned with the horizontal midline of the first selected graphic box
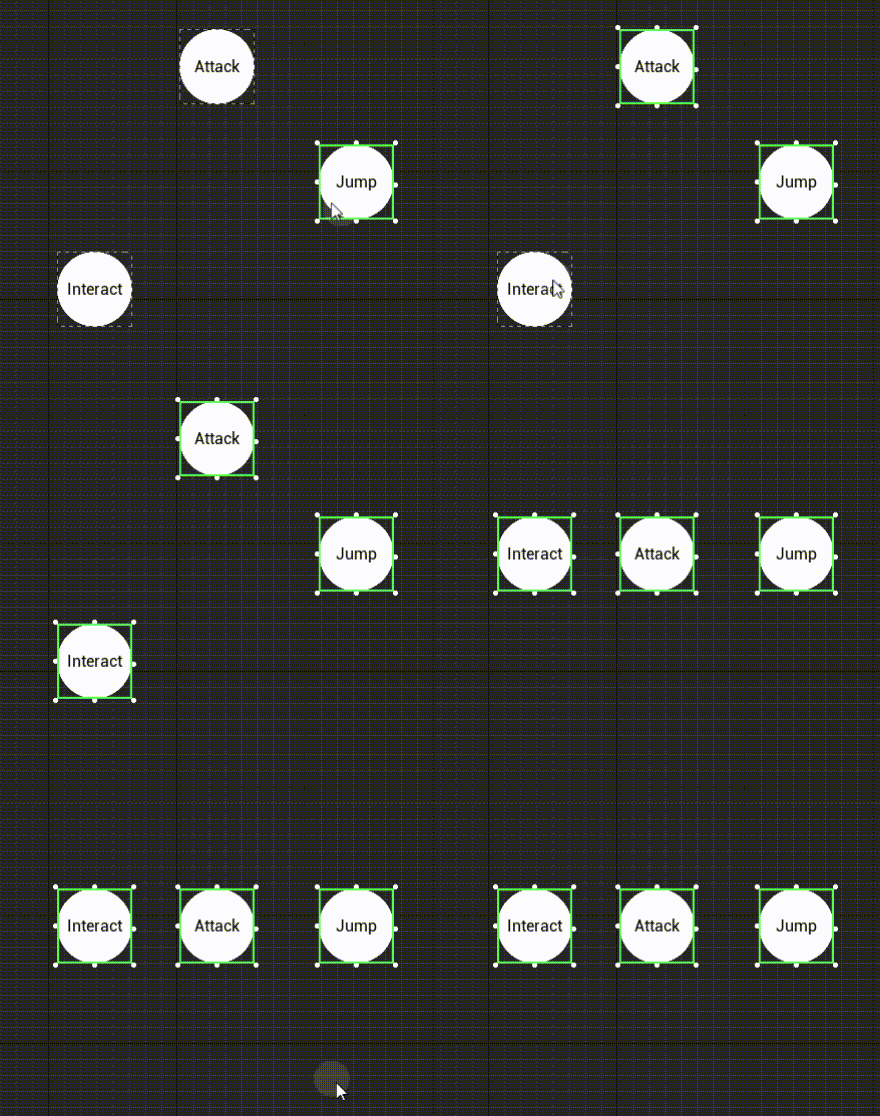
lodge
lodge is the align of the border/center points of multiple selected objects to a certain edge/center line of their immediate parent, regardless of the selection order
Up/down/left/right
- Take the bottom as an example: move the object vertical so that the bottom edge of the marquee is in line with the bottom edge of its immediate parent's marquee
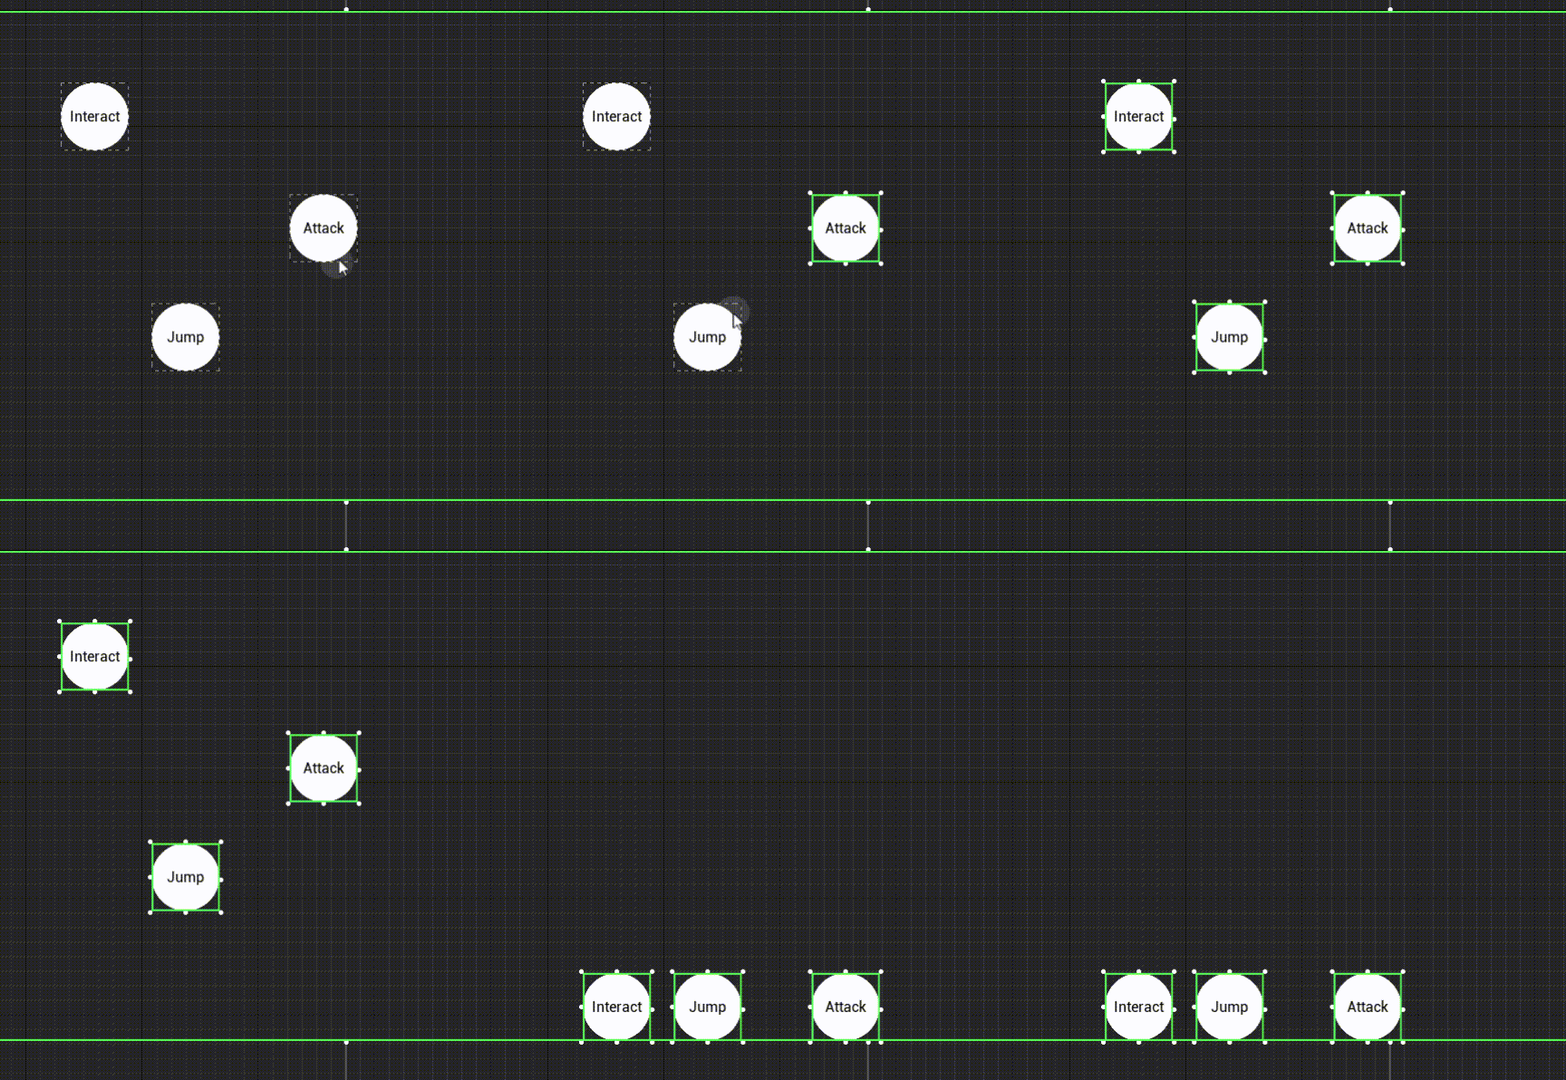
Horizontal/vertical line centered
- Take the example of centering a vertical line: move the object horizontal so that the center point of the marquee is in line with the vertical midline of its immediate parent's marquee
Right click menu
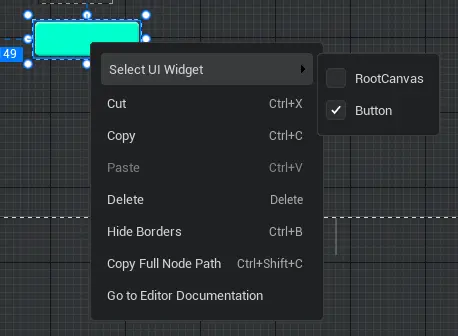
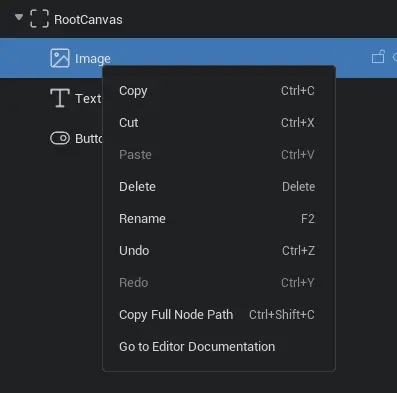
Right click in the designer or object list to open the right-click menu. The functions of the right-click menu include:
- Select UI object
- copy
- paste
- cut
- delete
- The dotted border is hidden
- Copy full node path
 Editor Doc