Material Editor
::: **tip **
It takes about 15 minutes to read this article
Help developers quickly understand and use Material Editor, this article contains the following
(1) what is a material editor, (2) how to use a material editor
:::
What is the Material Editor
- Material editor supports developers to modify material properties to achieve customized material effects
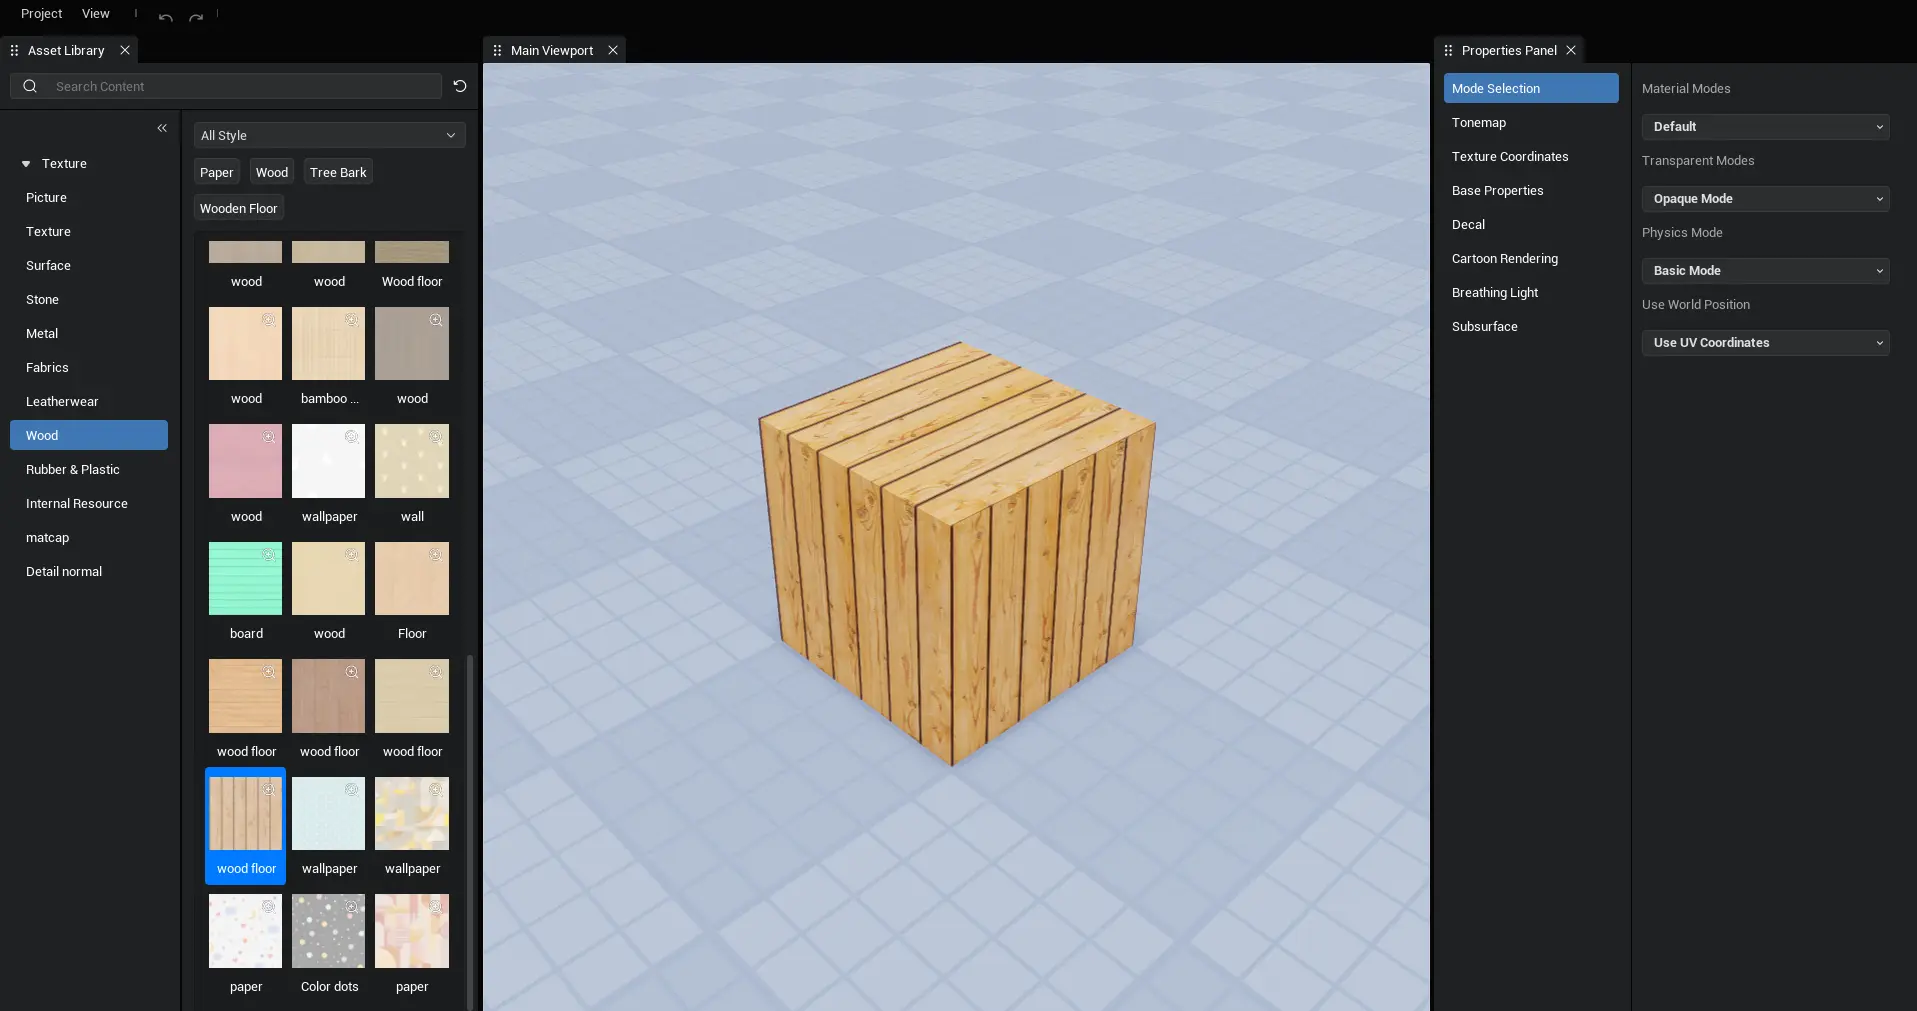
How to use Material Editor
Material Editor View Structure
- Material Editor consists of the following sections
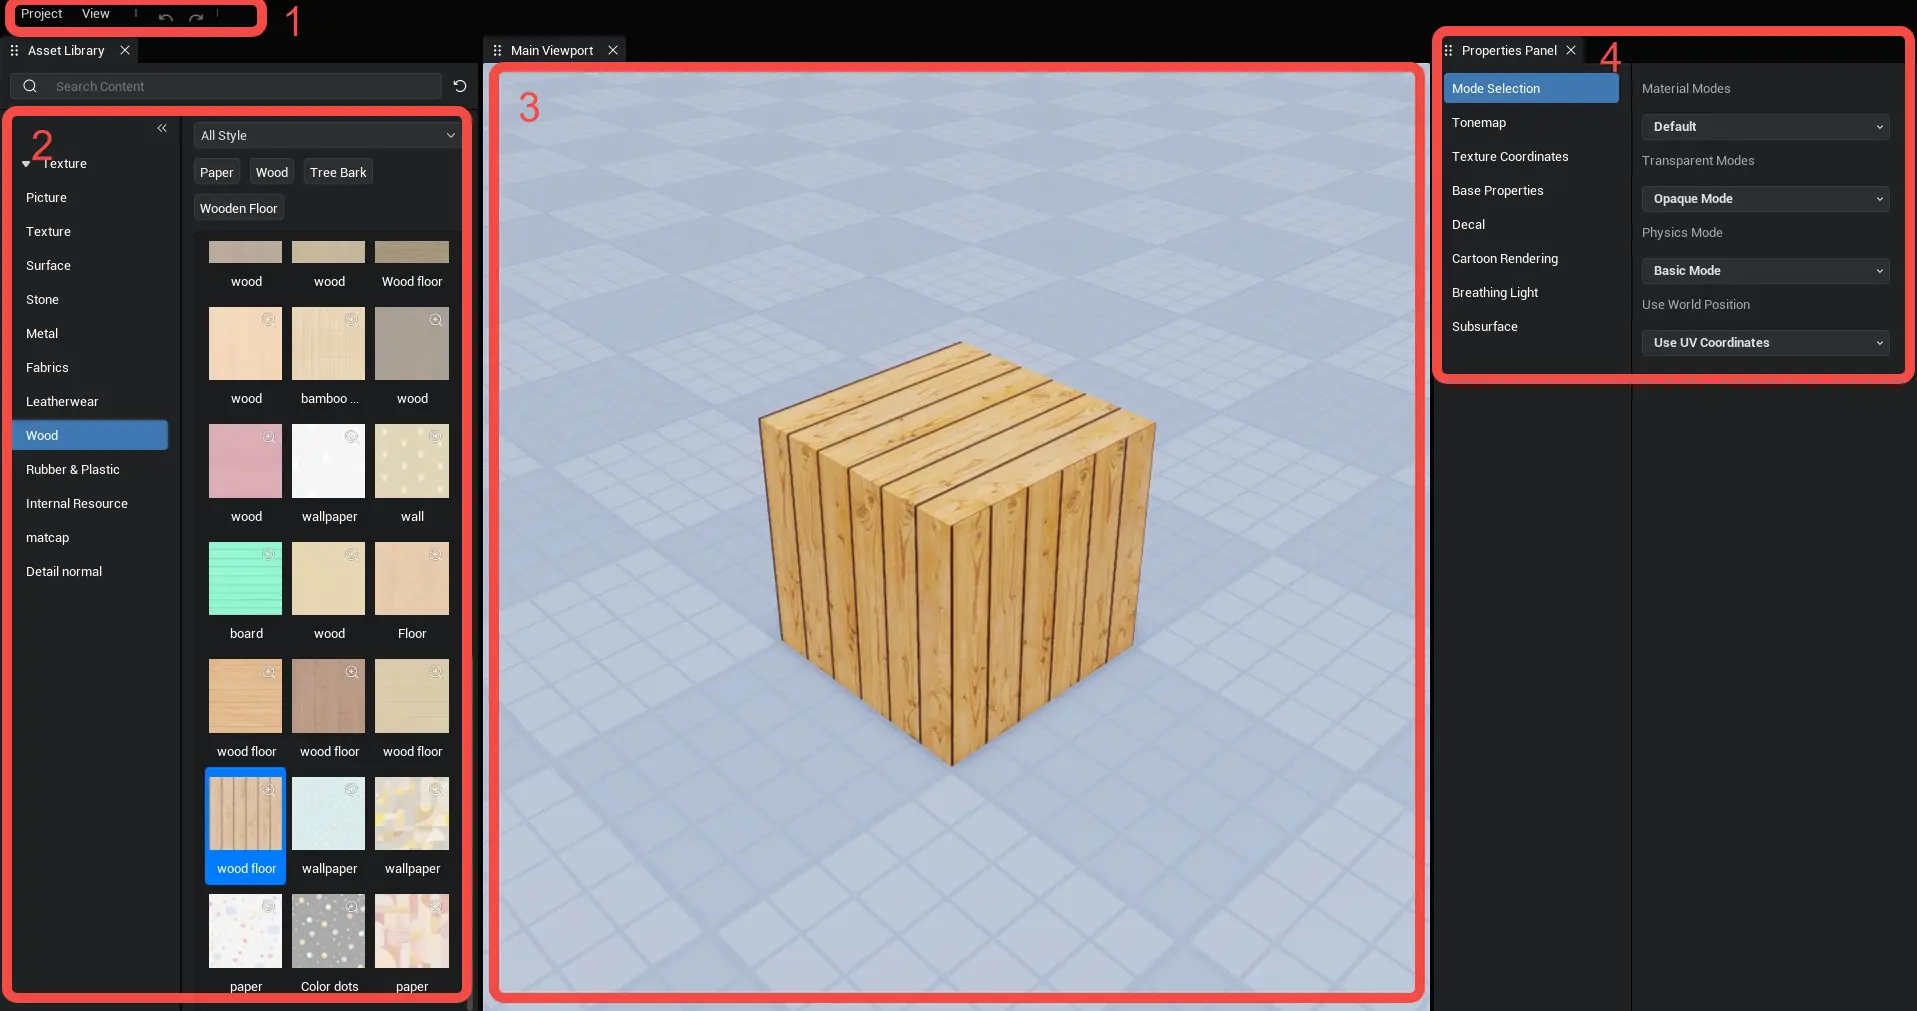
1. Menu Bar
- [Project] Save function provided after clicking drop down

- [View] After clicking the drop-down menu, provide the implicit switch of [Asset library], [Main viewport], [Property panel] and [Restore Default Layout] function
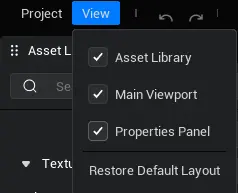
- [undo] and [redo] modification operations on material properties

2. Asset library
- Provides all the operational features of a normal asset library, but only shows assets under the scene texture classification
3. Main viewport
- Provides all operations of the normal main viewport for previewing material display
4. Property Panel
- Provides material specific property panels to support developer modifications to material properties
Create custom materials
- Select the model in the object manager that you want to modify the material, click the edit button under the material properties bar to open the material editor
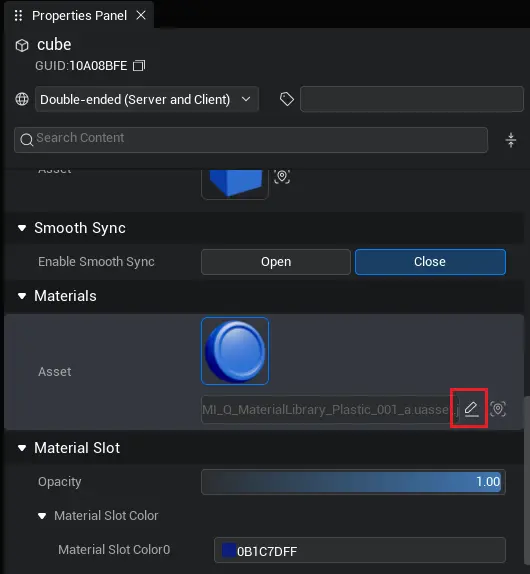
- After performing a save operation within the Material Editor, create custom materials and reference them to the selected model
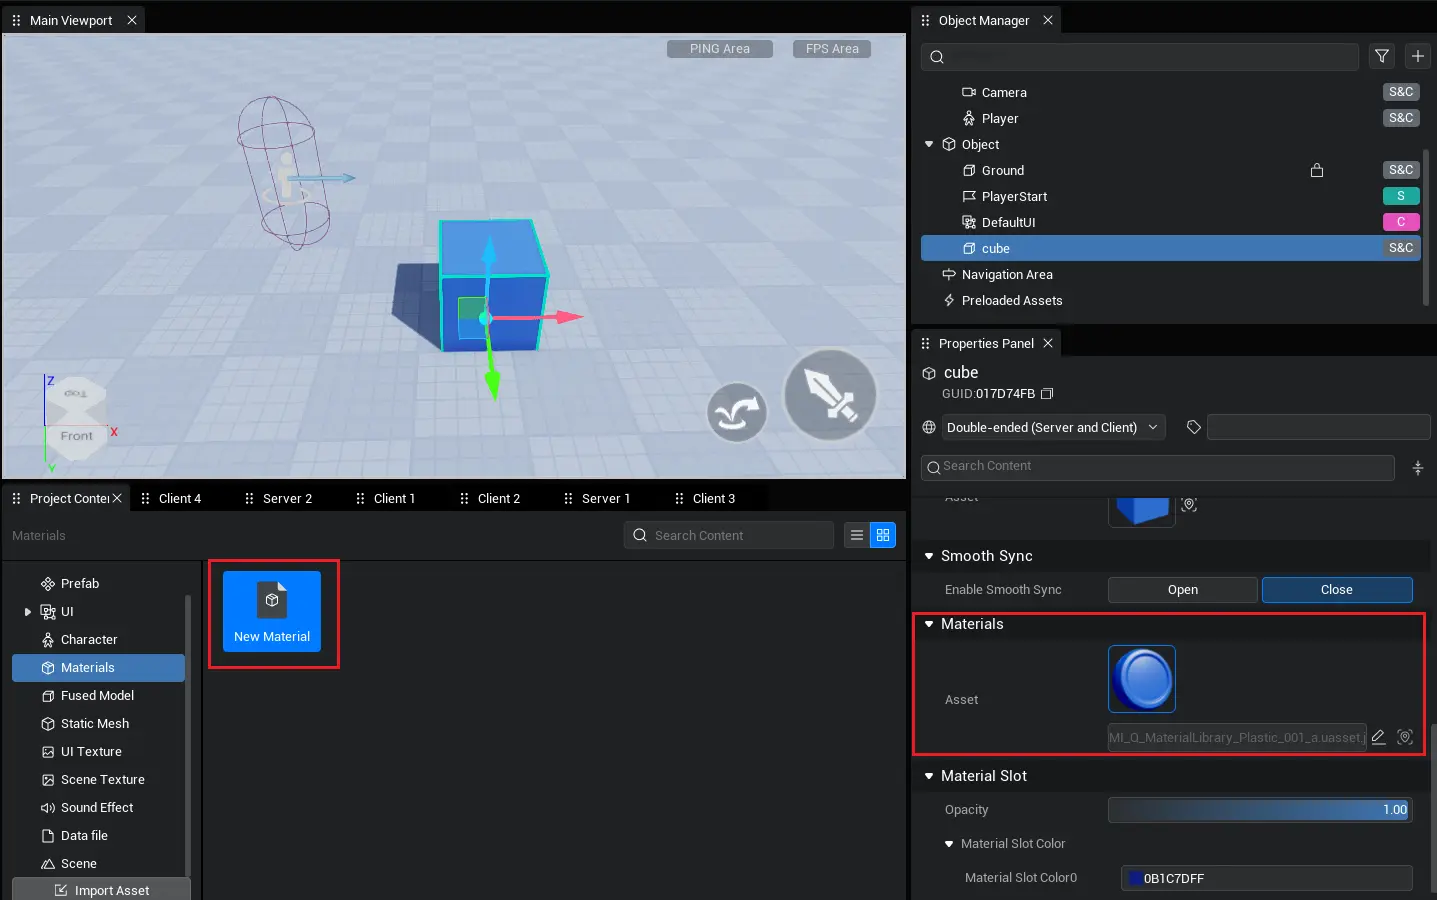
Edit customized materials
- After creating a custom material, there are two entries to open the material editor, different entries affect the preview model in the viewport
1. Select the model that references the material, click the edit button under the material properties bar, will directly use the current model to preview material effects

2. Double-click material in the project content or click the edit button in the top right corner of the icon to preview material effects using the unified model
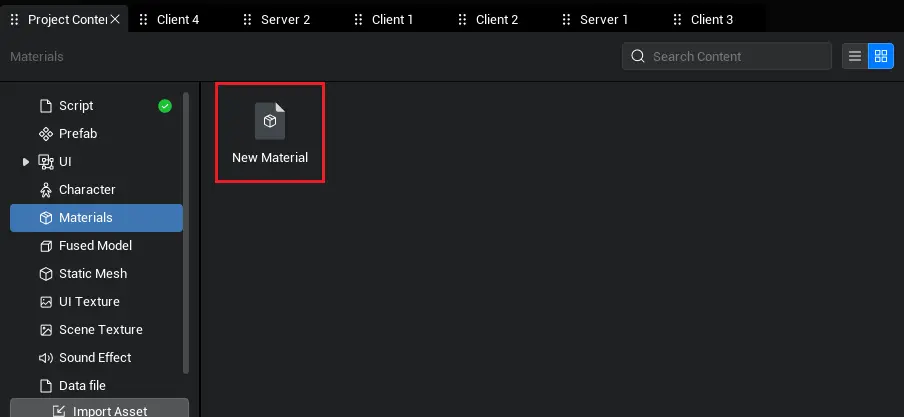
Use my assets
- Currently material editor can only show public assets in asset library, not scene texture in my assets
- To use a personal uploaded but undisclosed asset, you can Separate the material editor viewport and drag the scene texture from the My Assets page under the main editor viewport
Material properties
| Category | Name | Effects | Modification Method |
|---|---|---|---|
| Mode selection | Material mode | Toggle display mode of materials Opaque mode: means that the material has no transparent effect, the most common mode, and the least performance mode Masked mode: Mostly used to represent the skeleton of leaves, wire mesh, etc. The purpose of this mode is to save the number of triangles, so that the information of the skeleton on the surface of the model can be done on the texture. Translucent mode: Mostly used for large areas such as glass, water, etc. Transparency effect in large areas. Transparency effect is more silky and natural, but when two semi-permeable model bounding boxes overlap (or when the model itself is not a convex bag), it is prone to sort out problems | Drop down box selection toggle |
| Mode selection | Physical Mode | Switch physical mode of material Base mode: Physical base mode for color, metallization, roughness, AO (Ambient Occlusion), self-luminescent color and anisotropy based on numerical properties Advanced mode: Physical advanced mode for color, metallization, roughness, AO (Ambient Occlusion), self-luminescent color and anisotropic texture properties based on texture texture properties | Drop down box selection toggle |
| Mode selection | Texture coordinate mode | Use world coordinates Use UV coordinates | Drop down box selection toggle |
| Tone Map | Saturation | Sets the final color saturation. The greater the value, the higher the saturation, the smaller the value, and the lower the saturation. When the value is 0, the color is gray. | Drag slider/direct input |
| Tone Map | Hue | Set the final color hue | Set through Color Picker |
| Translucency | Pinch opacity | Achieves hole-piercing transparency, best when values are 0.25, 0.5, 0.75 | Drag slider/direct input |
| Translucency | Random seed | Screen pixel space random seed to determine different pricked pixel positions | Drag slider/direct input |
| Translucency | Global Opacity | equal to 1 minus translucent | Drag slider/direct input |
| Texture coordinates | Tiling rate by texture/direction | Sets the tiling rate for each coordinate direction of the regional color texture (the larger the value, the denser the tiling) | Drag slider/direct input |
| Texture coordinates | Offset by texture/direction | Set coordinate direction offsets for each region texture | Drag slider/direct input |
| Texture coordinates | Flow velocity by texture/direction | Sets the translation speed of each region texture in each coordinate direction. The larger the value, the faster the X axis translation speed. When set to 0, the speed is 0. | Drag slider/direct input |
| Texture coordinates | World coordinate normal Z-direction scale (check Show world coordinate display) | Normal Z scale affecting position of texture coordinates converted from world position | Drag slider/direct input |
| Base Properties | Color texture | Set main area color texture | Reference scene texture |
| Base Properties | Diffuse color | Set Main Area Diffuse Color | Set through Color Picker |
| Base Properties | Opacity minimum/maximum | Set the main area opacity minimum/maximum | Drag slider/direct input |
| Base Properties | Specular Strength | Set non-metallic base reflectivity, no reflection effect when parameter is set to 0 | Drag slider/direct input |
| Base Properties | MRAE texture | Set the MRAE texture intensity for the main area, R channel in texture map: Metallicity, G channel: Roughness, Channel B: AO (Ambient Occlusion) Channel A: Self-luminescence | Reference scene texture |
| Base Properties | MRAE intensity minimum/maximum | Set the MRAE minimum/maximum value for the main area. R channel: Metallicity, G channel: Roughness, Channel B: AO (Ambient Occlusion), Channel A: Self-luminescent intensity | Set through Color Picker |
| Base Properties | Normal texture | Set main area normal texture | Reference scene texture |
| Base Properties | Base Normal Intensity | Sets the normal mix ratio for the main area | Set through Color Picker |
| Base Properties | Anisotropic texture | Set anisotropic textures: R is the anisotropic tangent x component, G is the anisotropic tangent y component, and B is the anisotropic strength | Reference scene texture |
| Base Properties | Anisotropy | Sets the anisotropy of the main area with no anisotropy effect when parameter is 0 | Drag slider/direct input |
| Base Properties | Anisotropy minimum/maximum value | Sets the minimum/maximum value of anisotropy for the main area | Drag slider/direct input |
| Details Properties | Detail normal texture | Sets the normal texture of the detail area | Reference scene texture |
| Details Properties | Detail normal strength | Sets the normal blending ratio for the detail area | Set through Color Picker |
| Decals | Decal color texture | Set decal area color texture | Reference scene texture |
| Decals | Decal diffuse color | Sets the diffuse color of the decal area | Set through Color Picker |
| Decals | Decal Opacity Minimum/Maximum | Set decal area opacity minimum/maximum | Drag slider/direct input |
| Cartoon rendering | cartoon shadow contrast | Sets the shadow contrast for cartoon coloring. PBR if 0, full cartoon rendering if 1 | Drag slider/direct input |
| Cartoon rendering | Cartoon shadow minimum/maximum | Set minimum/maximum shadow value for cartoon coloring | Drag slider/direct input |
| Cartoon rendering | Cartoon indirect diffuse intensity | Image-based lighting diffuse reflection intensity | Drag slider/direct input |
| Cartoon rendering | Cartoon indirect diffuse transparency | Image-based lighting reflection Alpha | Drag slider/direct input |
| Cartoon rendering | Cartoon indirect highlight transparency | Image-based lighting highlights intensity | Drag slider/direct input |
| Cartoon rendering | Cartoon Highlight Color | Set Bright Area Color | Set through Color Picker |
| Cartoon rendering | Cartoon Shadow Color | Set Dark Area Color | Set through Color Picker |
| Breathing light | Breathing light Global/Emissive Mask Mode | When unchecked (False), the Emissive area is effective for the whole material, and the Emissive channel (A channel) of MRAE map in the base property will be invalid. When checked (True), the Emissive area is based on the Emissive channel of MRAE map in the base property (Note that setting 1 is invalid for low graphics quality) | Check Settings |
| Breathing light | Breathing light frequency | Sets the breath light level change amplitude. 0 means no breath effect. 1 means 16.0 seconds/cycle. 2 means 8.0 seconds/cycle. 3 means 4.0 seconds/cycle. 4 means 2.0 seconds/cycle. 5 means 1.0 seconds/cycle. 6 means 0.5 seconds/cycle. 7 means 0.25 seconds/cycle. | Drag slider/direct input |
| Breathing light | Breathing light color | Set the color of the breathing light | Set through Color Picker |
| Subsurface | Color | Sets the backlight color of the Subsurface | Set through Color Picker |
| Subsurface | Fresnel hardness | Sets the Fresnel (normal viewing angle dot product) hardness of the surface. The greater the value, the weaker the Fresnel effect. | Drag slider/direct input |
| Subsurface | Backlight hardness | Set the backlight (lighting angle dot product) hardness, the greater the value the stronger the Subsurface transition, the weaker the Subsurface effect | Drag slider/direct input |
| Subsurface | Back-face Range | Set the Subsurface back range, the larger the value the larger the range, when set to 0 the dark has no Subsurface effect | Drag slider/direct input |
| Subsurface | Back-face attenuation | Sets the attenuation range of the Subsurface in the backlight, the larger the value the larger the range | Drag slider/direct input |
 Editor Doc