Blocking Volume
INFO
It takes about 10 minutes to read this article
There are often areas in a project that are open to some characters but not to others. You can use [Blocking Volume] to add entry and exit permission management capabilities to a certain area to complete the above usage scenario. Through [Blocking Volume], we can dynamically set access permissions for characters, blocking player characters from entering or limiting the range of player characters' activities.
Blocking Volume object
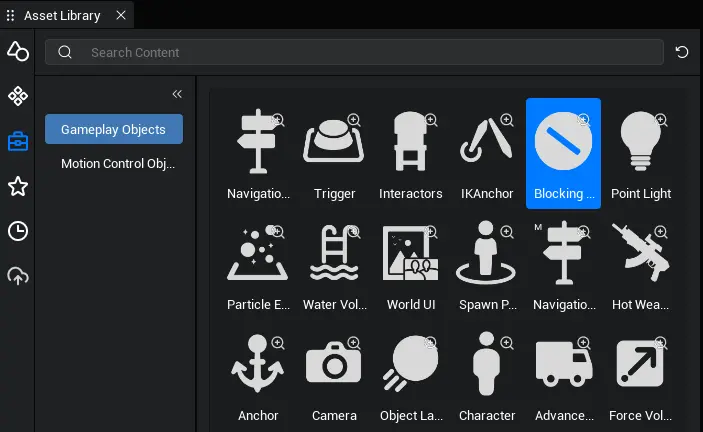
[Blocking Volume] is a functional object used in a project to control the access rights of other objects to an area. You can customize the properties of the [Blocking Volume] to control the location, scale, and rotation of the zone. After detecting that an object is approaching the edge of the area, the [Blocking Volume] will check whether the object has permission to pass and return the corresponding collision result. You can find the [Blocking Volume] in the [Gameplay Object] column in the [Asset Library].
Create a Blocking Volume
Created by placing a asset:
[Blocking Volume] itself can be placed in the game scene as a game object. You can drag the [Blocking Volume] from the [Gameplay Object] column in the [Asset Library] into the [Scene] or [Object Manager] to create the object.
- Find [Blocking Volume] in the [Gameplay Object] column of [Asset Library]

- Drag the object into the scene or [Object Manager
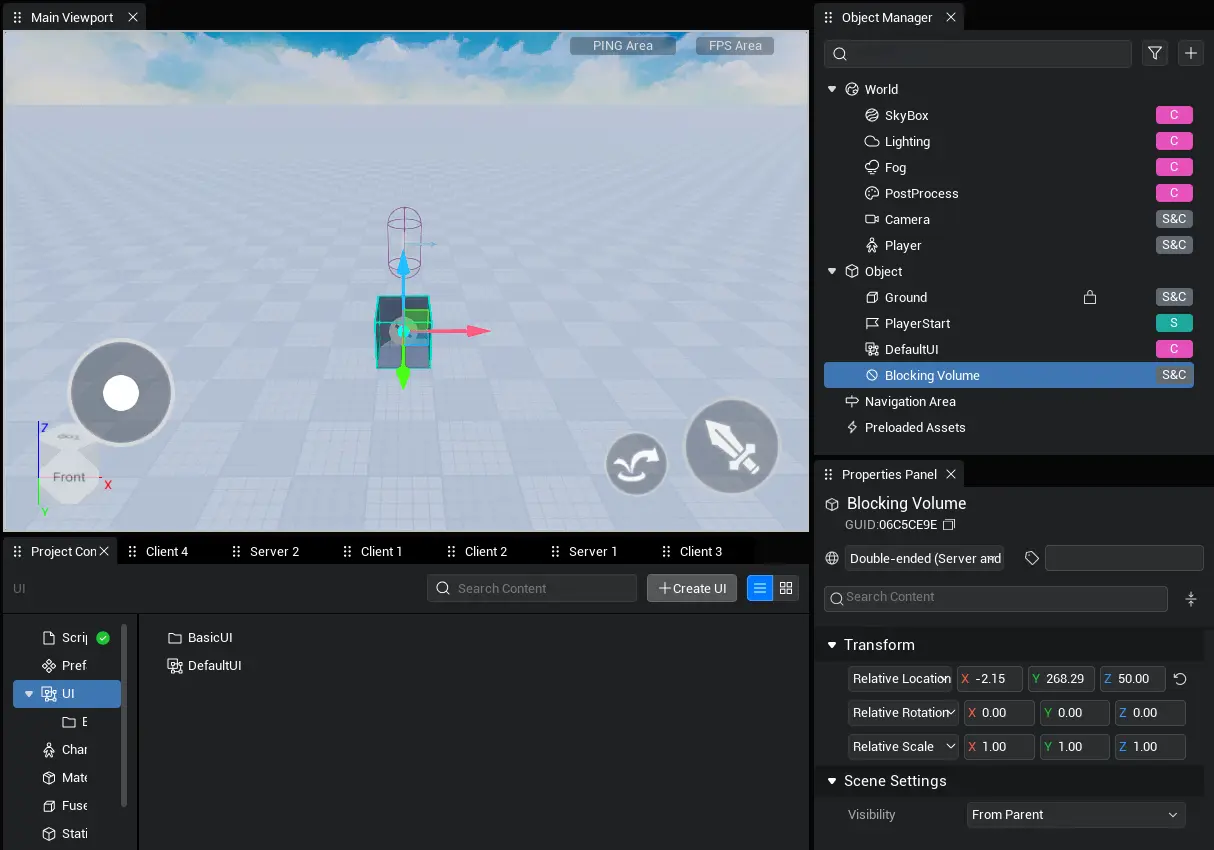
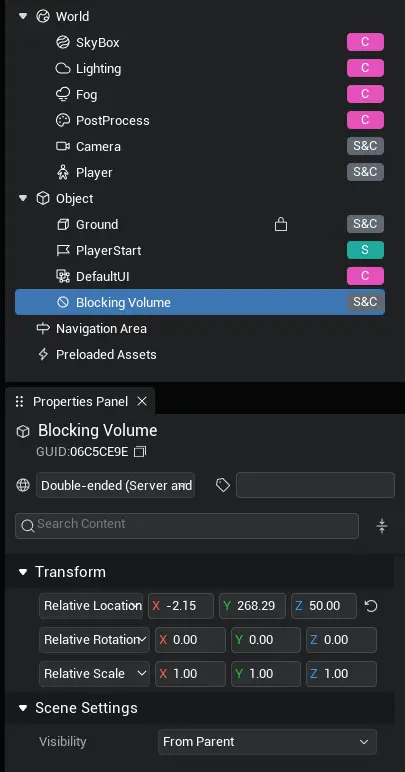
- In the [Object Manager] on the right, find the corresponding [Blocking Volume] object in the [Object] column and customize its properties
Create via script:
You can also use the script to access the [Blocking Volume] asset ID in the [Asset Library] while the game is running: "BlockingVolume" dynamically generates a [Blocking Volume] object for use. Create a new script file in the script directory under [Project Content] and drag the script into the [Object] column in the [Object Manager]. Select the script for editing and replace the onStart method in the script with the following sample code: asynchronously generate a [Blocking Volume] object, enable dual-end synchronization, set the position to (300, 0, 50), the rotation to (0, 0, 0), and the zoom factor to (1, 1, 1). Print the gameObjectId of the generated [Blocking Volume] object.
protected async onStart(): Promise<void> {
    if(SystemUtil.isServer()) {
        let wall = await GameObject.asyncSpawn("BlockingVolume", {replicates: true, transform: new Transform(new Vector(300, 0, 50), Rotation.zero, Vector.one)}) as BlockingVolume;
        console.log("wall gameObjectId: " + wall.gameObjectId);
    }
}
protected async onStart(): Promise<void> {
if(SystemUtil.isServer()) {
let wall = await GameObject.asyncSpawn("BlockingVolume", {replicates: true, transform: new Transform(new Vector(300, 0, 50), Rotation.zero, Vector.one)}) as BlockingVolume;
console.log("wall gameObjectId: " + wall.gameObjectId);
}
}TIP
[Blocking Volume] is a spatial concept that not only prevents external characters from entering, but also prevents internal characters from leaving.
Customizable Blocking Volume
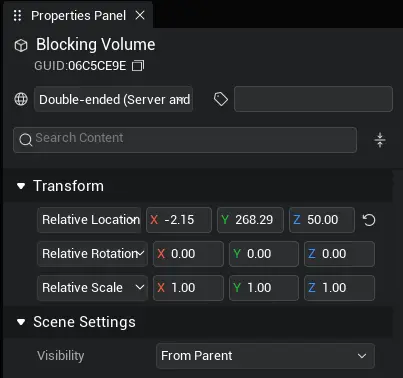
The transform property of the [Blocking Volume] will determine its position, direction, and scale. The function itself can dynamically set access permissions for the character. In the [Object] column of the [Object Manager], find the corresponding [Blocking Volume] object. After selecting it, we can view its property panel. Through the property panel, we can modify some of its properties. It should be noted that launching the [Blocking Volume] requires calling the function it provides. The editor modifies the properties mainly to configure its trajectory parameters in advance, so that it can be used directly in the script.
TIP
The main custom attribute of [Blocking Volume] is transform, and other attributes do not have much significance for its function.
Location of Blocking Volume
The position of the [Blocking Volume] is controlled by the worldTransform.position world position property inherited from the parent class GameObject , which is readable and writable. You can modify the position of the [Blocking Volume] object in the scene in the Properties panel, or you can dynamically read and write the properties of the [Blocking Volume] object in the code to control its position.
if(SystemUtil.isServer()) {
let wall = await GameObject.asyncSpawn("BlockingVolume", {replicates: true, transform: new Transform(new Vector(300, 0, 50), Rotation.zero, Vector.one)}) as BlockingVolume;
wall.worldTransform.position = new Vector(300, 0, 50);
console.log("wall worldTransform.position: " + wall.worldTransform.position);
}if(SystemUtil.isServer()) {
let wall = await GameObject.asyncSpawn("BlockingVolume", {replicates: true, transform: new Transform(new Vector(300, 0, 50), Rotation.zero, Vector.one)}) as BlockingVolume;
wall.worldTransform.position = new Vector(300, 0, 50);
console.log("wall worldTransform.position: " + wall.worldTransform.position);
}Blocking Volume rotation
The rotation of the [Blocking Volume] is controlled by the worldTransform.rotation world rotation property inherited from the parent class GameObject , which is readable and writable. You can modify the rotation of the [Blocking Volume] object in the scene in the Properties panel, or you can dynamically read and write the properties of the [Blocking Volume] object in the code to control its position.
if(SystemUtil.isServer()) {
let wall = await GameObject.asyncSpawn("BlockingVolume", {replicates: true, transform: new Transform(new Vector(300, 0, 50), Rotation.zero, Vector.one)}) as BlockingVolume;
wall.worldTransform.rotation = new Rotation(45, 0, 0);
console.log("wall worldTransform.rotation: " + wall.worldTransform.rotation);
}if(SystemUtil.isServer()) {
let wall = await GameObject.asyncSpawn("BlockingVolume", {replicates: true, transform: new Transform(new Vector(300, 0, 50), Rotation.zero, Vector.one)}) as BlockingVolume;
wall.worldTransform.rotation = new Rotation(45, 0, 0);
console.log("wall worldTransform.rotation: " + wall.worldTransform.rotation);
}Blocking Volume size
The scale of the [Blocking Volume] can be controlled by the worldTransform.scale world scaling property inherited from the parent class GameObject , which is readable and writable. When the shape of the [Blocking Volume] is a box, the XYZ values represent the length, width and height of the box respectively.
// Set the size of the forbidden area through the scale property
if(SystemUtil.isServer()) {
let wall = await GameObject.asyncSpawn("BlockingVolume", {replicates: true, transform: new Transform(new Vector(300, 0, 50), Rotation.zero, Vector.one)}) as BlockingVolume;
wall.worldTransform.scale = new Vector(2, 2, 2);
wall.worldTransform.scale = new Vector(300, 0, 50);
console.log("wall worldTransform.scale: " + wall.worldTransform.scale);
}// Set the size of the forbidden area through the scale property
if(SystemUtil.isServer()) {
let wall = await GameObject.asyncSpawn("BlockingVolume", {replicates: true, transform: new Transform(new Vector(300, 0, 50), Rotation.zero, Vector.one)}) as BlockingVolume;
wall.worldTransform.scale = new Vector(2, 2, 2);
wall.worldTransform.scale = new Vector(300, 0, 50);
console.log("wall worldTransform.scale: " + wall.worldTransform.scale);
}Use of Blocking Volume
Get the Blocking Volume object
[Blocking Volume] object under [Object] column in [Object Manager]:
Use the asyncFindGameObjectById interface to obtain the gameObjectId of the [Blocking Volume] object:
- Select the [Blocking Volume] object, right-click [Copy Object ID] to get its gameObjectId. Here, please pay attention to distinguish the asset ID of the [Blocking Volume] asset and the gameObjectId of the [Blocking Volume] object.
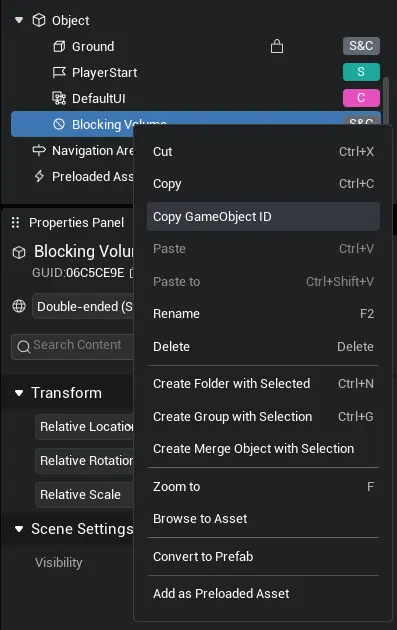
- Drag the script into the Object Manager and replace the
onStartmethod in the script with the following code: The code will asynchronously search for the object corresponding to the ID and receive it as a [Blocking Volume] object.
protected async onStart(): Promise<void> {
if(SystemUtil.isServer()) {
let wall = await GameObject.asyncFindGameObjectById("13CB1A8B") as BlockingVolume;
console.log("wall gameObjectId " + wall.gameObjectId);
}
}protected async onStart(): Promise<void> {
if(SystemUtil.isServer()) {
let wall = await GameObject.asyncFindGameObjectById("13CB1A8B") as BlockingVolume;
console.log("wall gameObjectId " + wall.gameObjectId);
}
}Use script mounting to obtain:
- Select the [Blocking Volume] object and mount the script under the [Blocking Volume] object
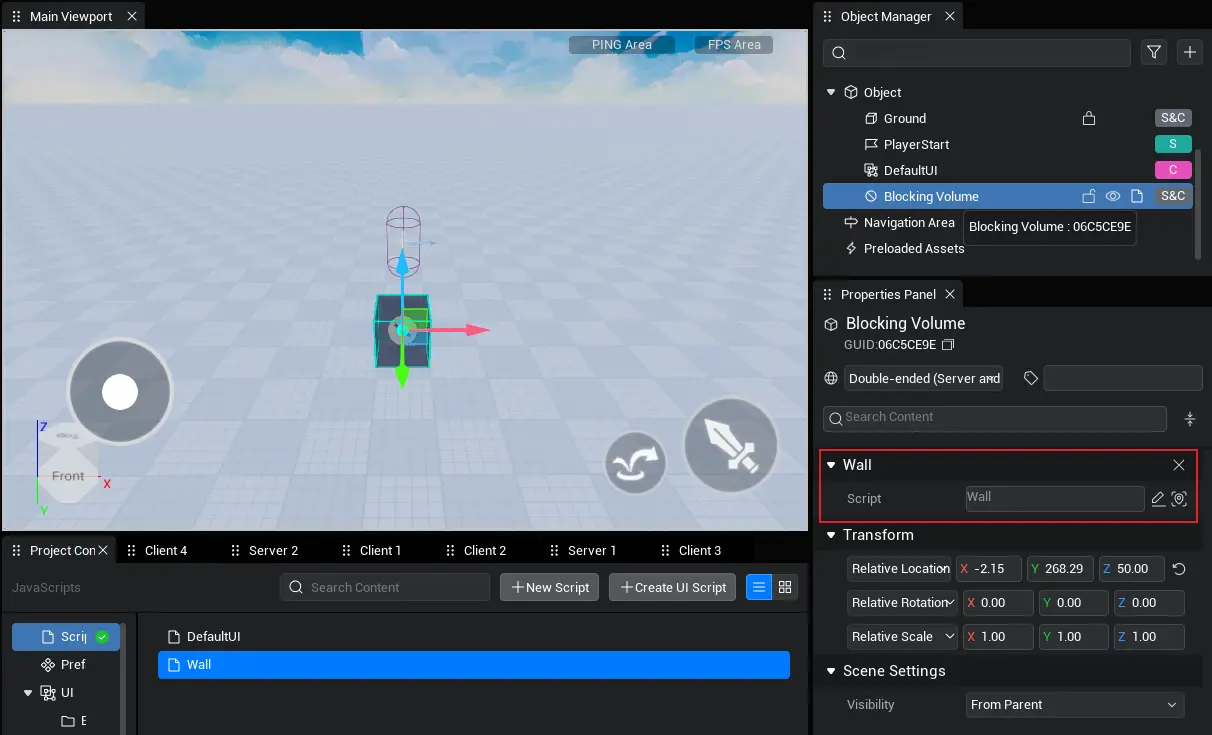
- Add the following code to the onStart method of the script: The code obtains the object mounted by the script and receives it as the [Blocking Volume] object
let wall = this.gameObject as BlockingVolume;let wall = this.gameObject as BlockingVolume;Dynamically generated [Blocking Volume] object:
Replace the onStart method in the script with the following sample code: The sample code asynchronously generates a corresponding [Forbidden Area] object by passing the asset ID "BlockingVolume" of the [Forbidden Area] to the asyncSpawn interface (on the client side).
protected async onStart(): Promise<void> {
    if(SystemUtil.isServer()) {
        let wall = await GameObject.asyncSpawn("BlockingVolume", {replicates: true, transform: new Transform(new Vector(300, 0, 50), Rotation.zero, Vector.one)}) as BlockingVolume;
        console.log("wall gameObjectId: " + wall.gameObjectId);
    }
}protected async onStart(): Promise<void> {
if(SystemUtil.isServer()) {
let wall = await GameObject.asyncSpawn("BlockingVolume", {replicates: true, transform: new Transform(new Vector(300, 0, 50), Rotation.zero, Vector.one)}) as BlockingVolume;
console.log("wall gameObjectId: " + wall.gameObjectId);
}
}Set access permissions for a single object
[Blocking Volume] Use the addPassableTarget and removePassableTarget interfaces to set the access permissions of specific objects. When an object obtains permission to pass through the [Blocking Volume], it can pass freely. Objects that do not obtain permission will be blocked (if the object itself needs to have collision capability). Copy the following sample code into the onStart method in the script: First, obtain the [Blocking Volume] object mounted by the script. After the client obtains the local player character, add two button methods: press the "1" key to add the permission to pass the [Blocking Volume] to the local character; press the "2" key to remove the permission to pass the [Blocking Volume] from the local character;
let wall = this.gameObject as BlockingVolume;

        if(SystemUtil.isClient()) {

            let myself = Player.localPlayer.character;

            InputUtil.onKeyDown(Keys.One, () => {
                wall.addPassableTarget(myself);
            });

            InputUtil.onKeyDown(Keys.Two, () => {
                wall.removePassableTarget(myself);
            });

        }
let wall = this.gameObject as BlockingVolume;
if(SystemUtil.isClient()) {
let myself = Player.localPlayer.character;
InputUtil.onKeyDown(Keys.One, () => {
wall.addPassableTarget(myself);
});
InputUtil.onKeyDown(Keys.Two, () => {
wall.removePassableTarget(myself);
});
}Get whether the object has access permissions
[Blocking Volume] Provides the getTargetPassable interface to obtain whether the current object has access permission. Add the following sample code to the above example: Print the result each time after setting the local character's pass permissions.
let wall = this.gameObject as BlockingVolume;

        if(SystemUtil.isClient()) {

            let myself = Player.localPlayer.character;

            InputUtil.onKeyDown(Keys.One, () => {
                wall.addPassableTarget(myself);
                console.log("passable: " + wall.getTargetPassable(myself));
            });

            InputUtil.onKeyDown(Keys.Two, () => {
                wall.removePassableTarget(myself);
                console.log("passable: " + wall.getTargetPassable(myself));
            });

        }
let wall = this.gameObject as BlockingVolume;
if(SystemUtil.isClient()) {
let myself = Player.localPlayer.character;
InputUtil.onKeyDown(Keys.One, () => {
wall.addPassableTarget(myself);
console.log("passable: " + wall.getTargetPassable(myself));
});
InputUtil.onKeyDown(Keys.Two, () => {
wall.removePassableTarget(myself);
console.log("passable: " + wall.getTargetPassable(myself));
});
}Set access rights for the entire Blocking Volume
[Blocking Volume] Use the clear and unblockAll interfaces to set the access permissions of all objects in a specific scene. After calling the clear interface, the pass permission of all objects will be removed; after calling the unblockAll interface, all objects will be given the pass permission of the Blocking Volume; add the following sample code to the above example: add two button methods: press the "3" key to remove the pass permission of the Blocking Volume for all characters; press the "4" key to add the pass permission of the Blocking Volume for all characters;
let wall = this.gameObject as BlockingVolume;

        if(SystemUtil.isClient()) {

            let myself = Player.localPlayer.character;

            InputUtil.onKeyDown(Keys.One, () => {
                wall.addPassableTarget(myself);
                console.log("passable: " + wall.getTargetPassable(myself));
            });

            InputUtil.onKeyDown(Keys.Two, () => {
                wall.removePassableTarget(myself);
                console.log("passable: " + wall.getTargetPassable(myself));
            });

            InputUtil.onKeyDown(Keys.Three, () => {
                wall.clear();
                console.log("passable: " + wall.getTargetPassable(myself));
            });

            InputUtil.onKeyDown(Keys.Four, () => {
                wall.unblockAll();
                console.log("passable: " + wall.getTargetPassable(myself));
            });

        }
let wall = this.gameObject as BlockingVolume;
if(SystemUtil.isClient()) {
let myself = Player.localPlayer.character;
InputUtil.onKeyDown(Keys.One, () => {
wall.addPassableTarget(myself);
console.log("passable: " + wall.getTargetPassable(myself));
});
InputUtil.onKeyDown(Keys.Two, () => {
wall.removePassableTarget(myself);
console.log("passable: " + wall.getTargetPassable(myself));
});
InputUtil.onKeyDown(Keys.Three, () => {
wall.clear();
console.log("passable: " + wall.getTargetPassable(myself));
});
InputUtil.onKeyDown(Keys.Four, () => {
wall.unblockAll();
console.log("passable: " + wall.getTargetPassable(myself));
});
}TIP
[Blocking Volume] Please place it in the scene as much as possible. Dynamic generation is not recommended. In addition, [Blocking Volume] does not support overlapping use.
 Editor Doc