Basic Editor Operations
Estimated reading time: 6 minutes.
Now that you're familiar with the editor's interface, let’s quickly walk through the basic operations of the GPark Editor (be sure to try them out in the editor to get hands-on practice!).
For more detailed information: Editor Windows Operation
1. Main Viewport Camera Controls
Camera Rotation: Hold down the right mouse button in the Main Viewport and drag the mouse to rotate the camera.
Camera Movement: While holding the right mouse button, use the W, A, S, D keys on your keyboard to move the camera. Combine this with the right mouse button rotation to navigate to your desired position.
Forward/Backward Movement: Use the mouse scroll wheel to move the camera forward or backward (this has the same effect as holding the right mouse button and pressing the W and S keys).
Accelerated Movement: If the camera is moving too slowly, hold the Shift key while performing the above actions to increase the speed.
Orbiting Around an Object: Select an object and press the F key to focus on it. Then hold the Alt key and drag with the left mouse button to rotate the camera around the object.
2. Using Game Objects
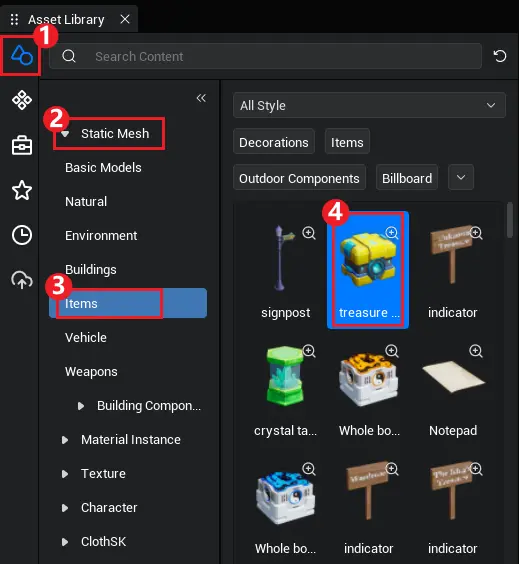
Using game objects is very straightforward. First, find a static object or effect you like in the Local Asset Library. For this demonstration, we'll use ① Art Object → ② Static Model → ③ Props → ④ Treasure Chest.
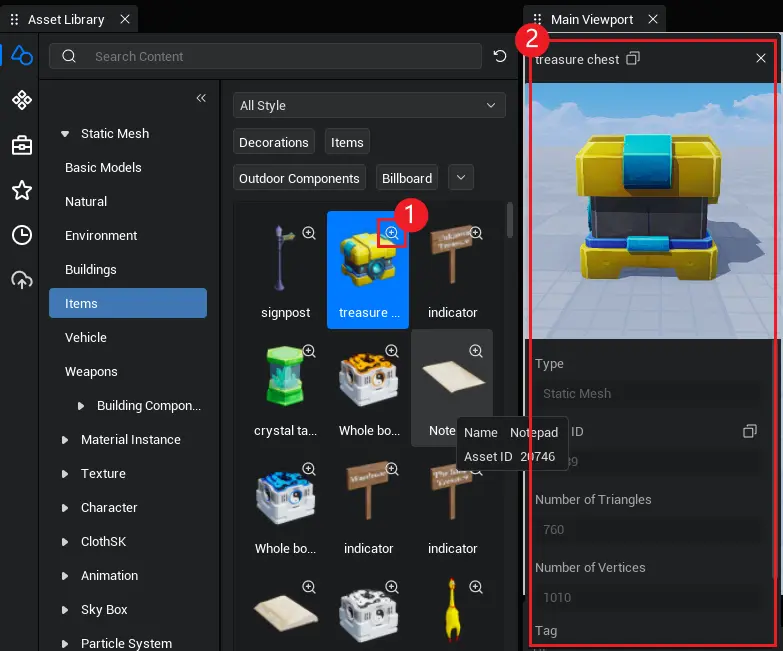
The ① magnifying glass icon in the top-right corner of the resource represents the preview feature. Clicking the magnifying glass will start automatically downloading the resource to your local system. Once the download is complete, the ② preview window will open automatically (as you click on different resources, the details page will update in real-time).
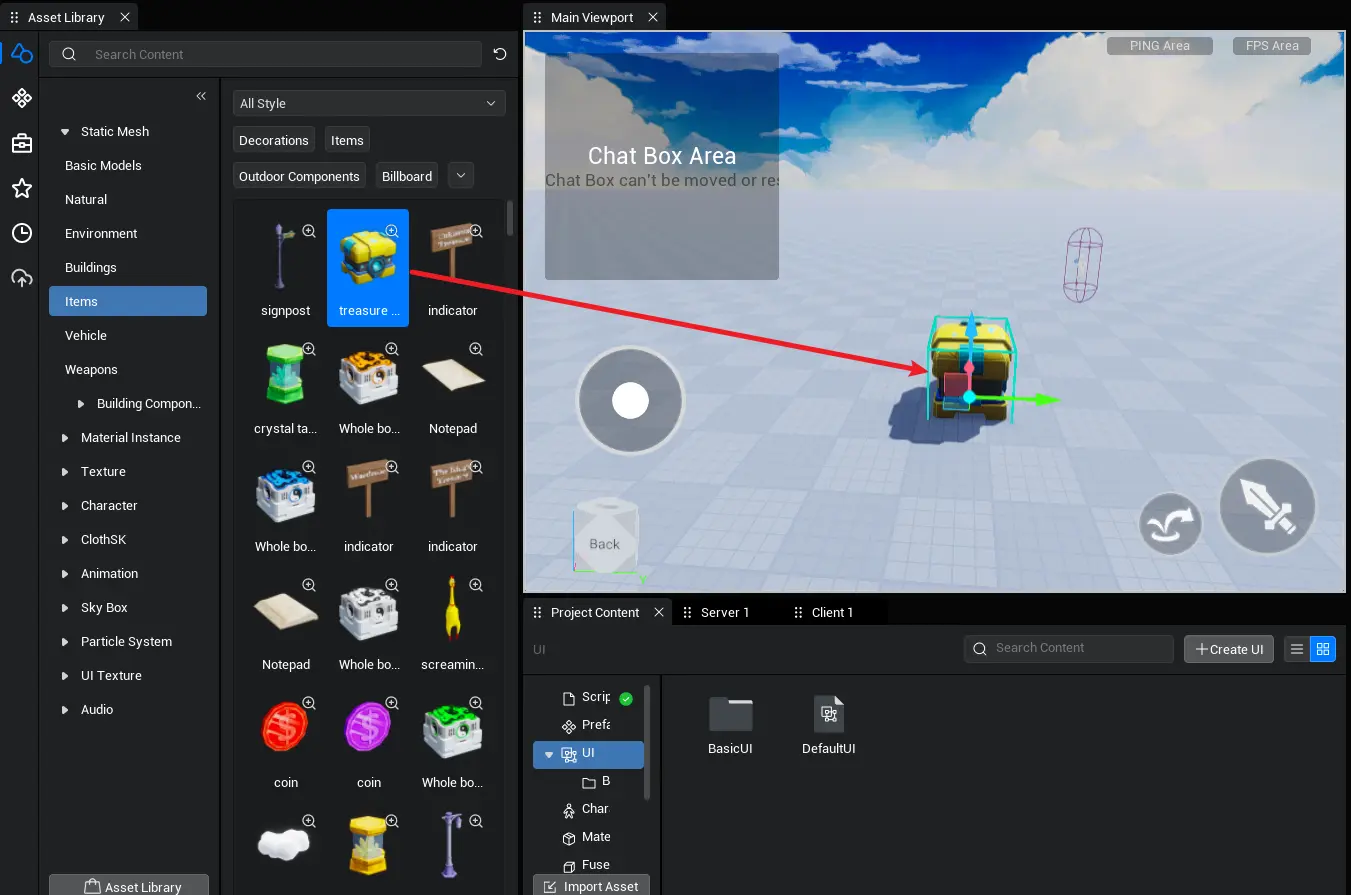
Drag the resource into the Scene Window (Main Viewport), as the diagram shows. In this example, we’ll drag the Treasure Chest into the Scene Window (Main Viewport). If the model hasn't been downloaded yet, the editor will automatically start the download process, and the object will be displayed once the download is complete.
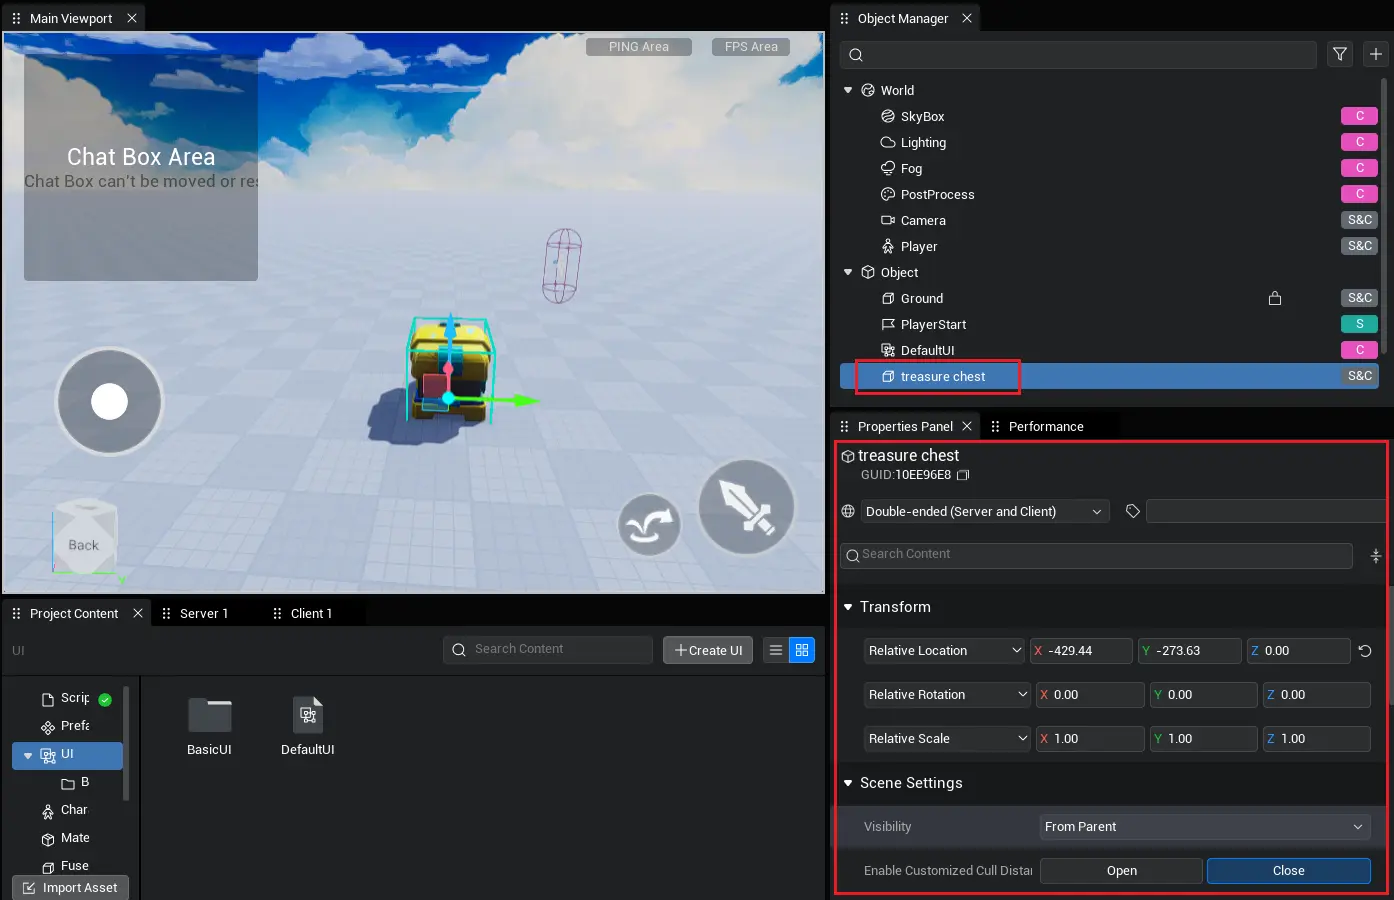
At the same time, the Treasure Chest object will also appear in the Object Manager window. By clicking on the object in the Object Manager, you can view its properties in the Properties Panel. Here, you can modify the properties to achieve your desired effects, as shown in the diagram.
3. Basic Operations for Game Objects
In the Main Viewport, select the game object you’ve created. For this demonstration, we’ll use a treasure chest to show how to move, rotate, and scale a game object.
3.1 Move
Ensure that the game object you want to manipulate is selected. Then, select the move button in the Toolbar or press the W key as a shortcut. As shown in the diagram, the highlighted state indicates that the move function is active.

In the Main Viewport, you’ll see a manipulatable axis appear on the game object. You can move the object within the scene by clicking and dragging the axis, as shown in the diagram.
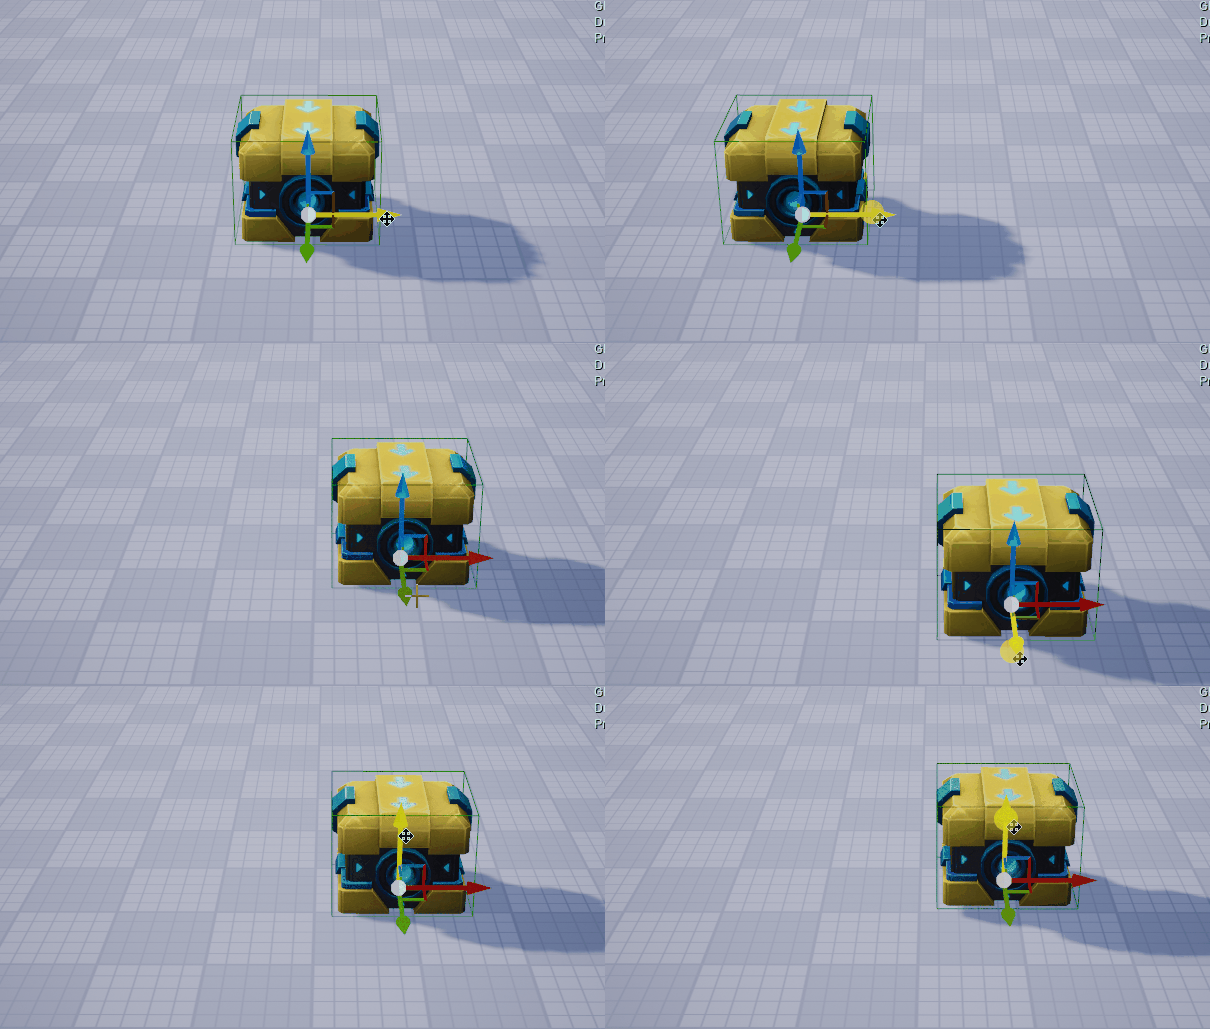
You can move the object simultaneously along both axes by clicking on the rectangular plane between two axes, as shown in the diagram.
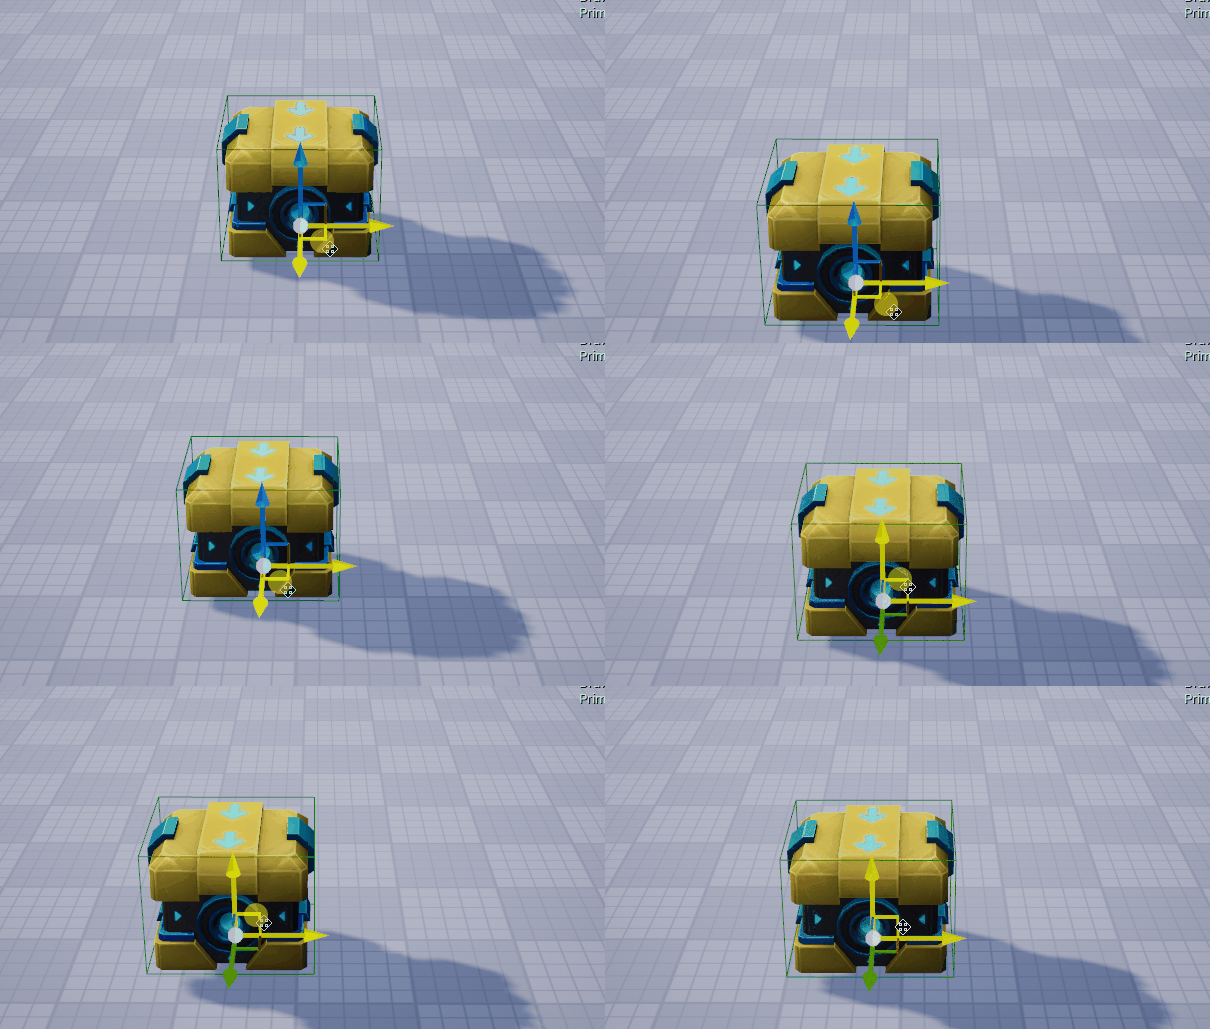
When the move function is active, you can enable grid-snapping and set the grid distance for each move. In this example, we enable the grid snapping feature and set the distance to 100, as shown in the diagram.

Next, repeat the move operation while comparing it to the previous diagram, as shown in the new illustration.
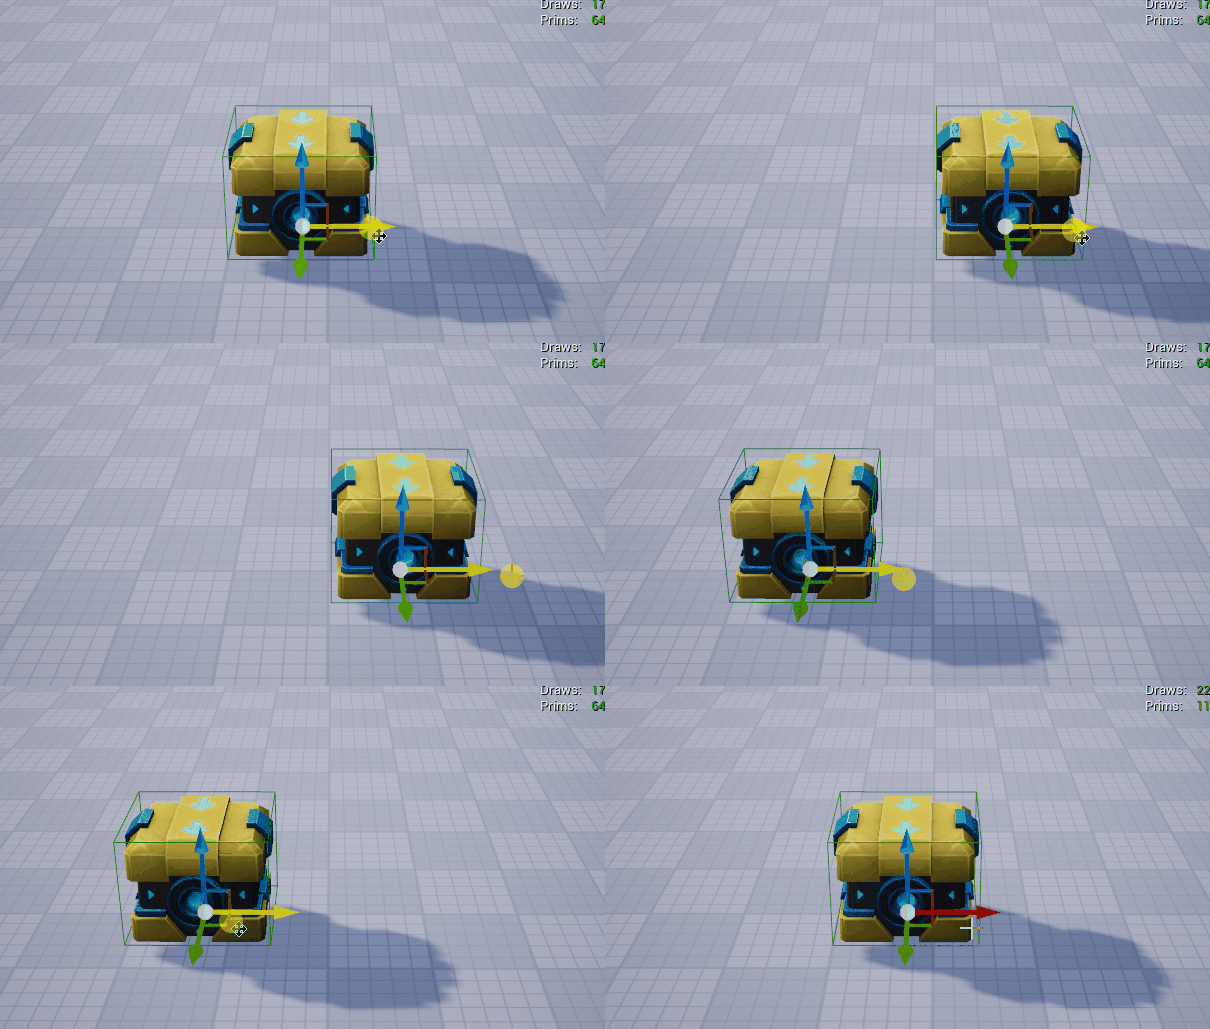
3.2 Rotate
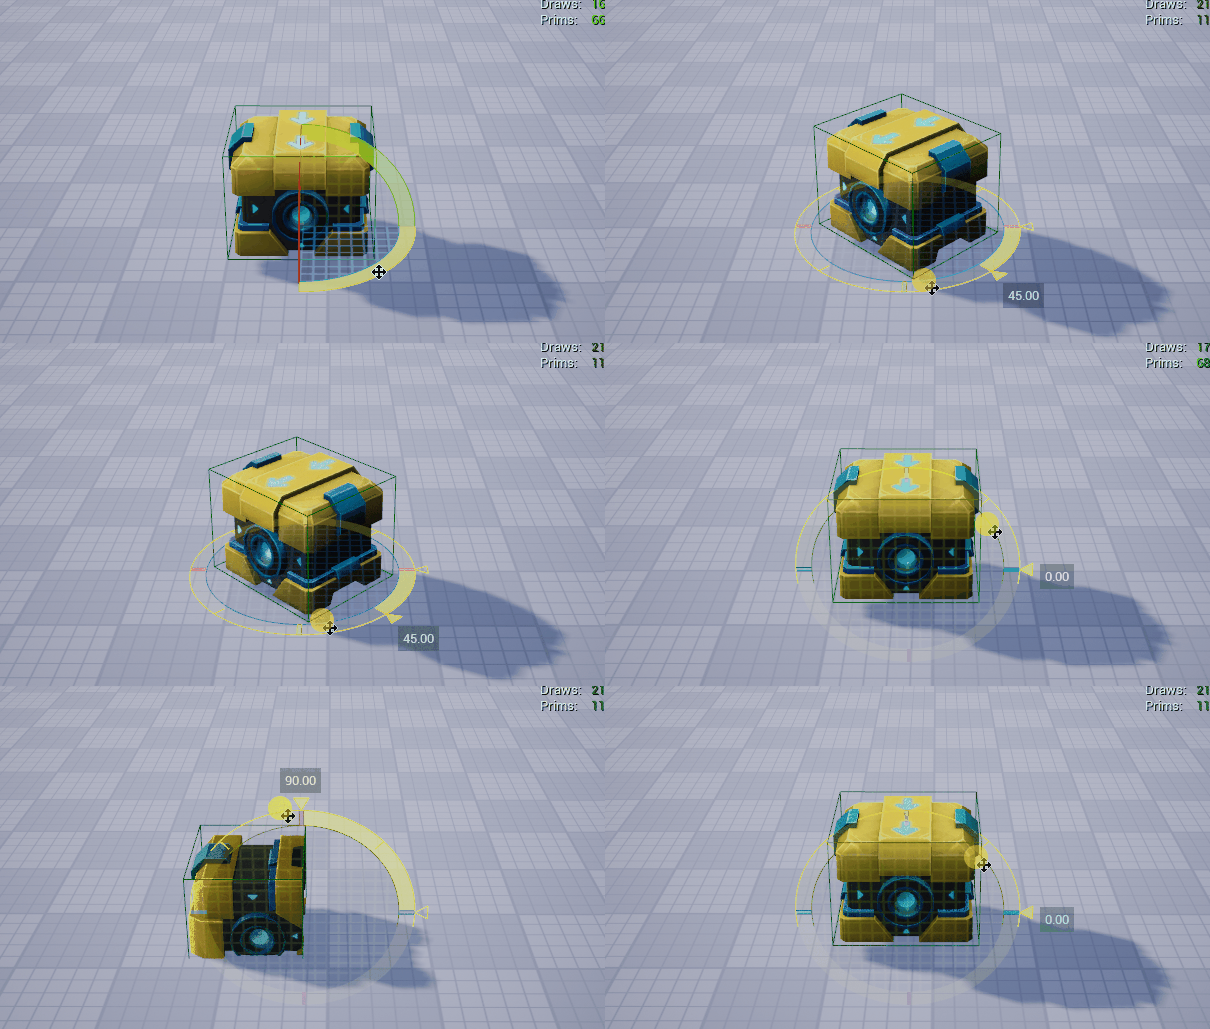
Ensure that the game object you want to manipulate is selected. Then, in the Toolbar, select the rotate button or press the E key as a shortcut. As shown in the diagram, the highlighted state indicates that the rotation function is currently active.

In the Main Viewport, you’ll see a manipulatable axis appear on the game object. You can rotate the object within the scene by clicking and dragging the axis, as shown in the diagram.
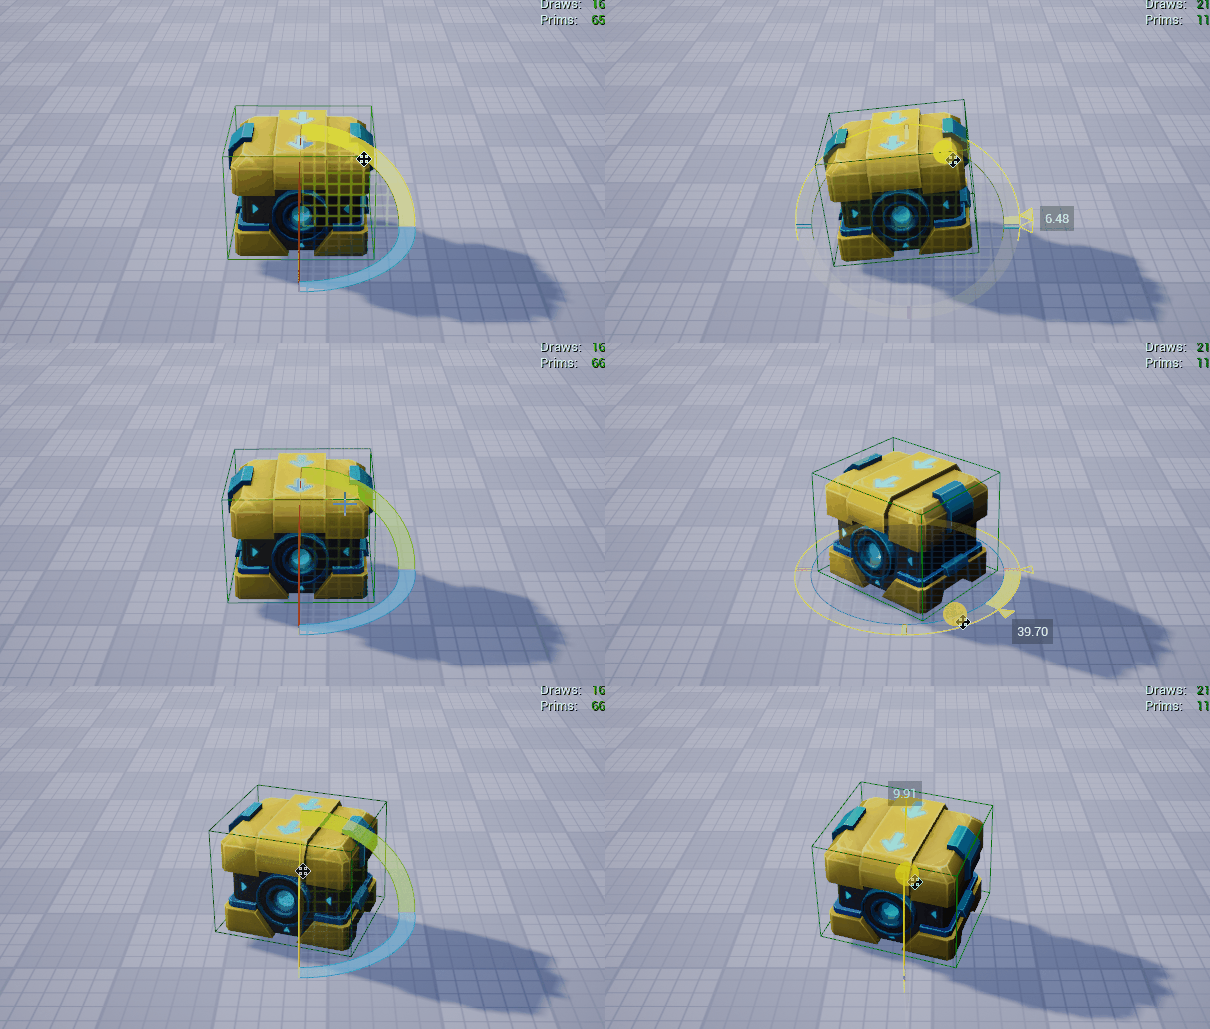
When the rotation function is active, you can enable the rotation angle snapping feature and set the degree value for each rotation. In this example, we enable the feature and set the angle to 45 degrees, as shown in the diagram.

Next, repeat the rotation operation and compare it to the previous diagram to see the difference.
3.3 Scale
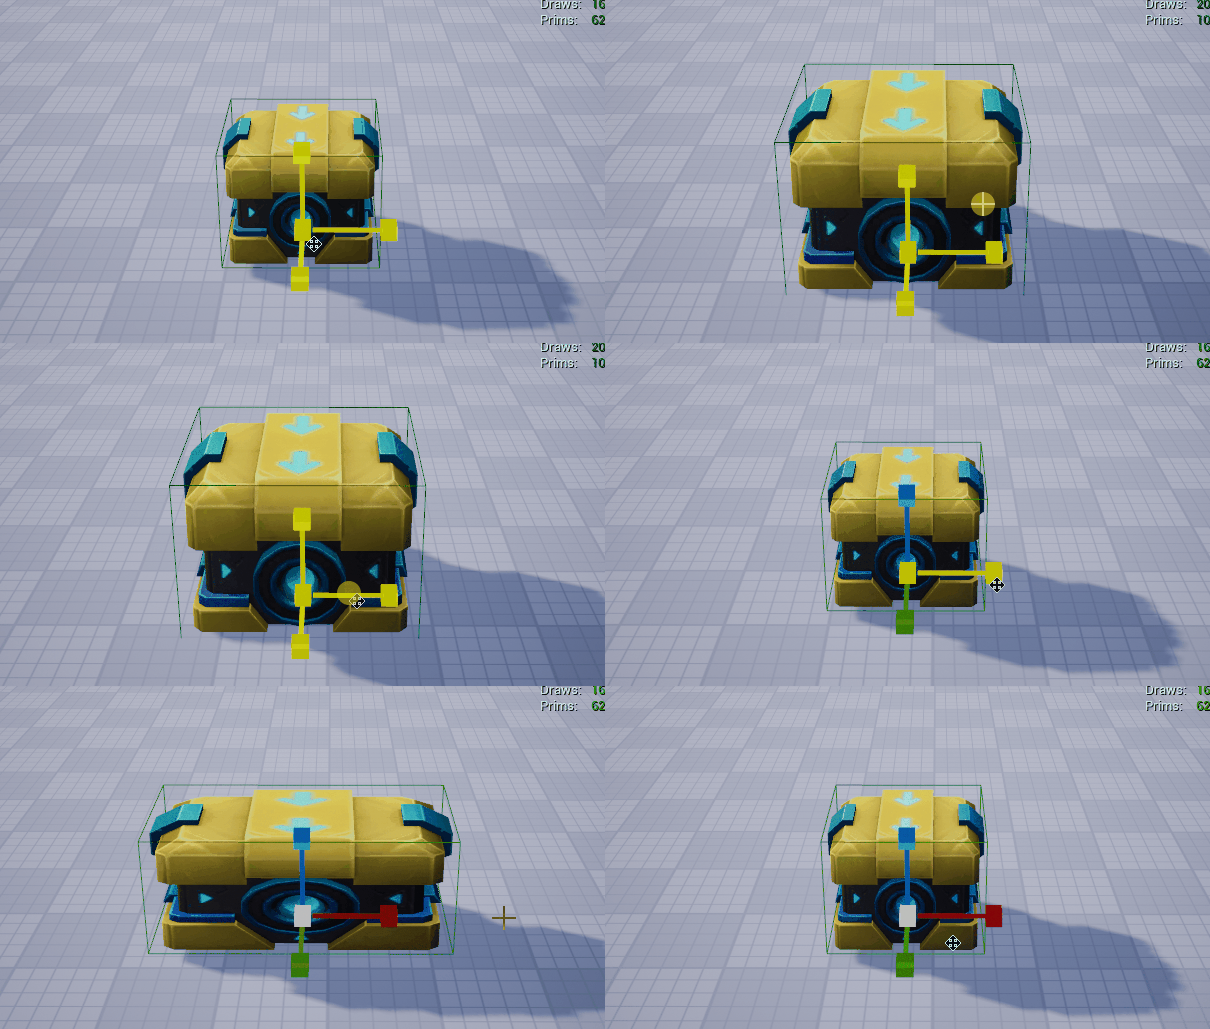
To begin scaling an object, ensure it’s selected. In the Toolbar, either click the scale button or press the shortcut key R. The button will be highlighted, indicating that the scaling function is now active, as shown in the diagram.

At this point, in the Main Viewport, you’ll notice scaling handles appear on the object. By clicking and dragging these handles, you can adjust the size of the object directly within the scene, as demonstrated in the diagram.
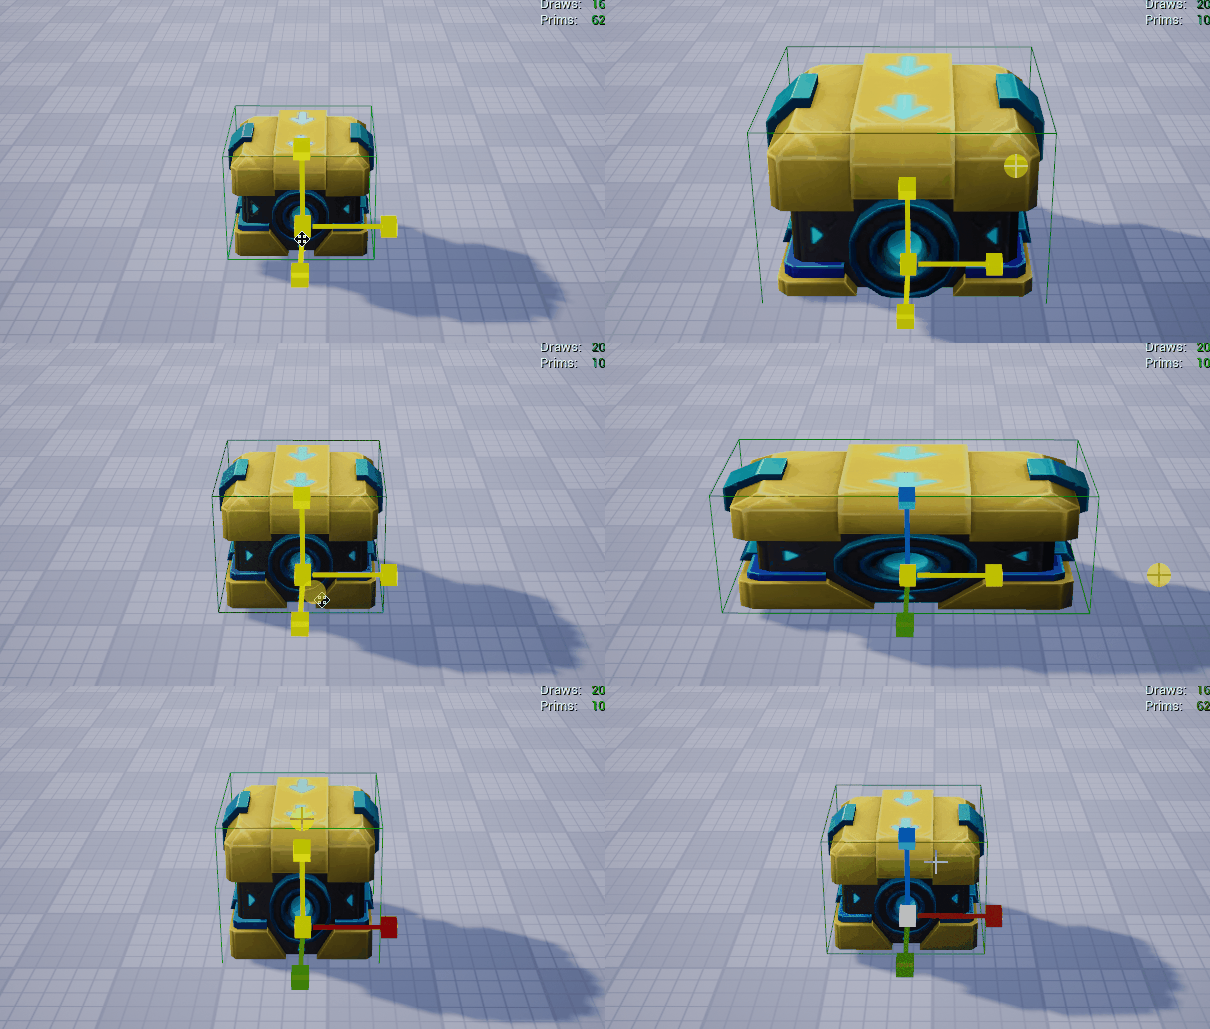
If precise control is needed, you can enable the scaling ratio setting and specify a scaling increment. For example, we set the ratio to 0.5 in this demonstration, as shown in the diagram.

Now, perform the scaling operation again and compare the results to the previous step, as illustrated.
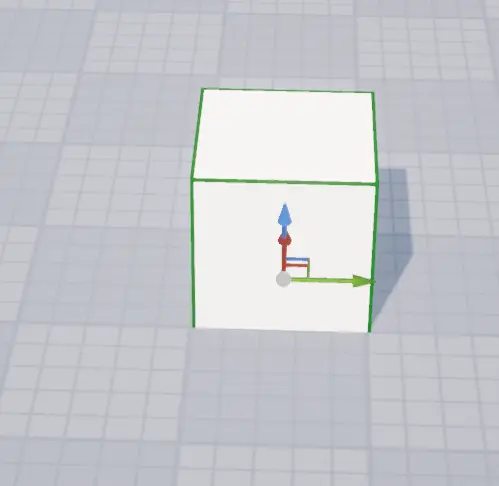
Since the default scale for most models is set to (1, 1, 1),

determining an object’s dimensions can be done by placing a Static Model → Basic Model → Cube (which has a default size of 100 x 100 x 100) alongside the object for comparison.
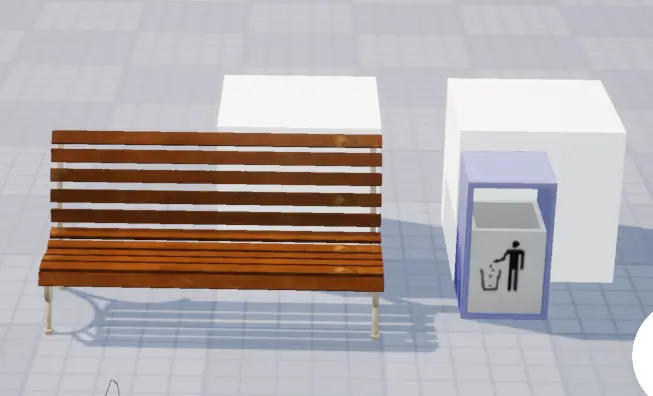
Alternatively, you can use the default scene ground as a reference, where the alternating color squares each measure 100 x 100 units.
4. Basic Shortcuts for the Main Viewport
| Operation | Shortcut |
|---|---|
| W | Switch to Move Mode |
| E | Switch to Rotate Mode |
| R | Switch to Scale Mode |
| Ctrl+S | Save Project |
| Ctrl + C | Copy Selected Object |
| Ctrl + X | Cut Selected Object |
| Ctrl + V | Paste Copied or Cut Object |
| Ctrl + W | Move Selected Object to Camera Position |
| Ctrl + E | Rotate Selected Object to Camera Direction |
| Delete | Delete Selected Object |
| Alt + Drag Axis Handle | Copy Object (Works in Move/Rotate Mode; Release Alt and press again to copy) |
| Alt + Left Mouse Drag | Rotate Camera View |
| Alt + Right Mouse Drag | Quickly Zoom Camera |
| Right Mouse + W, A, S, D | Move Camera Forward, Back, Left, Right |
| Right Mouse + Q, E | Move Camera Vertically |
| Right Mouse + Shift + W, A, S, D, Q, E | Accelerate Camera Movement |
| Middle Mouse + Drag | Move Camera Horizontally and Vertically |
| Select Object + F | Focus Camera on Selected Object |
| Select Object + End | Snap Selected Object Down to the Nearest Surface |
| ESC in Game Window | Exit Run Mode and Close Run Window |
| Right Mouse + C/Z | Increase/Decrease FOV (Zoom In/Out); FOV resets after releasing C/Z |
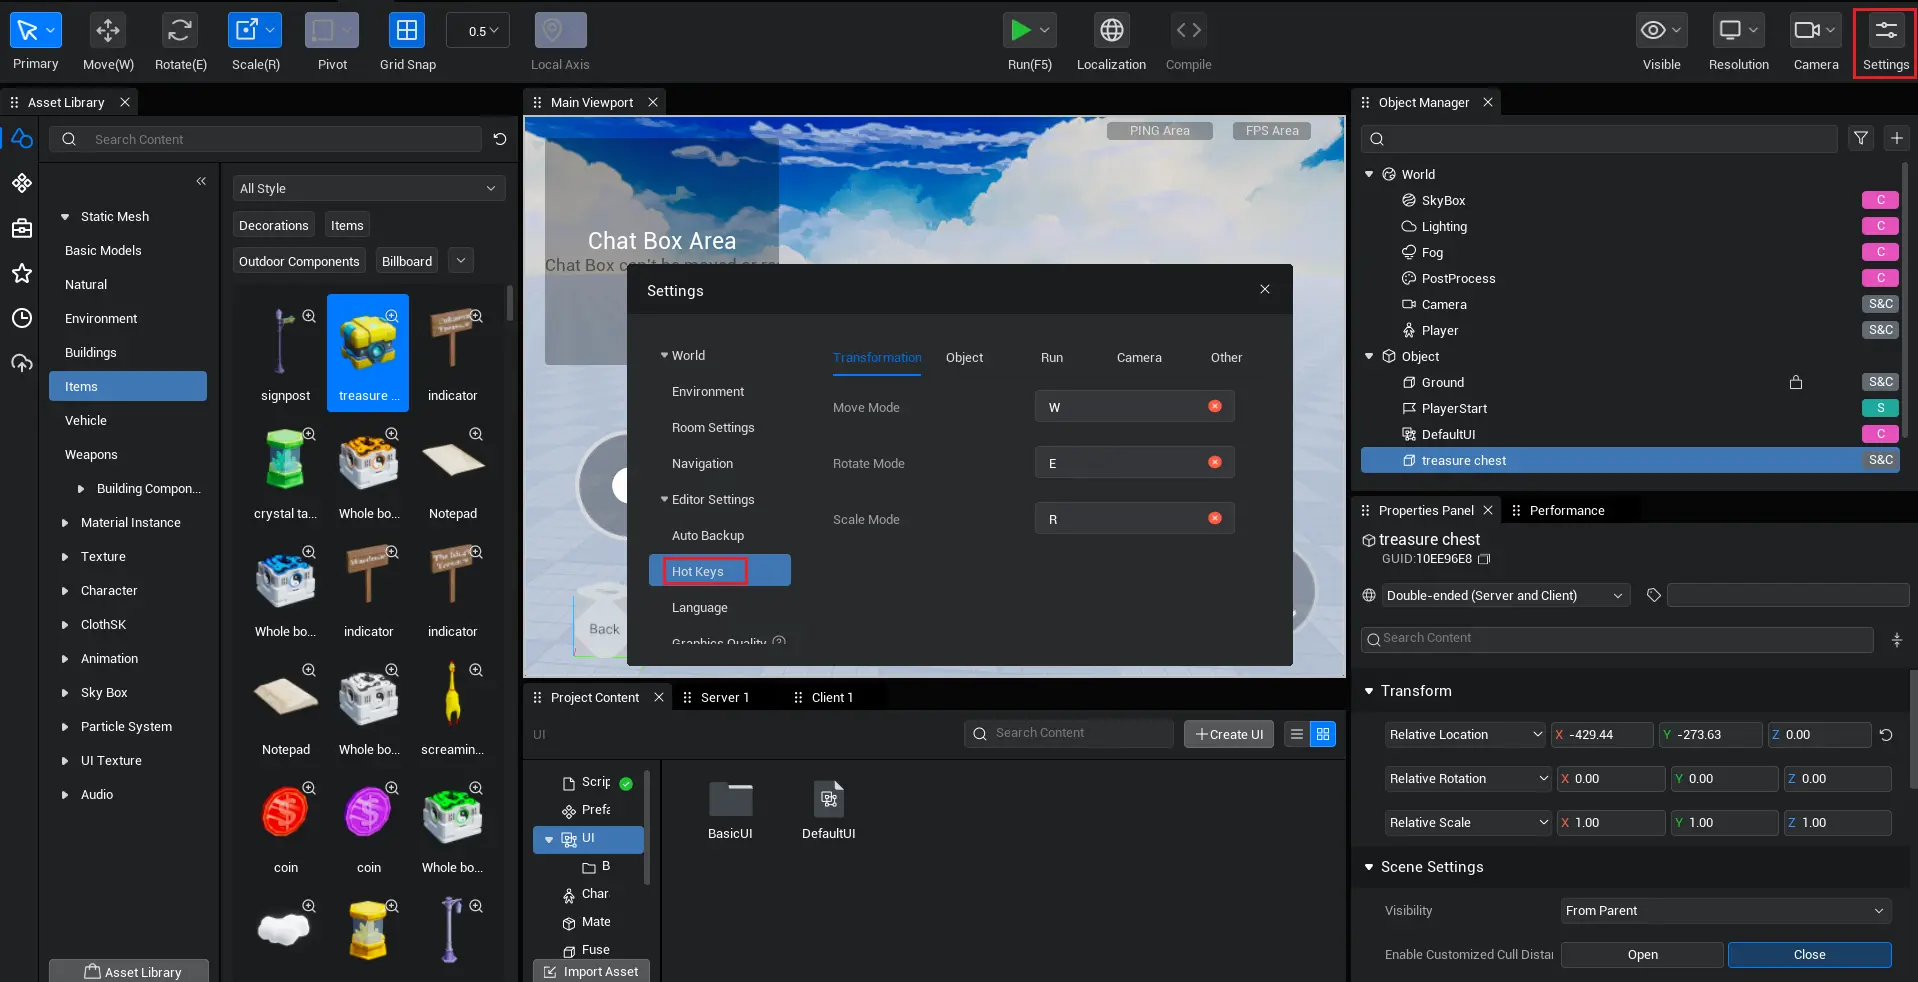
For more shortcuts, open the Settings menu in the top-right corner of the editor and select Keybinds.
For more information, please refer to: Editor Windows Operation
 Editor Doc