Editor Interface
TIP
It takes about 8 minutes to read this article.
Before using the editor, let's first get familiar with the different interfaces and their basic functions.
For more detailed information: Editor Windows Operation
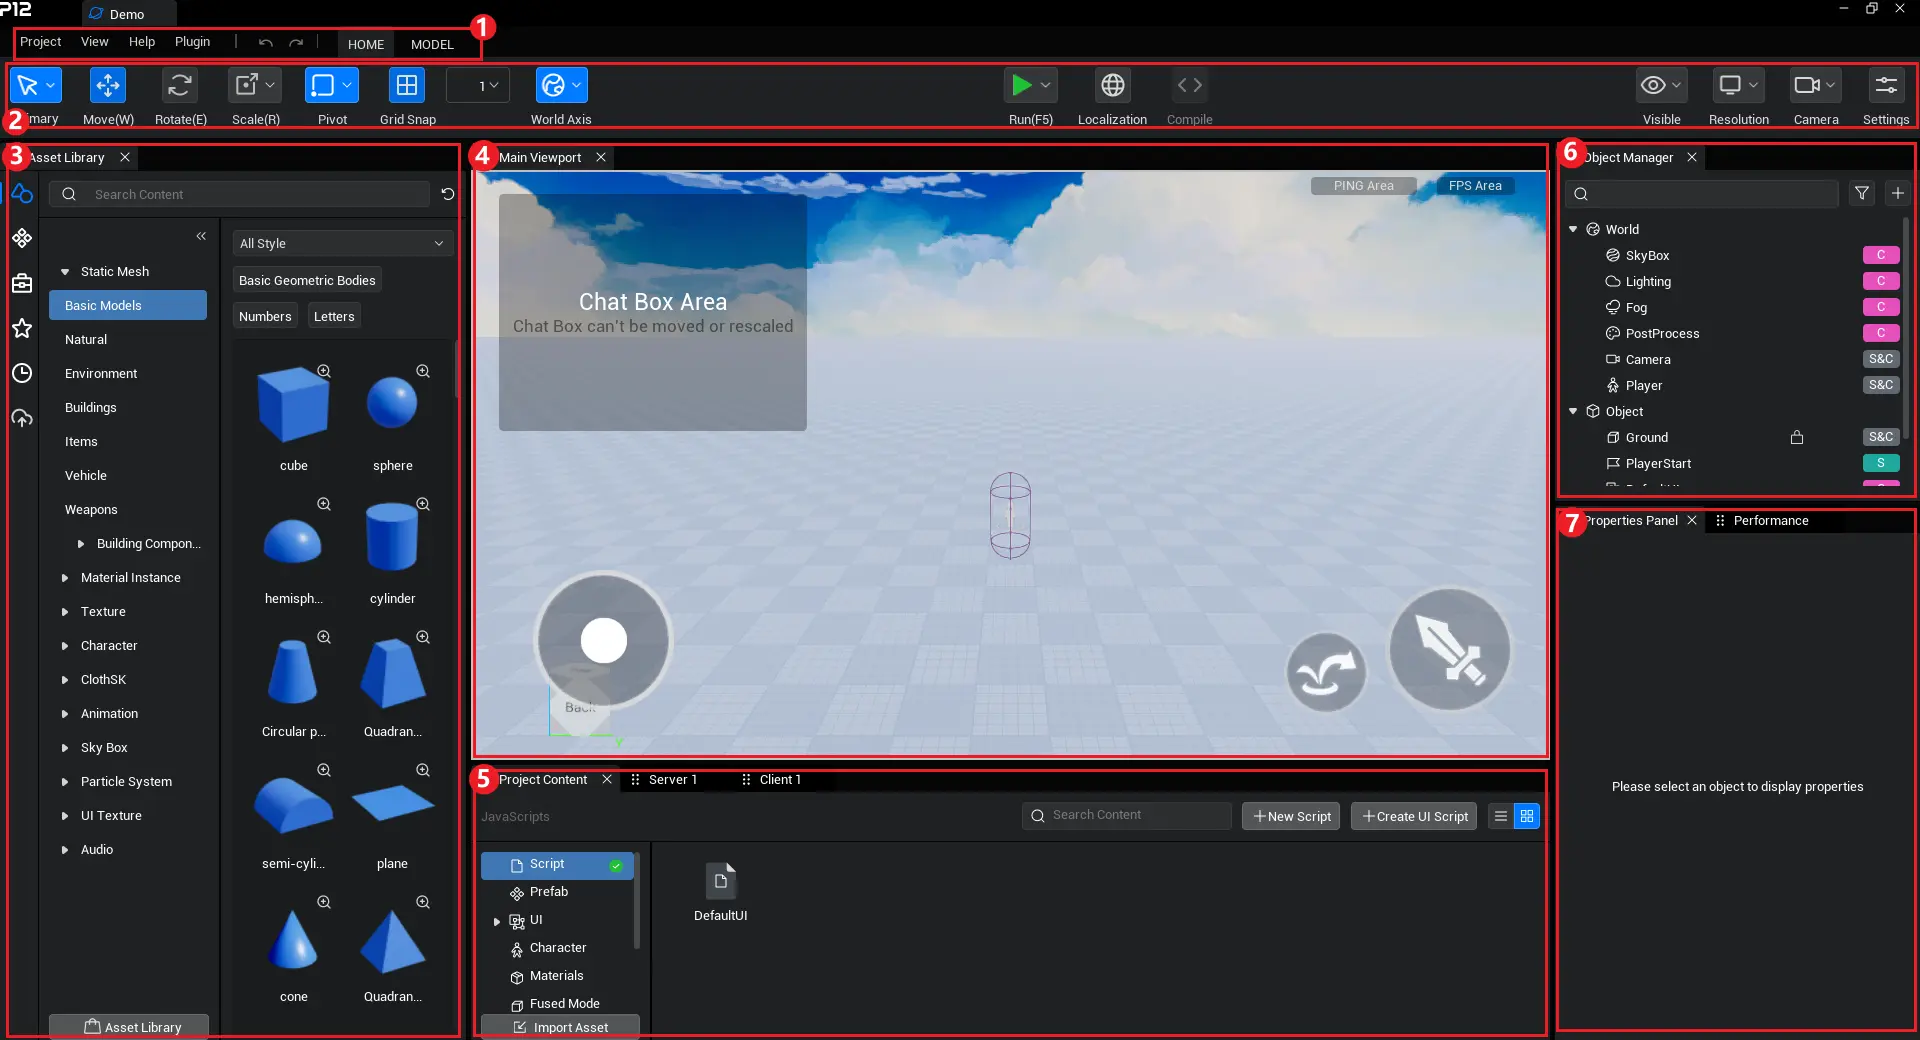
- The main interface of the editor is divided into 7 areas: the Menu Bar, Toolbar, Local Asset Library, Main Viewport, Project Content, Object Manager, and Properties Panel.
- Below is a brief introduction to the functions of each area.
1. Menu Bar
The Menu Bar contains three main items: Project, View, and Help, as shown in the diagram.

TIP
In the Help section, you can access our forum. If you encounter any issues while using the editor, feel free to provide feedback through the forum!
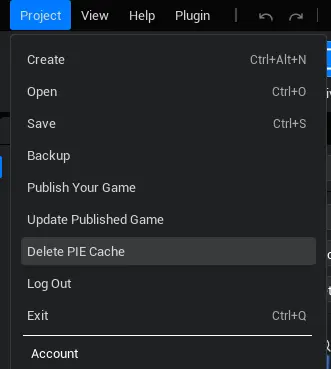
In the Project menu, you’ll find commonly used project-related features such as New, Open, Save, Backup, Publish Game, Update Published Game, Delete PIE Cache, Log Out, and Exit. The detailed menu options are shown in the diagram:
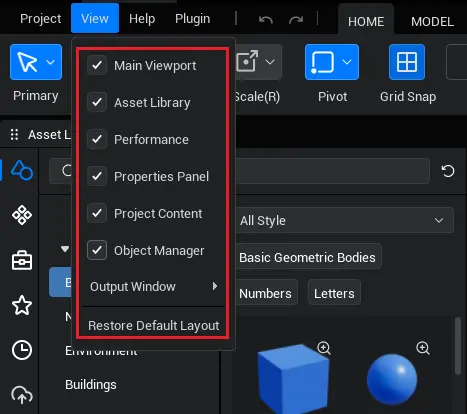
In the View menu, you’ll find all the available windows of the editor. By clicking the checkbox next to each window, you can toggle whether that window is displayed in the editor. The options include: Main Viewport, Local Asset Library, Project Content, Object Manager, Properties Panel, and more. The detailed menu options are shown in the diagram:
WARNING
If you accidentally close a window, such as the Main Viewport, you can restore it by selecting the corresponding checkbox in the View menu.
You can also simply select Reset to Default Layout at the bottom of the menu to reset all windows to their default positions.
2. Toolbar
The Toolbar contains a variety of commonly used functions during development, including modes like General, Move, Rotate, Scale, Grid, Collision, World Axes, Alignment Tools, Run, Manual Compile, Game Localization, Settings, and more, as shown in the diagram.

Next, we'll introduce the functionality of each button, starting with the ones on the left, which include Move, Rotate, Scale, and Grid. We'll dive into the detailed operations of these in the next section. In this chapter, let's first cover the other functions:
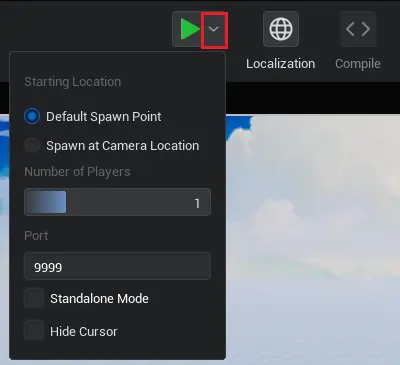
- Run: Runs the current game you are developing.

- By clicking the small arrow next to the Run button, you can configure additional options such as the number of clients to launch or setting up single-player mode. For more information, please refer to: Editor Windows Interface.
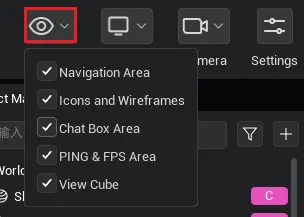
- Display: Toggle the visibility of various content in the viewport, such as navigation areas, icons and wireframes, chat box areas, PING areas, and FPS areas. These settings only affect how the editor displays the content and do not impact the final published game.
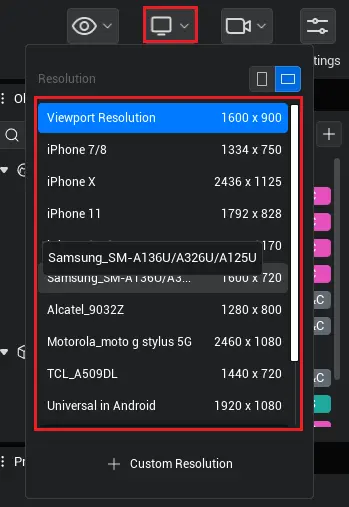
- Resolution: Set the orientation (landscape or portrait) and resolution of the current editing window. For more details, see: Screen Orientation && Resolution.
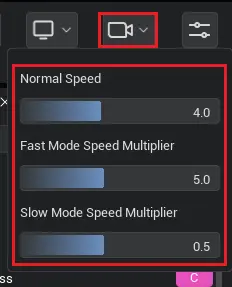
- Camera: Configure the movement speed of the camera lens. For more details, see: Camera.
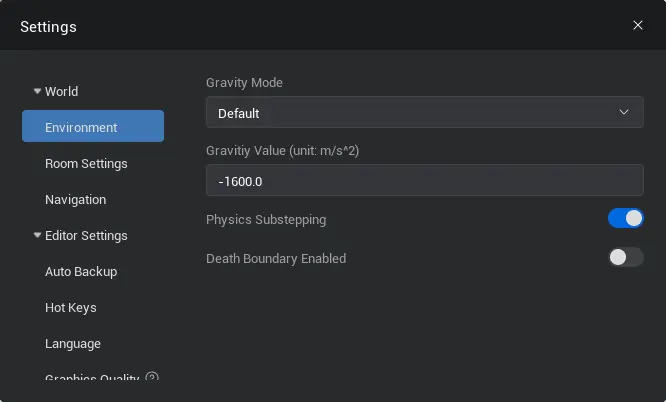
- Settings: Includes various configuration options such as World Settings, Environment Settings, Room Settings, Player Settings, Editor Settings, Auto Backup, Shortcut Settings, Language Settings, and Graphics Quality Simulation.

3. Local Asset Library
The Local Asset Library contains a variety of assets provided by the editor, including art resources, prefabs, game function objects, as well as features for favorites, history, and uploading resources.
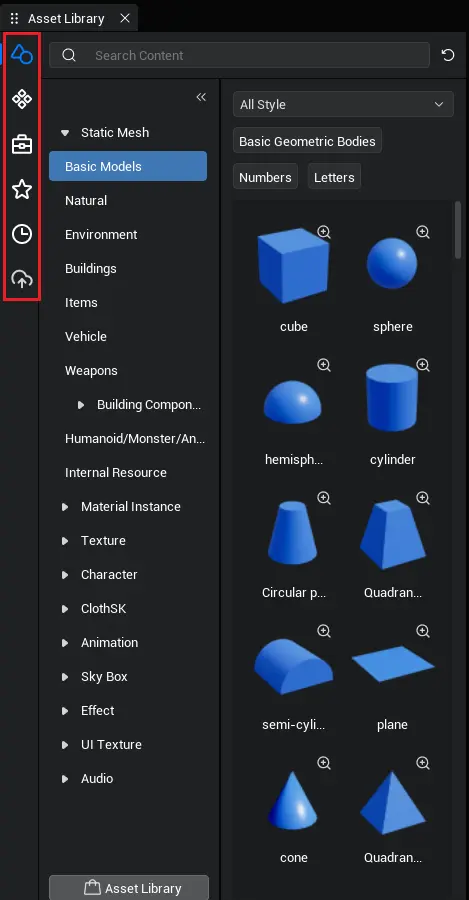
The menu on the far left of the Asset Library provides access to different sections in order: Art Resources, Prefabs, Game Function Objects, My Favorites, History, and My Resources.
Art Resources: Contains various types of game assets, including models, textures, materials, animations, effects, sound effects, and more.
Prefabs: Displays all the prefab resources available in the online resource library.
- What is a prefab: Prefabs can be understood as pre-assembled objects, scenes, or even functional modules with script logic. For a detailed introduction: Prefabs
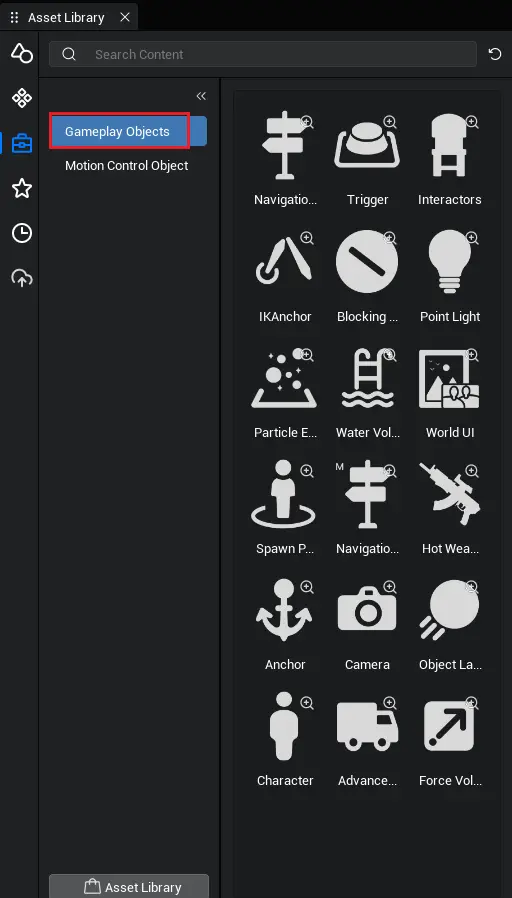
Game Function Objects: This section is divided into two parts—Game Function Objects and Motion Function Objects. These are pre-packaged functional objects that can easily implement complex logic, such as swimming areas, vehicles, navigation areas, and motion devices.
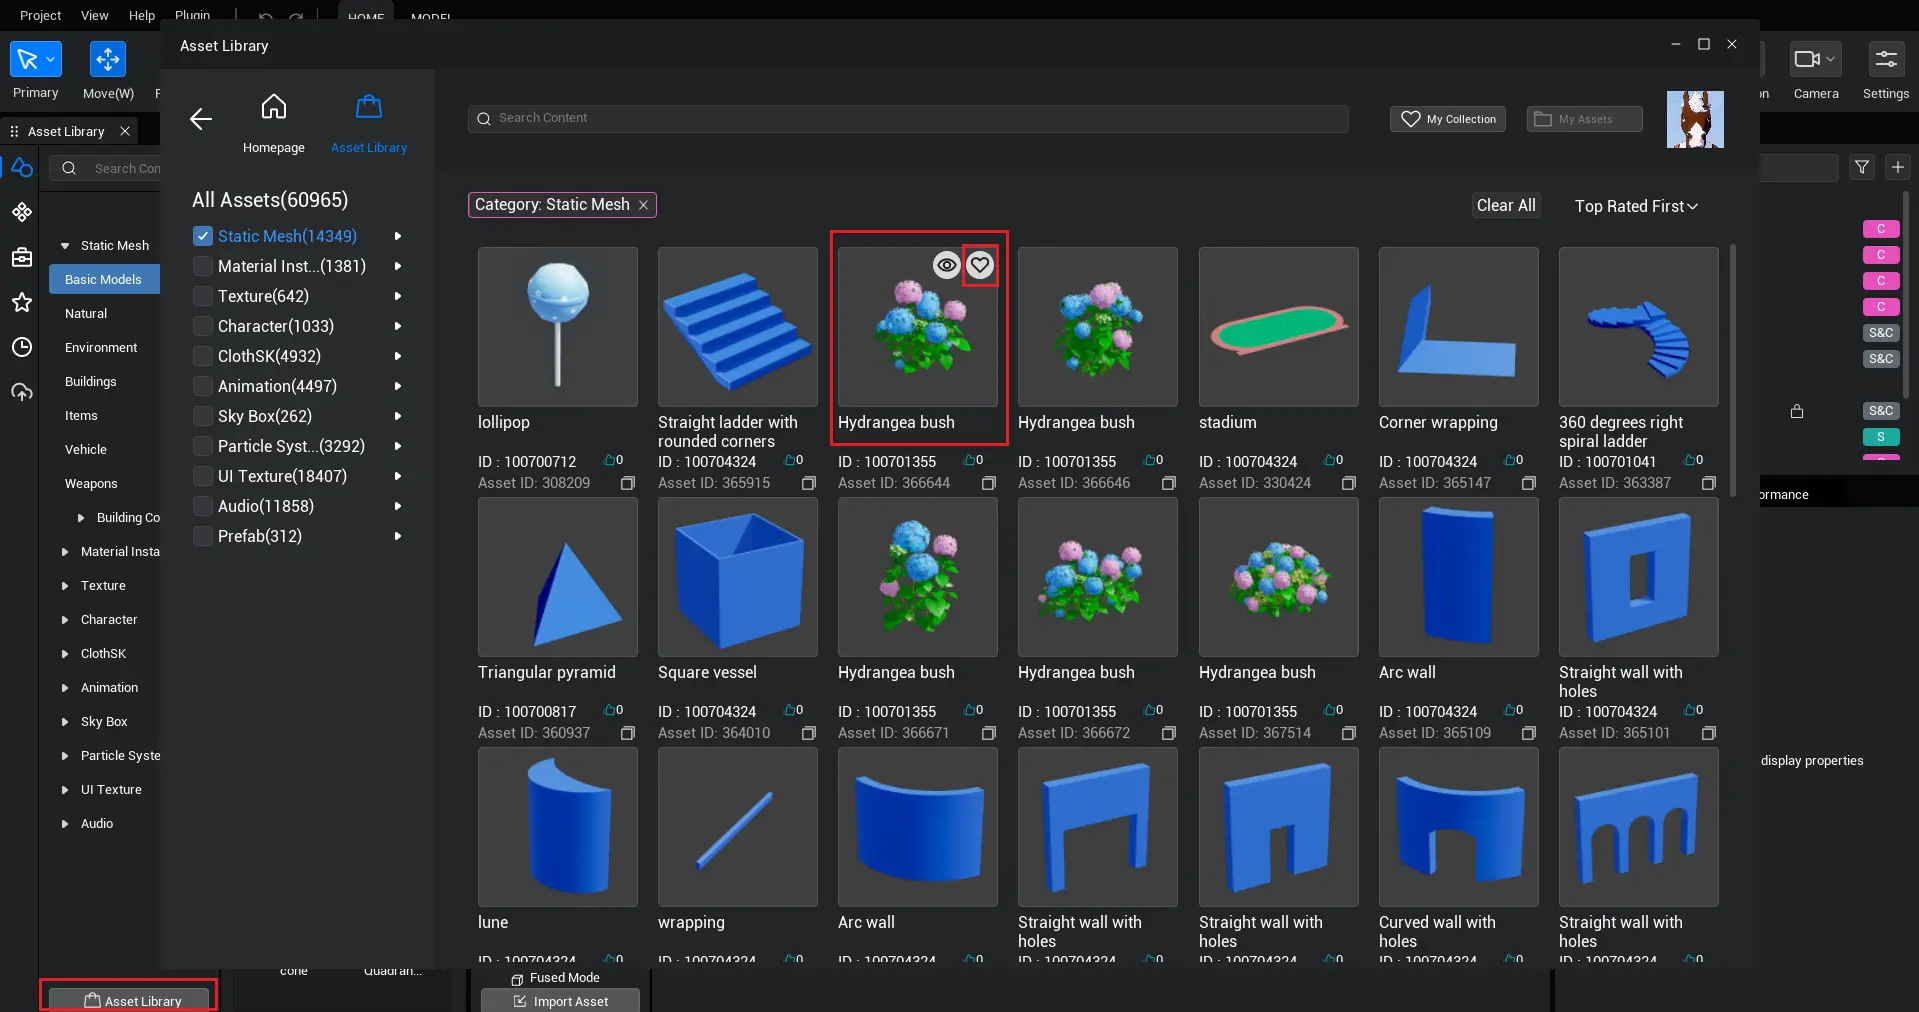
- My Favorites: When you are browsing in the Asset Library and find a resource you like, you can ① hover the resource by mouse, ② in the top-left corner of the details page, ③ click the favorite button. You will then be able to see all your favorite resources under the My Favorites section.
- History: Resources you’ve previously used will be recorded here, helping you avoid getting lost in the vast Asset Library while trying to find them again.
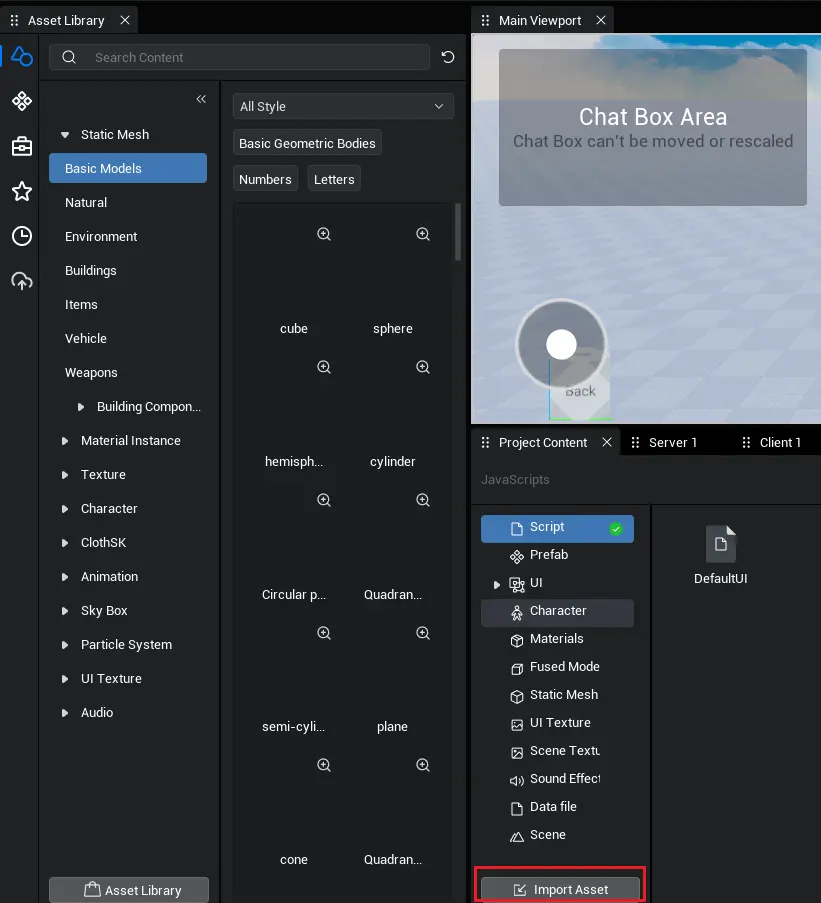
- My Resources: This page displays all locally uploaded resources. You can upload new resources by clicking the "Upload Resource" button located at the bottom of the Project Content panel.
4. Main Viewport
The Main Viewport is the primary window we use for scene editing. You can easily drag and drop content from the Local Asset Library and Game Function Objects directly into the Main Viewport, allowing you to build feature-rich, high-quality scenes quickly.
5. Project Content
The Project Content window contains all the resources owned by the developer, including prefabs, scripts, UI, characters, and more, as shown in the diagram:
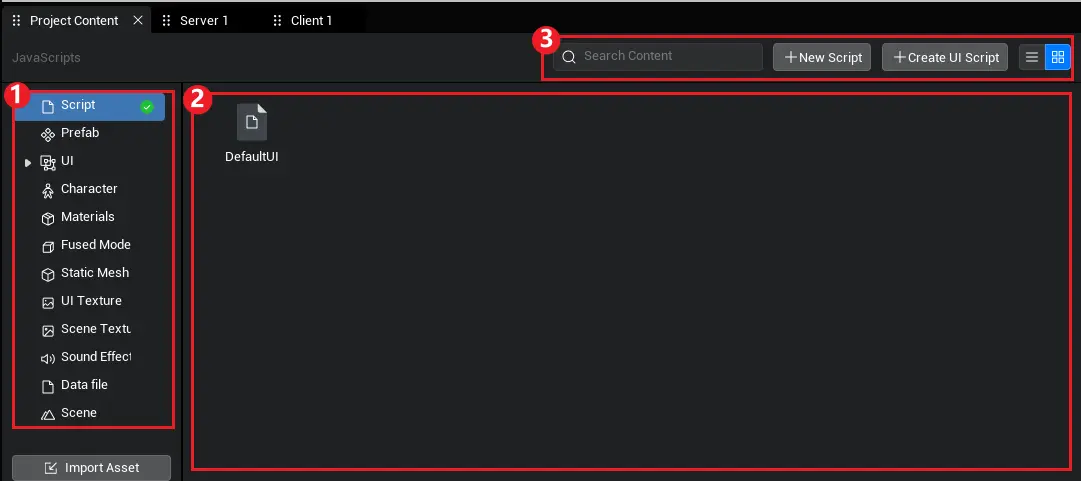
1: Project Directory: Displays the various types of files within the current project.
2: File List for the Selected Directory: You can right-click to create new folders, refresh, paste content, and more.
3: Project Content Functional Area: This area provides options for searching, creating new scripts, creating new UI scripts, importing scripts, switching views, and more. The functions displayed will change based on the selected project directory. For example, when selecting UI, the functional area will display a "Create UI" button, as shown in the diagram.

WARNING
After installing VSCode, double-clicking a script will default to opening it in VSCode for editing.
If scripts are being opened with Notepad instead, you can try the following steps:
- Set
.tsfiles to open by default with VSCode (please search for instructions on how to set default file associations for your operating system). - Right-click and select Run as Administrator when starting the editor.
- Review the "VSCode Installation" chapter for detailed instructions.
6. Object Manager
The Object Manager window contains all the elements present in the current game scene. Here, you can modify names, copy, paste, delete items, and more. You can also view the runtime environment for each element. For detailed information, please see the diagram below.
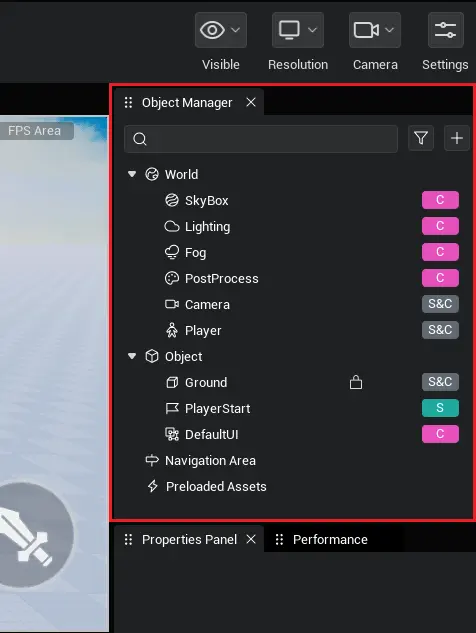
- You can filter the contents displayed in the object list by using the filter button located in the top-right corner.
7. Properties Panel
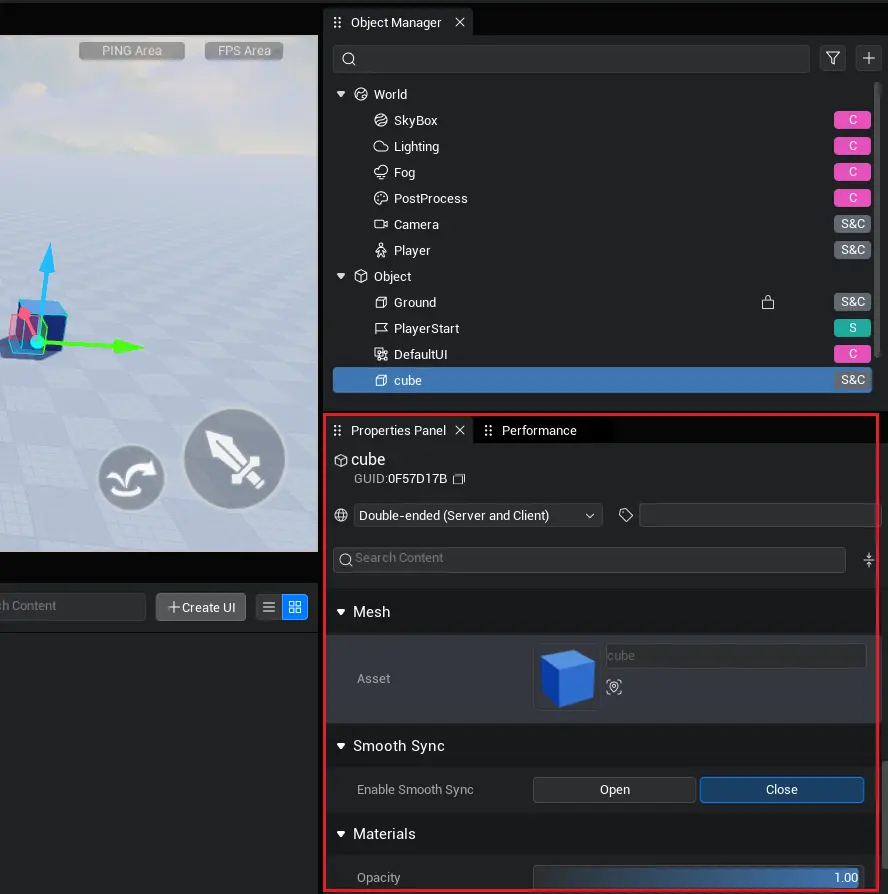
When you select a game object in the Object Manager, the Properties Panel will display the corresponding attributes. Here, you can view and adjust the properties of the selected object, as shown in the diagram.
 Editor Doc