Prefab
It will take approximately 20 minutes to read this article.
In order for developers to better understand and use prefabs, this article contains the following 3 elements:
(1) Prefab Introduction (2) Prefab User Guide (3) Important Notes
Introduction to Prefab
What is the prefab
- Prefabs are reusable Unions of game objects, a mechanism for unioning game objects into a whole and saving them as a separate asset. Prefabs can be used to create and store all components, properties, and child objects of an game object. When the same game object needs to be reused multiple times, a prefab can be used to set the game object to prefab.
- All nodes contained within the prefab are reference relationships.
Prefab Foundation Rules
- Prefab structure
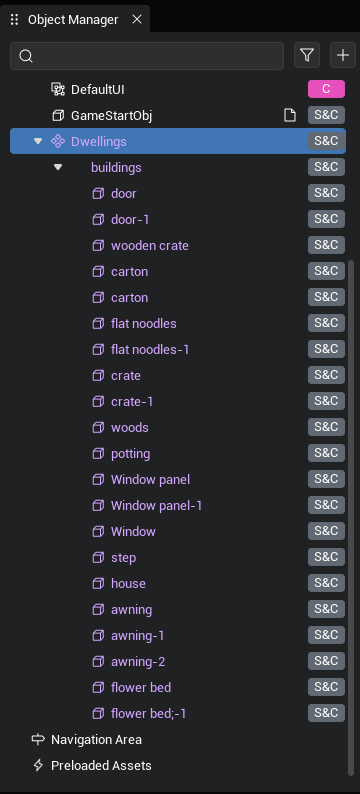
- Prefabs all contain a prefab head node, and when an empty prefab is created, a default head node is automatically generated.
- Prefab child objects under prefab head nodes, child objects can be horizontal, parent-child structural relationships
Prefab User Guide
Creating and storing prefabs
New prefab
Method: Click [New Prefab] button in Project Content-Prefab Classification

Existing object generated as prefab
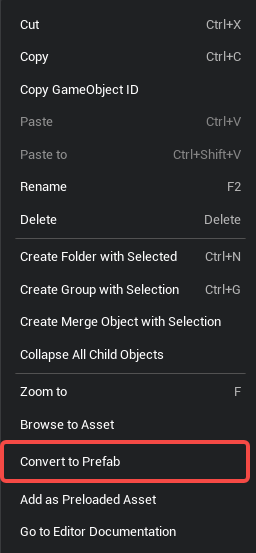
- Method 1: Select objects in Object Manager, click Generate as Prefab in the right-click menu, and generate selected objects and their children as prefabs
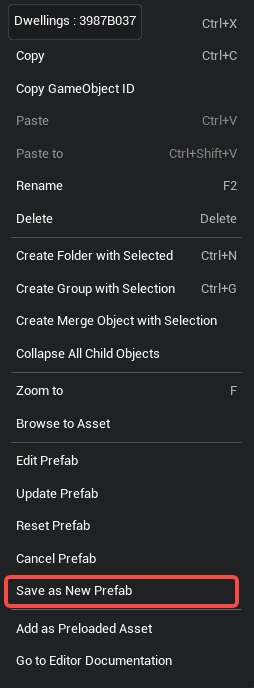
Method 2: Select the prefab reference object header node for an instance state in Object Manager and click Save as New Prefab in the right-click menu. The selected instance state prefab reference object will be de-referenced from the original prefab and generated as a new prefab
Storage of prefabricated
Project Content - Prefab classification stores all prefab resources under the current project

The scripts, UI, materials it references in each prefab file are stored separately under the corresponding file type and not integrated with prefab files in the same project content grouping
Editor of the prefab
Edit in prefab edit viewport
- Entry 1: Select a prefab in the project content, click [Edit] in the right-click menu or double-click prefab file to open the selected prefab in the prefab edit viewport for editing

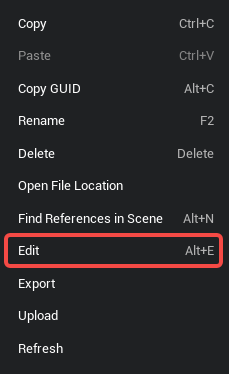
(Open prefab for editing through engineering content)
- Entry 2: Select a prefab head node in Object Manager and click [Edit Prefab] in the right-click menu to open the selected prefab in the prefab edit viewport for editing
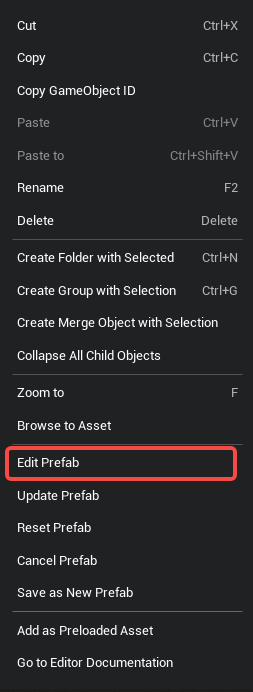
(Open prefab for editing through Object Manager)
Edit the prefab in the main scene
Select a prefab directly in the object manager to edit node information or properties
TIP
Edit the prefab in the prefab edit viewport and save it to sync to all referenced prefabs in the scene. Edit the prefab in the main scene and do not sync to other referenced prefabs of the scene.
Save prefab modifications
Save in prefab edit viewport
- Click the [Save] button in the project content to save the modifications to the prefab
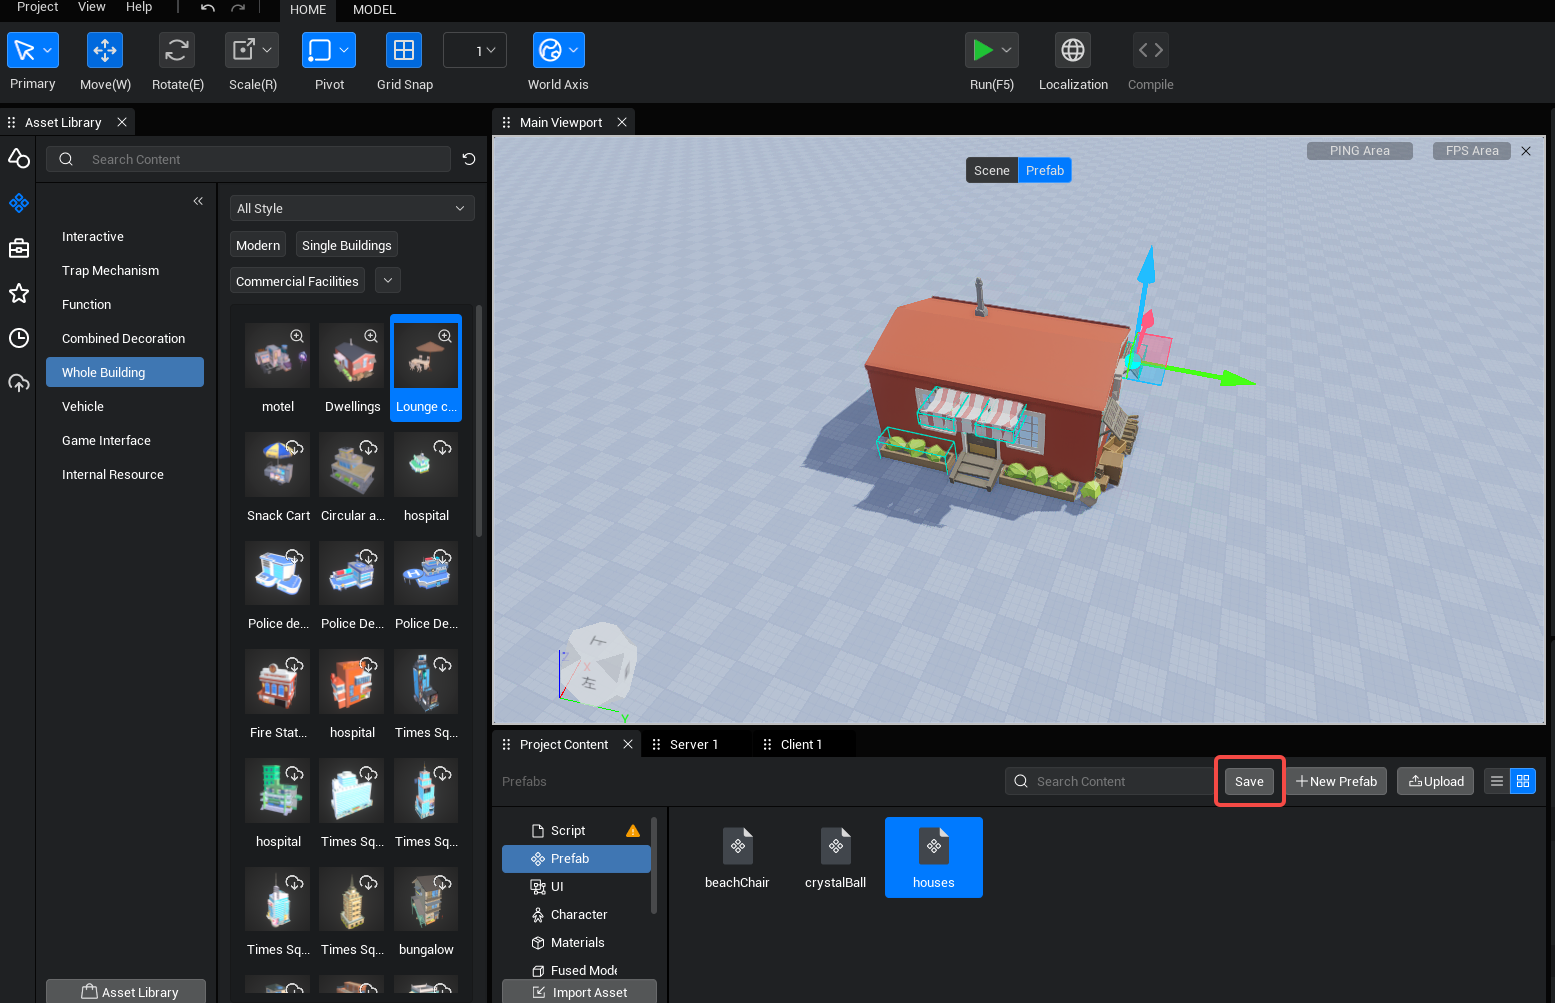
When switching editing status and editing objects, click the [Save] button in the Save prompt popup
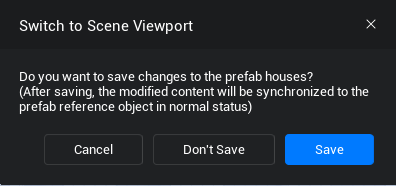
Save in the main editor
Click [Update Prefab] in a prefab right-click menu to save the current changes to the prefab reference object in Object Manager
Click [Save as New Prefab] in the right-click menu of a prefab to save the current modification to the prefab reference object in the Object Manager as a new prefab
Use of prefabs
Edit Status
Locate the prefab you need to use in the asset library and drag it to the object manager or the primary viewport to create the prefab referenced object. At this point the prefab is a network asset and cannot be edited locally. If you need to make a secondary edit, you need to import the prefab to the local project content.
Find the prefab in the project content and drag to Object Manager and main viewport to create prefab referenced object
Operational status
- Dynamically generate prefabricated referenced objects via API
/* Dynamically generate prefab referenced objects that require prefab asset IDs in local asset libraries or project content (requires preloaded resources) */
GameObject.spawn("AssetId")

/* Asynchronously generate prefab reference objects that require prefab asset IDs in local asset libraries or project content (no preloaded resources required) */
GameObject.asyncSpawn("AssetId")
/* Dynamically generate prefab referenced objects that require prefab asset IDs in local asset libraries or project content (requires preloaded resources) */
GameObject.spawn("AssetId")
/* Asynchronously generate prefab reference objects that require prefab asset IDs in local asset libraries or project content (no preloaded resources required) */
GameObject.asyncSpawn("AssetId")Deleting prefabs
When a prefab is in the project content, the scene is verified to contain a referenced object for the prefab
- Popup if there is a referenced object
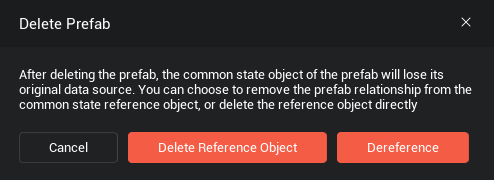
delete Reference Object: delete the referenced object in the scene for this prefabile delete it
Dereference: Delete this prefab, but keep the objects in the scene so they become normal objects and no longer depend on the original prefab file
Displays a secondary confirm pop-up if there is no referenced object
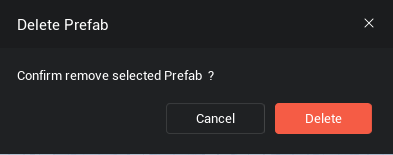
- When deleting a prefab folder, a secondary confirm pop-up is displayed. When you click confirm, the Delete Reference Object logic is executed on all prefabs in the folder

Import, export of prefabs
Export prefab
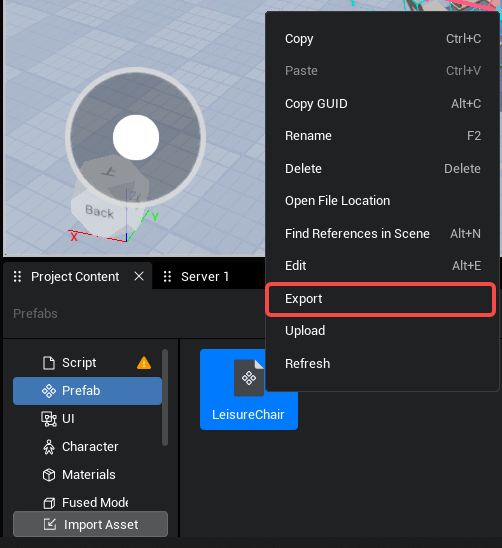
- Select a prefab under Project Content - Prefab category and click [Export] button in right-click menu
- Exported prefabs and their included files can be viewed within the pop-up interface, and files to be exported can be selected by checking
- Files such as scripts, UI, and materials referenced by the prefab are exported together in corresponding paths
Import prefab
- Click the Project Content [Asset Import] button, select the prefab in Asset Manager and import the prefab

Prefab files will be parsed on import and all referenced files restored into the project
The import details panel is displayed at the time of import, giving developers structural information about prefab, which allows you to determine what needs to be imported by Checkboxing in front of the file.
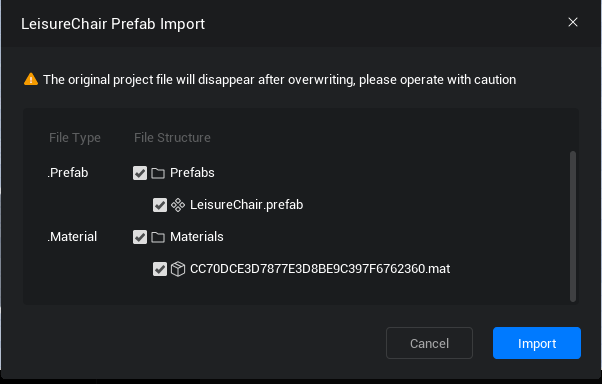
- Rename or overwrite the user if the file in the current project conflicts with the imported prefab
- Overwrite: Select Overwrite to import the imported file overwrite on import; and display the overwrite icon to the right of the file
- Rename: Select Rename to automatically rename imported files when importing
Updating preforms
- In Object Manager, after editing a prefab, the [Update Prefab] feature syncs the edited state to other referenced prefabs while updating prefab files in the project content.
Reset prefab
- In the Object Manager, selecting prefabs to use the Reset Prefabs feature restores the selected prefab to the state of the prefab in the project content.
Disarm the preform.
- In Object Manager, right-click the prefab header node to provide the disarm prefab operation
- This operation is able to turn prefab reference objects into normal objects (purple-white)
Important Notes and Recommendations for Using Prefab Features
When dynamically generating prefabs using spawn, you need to use the AssetUtil class to download and load the prefab assets or drag the prefab into the priority loading area in the object manager
No preloading assets when generating prefab asynchronously using asyncSpawn
 Editor Doc